Adding Images – Buildbox 3 Manual

By |

Add Images

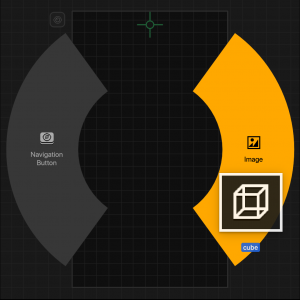
To add an image to a UI screen:

  1. Drag the image file from your computer over the UI Editor and drop it over the Image section on the right of the Drop Wheel.
  2. Position the image on the screen as needed and define its attributes in the Options panel on the right.
    The image will also appear as an asset in Asset panel and the Outliner.
You can also add background images to scenes in 3D Worlds as explained in Changing Background in Scenes. Those images are treated like objects with only Entity Attributes

Viewing Collision Shapes – Buildbox 3 Manual

By |

View Collision Shapes

A collision shape is the surface area around an object that gets affected when two objects from different collision groups collide.

To view collision shapes in the Scene Editor, on the toolbar, click the Collision Shape Editor button. See also Changing Collision Shapes.

If you don’t see the collision shape of an object:

  1. In the Asset panel, double-click the corresponding asset.
  2. In the displayed Node Map of the asset, click the purple Start node.
  3. In the Options panel, select the Physics checkbox.
  4. On the Navigation bar, click the 3D World to return to the Scene Editor.
    Now you should be able to see and move the collision shape of the selected object.
To preview the collision shapes in the scene, turn on the Debug Mode in the Preview window.

Making Characters Jump – Buildbox 3 Manual

By |

Make Characters Jump or Move in a Certain Way

To make a character jump, rotate, or move in a certain direction, for example, side to side, you need to add a corresponding movement node to its Node Map. You may also use the nodes to make objects bounce, float, or rotate when the player touches the screen.

You can also quickly add movement and other functionality to an asset by selecting an asset in the Asset panel, and in the Options panel, click Add Brainbox and select the desired effect. The attributes will appear in the Options panel.

For characters, you also need to make sure that they are set as dynamic in their Start node attributes as instructed below. See also, Making Objects Move Naturally

To make a character jump or move in a certain way:

  1. On the Mind Map, double-click the World node where you want to modify the character’s movement.
  2. Inside the World, on the Asset panel, double-click the character whose movement you want to change.
  3. On its Node Map, select the Start node.
  4. In the Options panel on the right, select the Physics checkbox and in the displayed Type list, select Dynamic.
  5. In the Node panel on the left, expand the Movement category and drag the movement node you need to the Node Map, for example, Jump or Path Jump.
  6. Update the node attributes in the respective Options panel on the right.
  7. Connect the new node input with the output of the node that will enable the movement, for example, when the player touches the screen:
  8. Preview and test your game.
Trail 3D Node – Buildbox 3 Manual

By |

Trail 3D Node

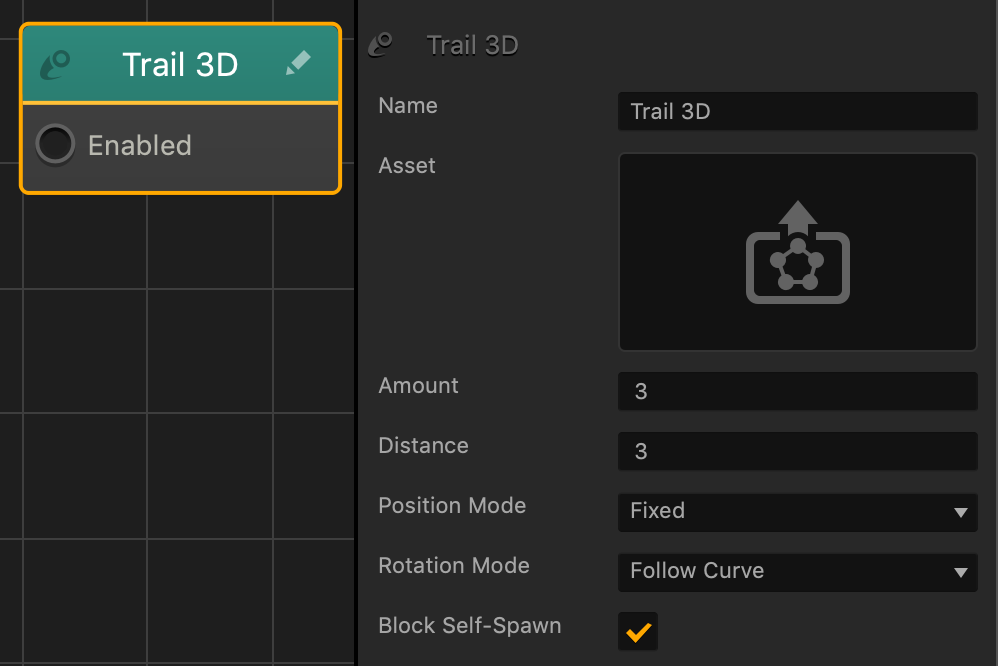
This content node spawns multiple specified assets that follow behind the controlling asset in a trail.

Option Description
Asset Click the edit icon to specify which asset will follow the controlling asset.
Amount Enter the amount of assets that that will follow the controlling asset.
Distance Enter the distance between each asset that spawns in the trail.
Position Mode Select to determine how the controlling asset leaves the trail behind.

  • Fixed—leaves the specified asset behind as a stationary trail.
  • Smooth—the specified asset will follow the controlling asset.
Rotation Mode Select to determine how the specified asset rotates in the trail.

  • Follow Curve—the specified asset will rotate so that it always faces the controlling asset’s movement path.
  • Match Entity—the specified asset will match the controlling asset’s rotation.
Block Self Spawn Select to prevent the controlling asset from spawning in the trail.

If needed, you can also customize this node. For details, see Customizing Nodes.

Debris Explosion Node – Buildbox 3 Manual

By |

Debris Explosion Node

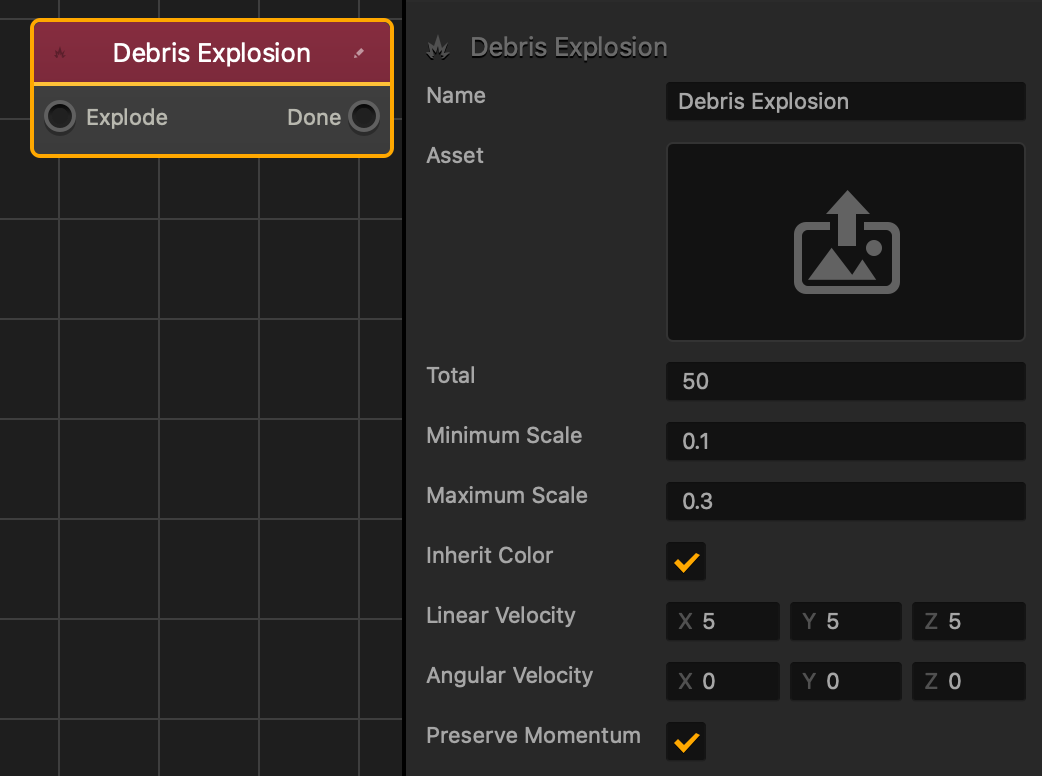
This action node spawns multiple specified assets as debris in a burst outward from the center of the attached asset.

In order to create realistic and fluid debris, it is recommended that the specified asset’s physics is set to Dynamic.

Option Description
Asset Click the edit button to open the Asset Manager window.
Total Specifies how many assets appear.
Minimum Scale The minimum size an asset appears in.
Maximum Scale The maximum size an asset appears in.
Inherit Color If checked, the assets being spawned will keep their original color.
Linear Velocity Specify the amount and direction that the assets will move towards.
Angular Velocity Specify the amount and direction the assets will rotate.
Preserve Momentum If checked, the debris will be affected by the previous assets movement, and will move in the same direction when spawned.

If needed, you can also customize this node. For details, see Customizing Nodes.

Reset Node – Buildbox 3 Manual

By |

Reset Node

This action node resets the specified point score back to 0.

Option Description
Local/Global Choose between the local and global score types.
Points/Coins Select which score type will be reset.
Current/Total Select which point amount is reset.

  • Current: The total points that is being calculated in the world.
  • Total: The grand total points that is being calculated throughout the entire game.

If needed, you can also customize this node. For details, see Customizing Nodes.

Camera Zoom Animation Node – Buildbox 3 Manual

By |

Camera Zoom Animation Node

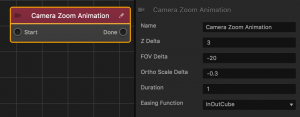
This action node sets the camera zoom amount over time.

Option Description
Name Type a custom name for this node, if needed.
Z Delta The distance along the Z axis that the camera will move over time.
FOV Delta The amount that the field of view will change over time.
Ortho Scale Delta The amount that changes the size of the camera’s view over time, if the camera’s Projection is set to Orthogonal.
Duration The amount of time in seconds the animation will last
Easing Function Specifies the rate of change when the camera rotates.

  • For an ease in ease out pattern, select InOutCube.
  • For a straight and constant pattern, select linear.

If needed, you can also customize this node. For details, see Customizing Nodes.

Set Physics Node – Buildbox 3 Manual

By |

Set Physics Node

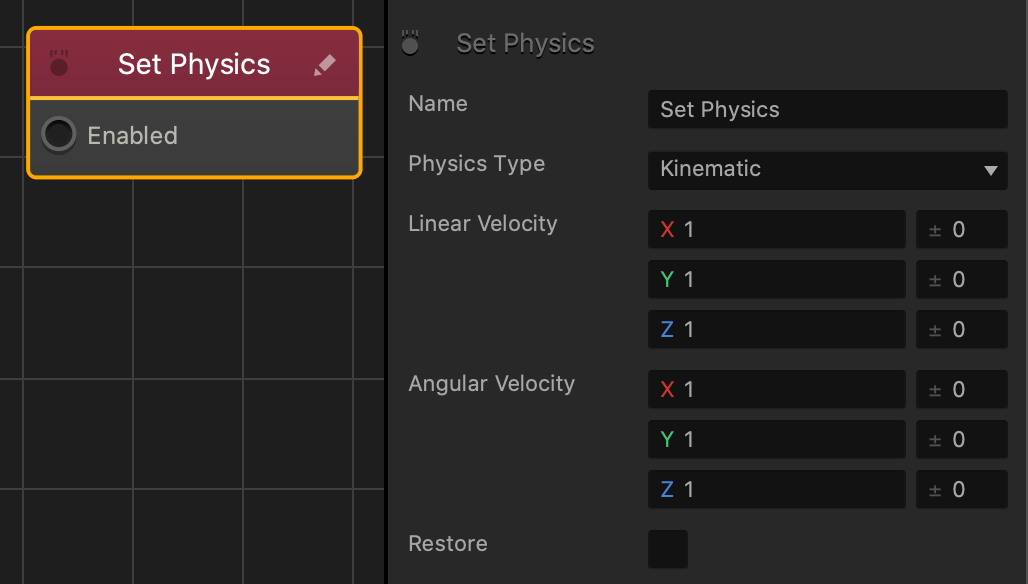
This action node changes the physics settings on an asset. This will override the physics settings on the start node.

Option Description
Name Type a custom name for this node, if needed.
Physics Type Select the type of physics to define the motion of the selected asset and its collision shape:

  • Static—Select to make the asset or character static. It won’t move at all.
  • Dynamic—Select to make the asset or character move naturally, adhering to the laws of gravity.
  • KinematicSelect to make the asset move when colliding with other objects. It will not be affected by gravity.
Linear Velocity Affects the level of movement along each axis when affected by gravity and colliding with other objects.

Enter a range value on the right to make the asset pick a random axis value.

  • The range value is both added and subtracted to create a minimum and maximum of possible outcomes.
  • For example, if you enter a value of 100 in the Y axis field and 50 in its range value field, a value between 50 and 150 will be selected during gameplay.
    |50———-100———-150|
Angular Velocity Affects the level of rotation along each axis when affected by gravity and colliding with other objects. Enter a range value on the right to make the asset pick a random axis value.
Restore Select to revert the asset back its original physics settings, when this node is no longer active.

If needed, you can also customize this node. For details, see Customizing Nodes.