Physics Component – API Reference

By |

Physics Component

This component is used for processing physics. You can find the physics menu in the Start node. To access these functions, you can use this.entity().physics().

Function Description
activateBody()

When the body type is “kDynamic” and “Always Active” is disabled, the body will become inactive after a short period of time. This function activates it again.

affectedAsset()

Returns the affected asset set for the physics component. This decides what type of assets this body can interact with.

angularDamping()

Returns the angular damping factor. Angular damping simulates drag; the higher the value, the more this entity will resist rotation.

angularVelocity()

Returns the current angular velocity value of the object.

clearVelocities()

Sets angular and linear velocity to zero.

collisionData()

Returns an object containing collision data for this entity. Optionally an Entity can be passed to get data about one entity specifically.

collisionGroup()

Returns the collision group of the object.

disableDeactivation(value)

A body will become inactive after a short period of time if left alone. If you disable deactivation, the body will always stay active. This is recommended for Linker entities.

friction()

Returns the body’s friction value.

gravity()

Returns the gravity value affecting the entity. If it hasn’t been adjusted for this entity, this method will return the gravity value of the Scene.

hasCollision(entity)

Returns true if the given entity collides with the current one.

isPhysics()

Returns true if physics is enabled on this entity, false if not.

linearDamping()

Returns the linear damping factor. Linear damping simulates drag; the higher the value, the more this entity will resist translation.

linearFactor()

Returns “position factor” of the physics component. The linear factor determines how the physics engine affects specific linear/position axes. For instance of x=0, the physics engine will not calculate physics for that axis. If x=2.0, it will calculate physics magnified by 2.

linearVelocity()

Returns the current linear velocity value of the entity.

mass()

Returns the mass value of the entity. This defaults to 1.

mesh()

Returns the collision shape mesh if assigned. Null if a mesh is not being used as the collision shape.

parentEntity()

Returns the entity that this physics component belongs to.

predictedPosition(time)

Returns the predicted position of the body based on the given time.

rebuildShape()

Call this function to update the physics collision shape. This should be done if you change the shape or scale of your Entity in code.

restitution()

Returns the “Bounce” value of the physics component. The higher the value, the higher the bounce upon collision.

setAffectedAsset(value)

Sets the affected asset for the physics component. This decides what type of assets this body can interact with. Possible values: “kAll”, “kEnemy”, “kPlatform”, “kCoin”, “kCharacter”, “kPath”, Asset.

setAngularDamping(value)

Sets the angular damping factor, range 0-1. Angular damping simulates drag; the higher the value, the more this entity will resist rotation.

setAngularFactor(x, y, z)

Sets the “rotation factor” of the object. This determines how the physics engine affects specific angular/rotation axes. For instance of x=0, the physics engine will not calculate physics for that axis. If x=2.0, it will calculate physics magnified by 2.

setAngularVelocity(x, y, z)

Sets the angular velocity value of the object.

setCollisionGroup(group)

Set the collision group of the entity.

setCreated(value)

Enables/disables everything that is connected to the “Start” node.

setFriction(value)

Sets the friction value for the body.

setGravity(x, y, z)

Sets gravity value affecting this entity. This will override the gravity value in the scene, and will not affect other objects.

setLinearDamping(value)

Sets the linear damping factor, range 0-1. Linear damping simulates drag; the higher the value, the more this entity will resist translation.

setLinearFactor(x, y, z)

Sets the “position factor” of the object. This determines how the physics engine affects specific linear/position axes. For instance of x=0, the physics engine will not calculate physics for that axis. If x=2.0, it will calculate physics magnified by 2.

setLinearVelocity(x, y, z)

Sets the linear velocity of the entity.

setMass(value)

Sets the mass of the entity. A mass of 0 will not be affected by gravity.

setMesh(mesh)

Sets the mesh of the collision shape from a MeshModel script attribute.

setMesh(name)

Sets the mesh of the collision shape based on the name of the mesh.

setPhysics(value)

Enables/disables physics.

setRestitution(value)

Sets the “Bounce” value of the physics component. The higher the value, the higher the bounce upon collision.

setShapePosition(x, y, z)

Sets the collision shape position of the object. Note: you must call rebuildShape() after calling this for the change to be reflected in game.

setShapeRotation(x, y, z)

Sets the collision shape rotation of the object. Note: you must call rebuildShape() after calling this for the change to be reflected in game.

setShapeScale(x, y, z)

Sets the collision shape scale of the object. Note: you must call rebuildShape() after calling this for the change to be reflected in game.

setShapeType(type)

Sets the shape type. Highly recommended to use “kHullShape” over “kMeshShape”.

setType(value)

Sets the type of the physics body.

shapePosition()

Returns the position of the collision shape.

shapeRotation()

Returns the rotation of the collision shape.

shapeScale()

Returns the scale of the collision shape.

shapeType()

Returns the shape type of the collision shape.

type()

Returns the type of the physics body.


activateBody()

When the body type is “kDynamic” and “Always Active” is disabled, the body will get inactive after a short period of time. This function activates it back.

↑ Back to top


affectedAsset()

Returns the affected asset set for the physics component. This decides what type of assets this body can interact with. Possible values: “kAll”, “kEnemy”, “kPlatform”, “kCoin”, “kCharacter”, “kPath”, Asset.

Returns

string / Asset – the asset or group of assets this body can interact with

↑ Back to top


angularDamping()

Returns the angular damping factor. Angular damping simulates drag; the higher the value, the more this entity will resist rotation.

Returns

number – the angular damping factor, range 0-1

↑ Back to top


angularFactor()

Returns the “rotation factor” of the physics component. The angular factor determines how the physics engine affects specific angular/rotation axes. For instance of x=0, the physics engine will not calculate physics for that axis. If x=2.0, it will calculate physics magnified by 2.

Returns

Vec3 the {x, y, z} components of the angular factor.

↑ Back to top


angularVelocity()

Returns the current angular velocity value of the object.

Returns

Vec3 the {x, y, z} components of the angular velocity.

↑ Back to top


clearVelocities()

Sets angular and linear velocity to zero.

↑ Back to top


collisionData()

Returns an object containing collision data for this entity. Optionally an Entity can be passed to get data about one entity specifically.

The returned object will have these properties (Data types in parenthesis). Keep in mind that a property is accessed like this: this.entity().physics().collisionData().totalImpulse;.

entity – the entity that’s being collided with (Entity)
totalImpulse – the total impulse from all collision points (number)
collisionPoints – an array of objects containing data about each point of collision (array of Objects). Each object in the array has these properties:
impulse – the impulse from the collision point (number)
normal – the normal of the collision point (Vec3)
position – the position of the collision point (Vec3)

Parameters

Entity (optional) an entity to check collision data with the current entity

Returns

Object – data object containing the information listed above

↑ Back to top


collisionGroup()

Returns the collision group of the object.

Returns

string possible values: kNone, kCharacter, kEnemy, kPlatform, kCoin

↑ Back to top


disableDeactivation(value)

A body will become inactive after a short period of time if left alone. If you disable deactivation, the body will always stay active. This is recommended for Linker entities.

Parameters

boolean value – true to keep the entity always active, false to allow it to become inactive as normal

↑ Back to top


friction()

Returns the body’s friction value. This can also be seen in the Start node unless altered at runtime.

Returns

number the friction value of the body

↑ Back to top


gravity()

Returns the gravity value affecting the entity. If it hasn’t been adjusted for this entity, this method will return the gravity value of the Scene.

Returns

number the current gravity value of the entity.

↑ Back to top


hasCollision(entity)

Returns true if the given entity collides with the current one.

Parameters

Entity entity the entity to check for a collision with

Returns

boolean true if the entities are colliding, false if not.

↑ Back to top


isPhysics()

Returns true if physics is enabled, false if not.

Returns

boolean true if physics is enabled, false if not.

↑ Back to top


linearDamping()

Returns the linear damping factor. Linear damping simulates drag; the higher the value, the more this entity will resist translation. Default value: 0

Returns

number the linear damping, range 0-1.

↑ Back to top


linearFactor()

Returns “position factor” of the physics component. The linear factor determines how the physics engine affects specific linear/position axes. For instance of x=0, the physics engine will not calculate physics for that axis. If x=2.0, it will calculate physics magnified by 2.

Returns

Vec3 the {x, y, z} linear factor.

↑ Back to top


linearVelocity()

Returns the current linear velocity value of the entity.

Returns

Vec3 the {x, y, z} linear velocity of the entity.

↑ Back to top


mass()

Returns the mass value of the entity. This defaults to 1.

Returns

number the mass of the entity

↑ Back to top


mesh()

Returns the collision shape mesh if assigned. Null if a mesh is not being used as the collision shape.

Returns

MeshModel the object of the collision shape mesh

↑ Back to top


parentEntity()

Returns the entity that this physics component belongs to.

Returns

Entity the parent entity of the physics component

↑ Back to top


predictedPosition(time)

Returns the predicted position of the body based on the given time.

Parameters

number time – the number of seconds from now that you’d like to predict the position of the entity

Returns

Vec3 entity’s predicted {x, y, z} position after time based on its current Velocity.

↑ Back to top


rebuildShape()

Call this function to update the physics collision shape. This should be done if you change the shape or scale of your Entity in code.

↑ Back to top


restitution()

Returns the “Bounce” value of the physics component. The higher the value, the higher the bounce upon collision.

Returns

number the “Bounce” value of the physics component

↑ Back to top


setAffectedAsset(value)

Sets the affected asset for the physics component. This decides what type of assets this body can interact with. Possible values: “kAll”, “kEnemy”, “kPlatform”, “kCoin”, “kCharacter”, “kPath”, Asset.

Parameters

string value / Asset value – the asset or group of assets this body can interact with

↑ Back to top


setAngularDamping()

Sets the angular damping factor, range 0-1. Angular damping simulates drag; the higher the value, the more this entity will resist rotation.

Parameters

number value – the angular damping factor

↑ Back to top


setAngularFactor(x, y, z)

Sets the “rotation factor” of the object. This determines how the physics engine affects specific angular/rotation axes. For instance of x=0, the physics engine will not calculate physics for that axis. If x=2.0, it will calculate physics magnified by 2.

Parameters

number x – the x component of the new angular factor
number y – the y component of the new angular factor
number z – the z component of the new angular factor

↑ Back to top


setAngularVelocity(x, y, z)

Sets the angular velocity value of the object.

Parameters

number x – the x component of the new angular velocity
number y – the y component of the new angular velocity
number z – the z component of the new angular velocity

↑ Back to top


setCollisionGroup(group)

Set the collision group of the entity.

Parameters

string group – possible values: kNone, kCharacter, kEnemy, kPlatform, kCoin

↑ Back to top


setCreated(value)

Enables/disables everything that is connected to the “Start” node.

Parameters

boolean value – true to enable, false to disable

↑ Back to top


setFriction(value)

Sets the friction value for the body. This can also be changed in the Start node.

Parameters

number value – the new friction value

↑ Back to top


setGravity(x, y, z)

Sets gravity value affecting this entity. This will override the gravity value in the scene, and will not affect other objects.

Parameters

number x – the x component of the new gravity
number y – the y component of the new gravity
number z – the z component of the new gravity

↑ Back to top


setLinearDamping(value)

Sets the linear damping factor, range 0-1. Linear damping simulates drag; the higher the value, the more this entity will resist translation.

Parameters

number value – the linear damping factor

↑ Back to top


setLinearFactor(x, y, z)

Sets the “position factor” of the object. This determines how the physics engine affects specific linear/position axes. For instance of x=0, the physics engine will not calculate physics for that axis. If x=2.0, it will calculate physics magnified by 2.

Parameters

number x – the x component of the new linear factor
number y – the y component of the new linear factor
number z – the z component of the new linear factor

↑ Back to top


setLinearVelocity(x, y, z)

Sets the linear velocity of the entity.

Parameters

number x – the x component of the new linear velocity
number y – the y component of the new linear velocity
number z – the z component of the new linear velocity

↑ Back to top


setMass(value)

Sets the mass of the entity. A mass of 0 will not be affected by gravity.

Parameters

number value – the new mass of the entity

↑ Back to top


setMesh(mesh)

Sets the mesh of the collision shape from a MeshModel script attribute.

Parameters

MeshModel mesh – the new mesh for the collision shape

↑ Back to top


setMesh(name)

Sets the mesh of the collision shape based on the name of the mesh.

Parameters

string name – the new mesh for the collision shape

↑ Back to top


setPhysics(value)

Enables/disables physics.

Parameters

boolean value – true to enable physics, false to disable

↑ Back to top


setRestitution(value)

Sets the “Bounce” value of the physics component. The higher the value, the higher the bounce upon collision.

Parameters

number value – the new “Bounce” value

↑ Back to top


setShapePosition(x, y, z)

Sets the collision shape position of the object. Note: you must call rebuildShape() after calling this for the change to be reflected in game.

Parameters

number x – the x component of the new shape position
number y – the y component of the new shape position
number z – the z component of the new shape position

↑ Back to top


setShapeRotation(x, y, z)

Sets the collision shape rotation of the object. Note: you must call rebuildShape() after calling this for the change to be reflected in game.

Parameters

number x – the x component of the new shape rotation
number y – the y component of the new shape rotation
number z – the z component of the new shape rotation

↑ Back to top


setShapeScale(x, y, z)

Sets the collision shape scale of the object. Note: you must call rebuildShape() after calling this for the change to be reflected in game.

Parameters

number x – the x component of the new shape scale
number y – the y component of the new shape scale
number z – the z component of the new shape scale

↑ Back to top


setShapeType(type)

Sets the shape type. Highly recommended to use “kHullShape” over “kMeshShape”.

Parameters

string type – Possible values: “kCubeShape”, “kSphereShape”, “kCylinderShape”, “kHullShape”, “kMeshShape”.

↑ Back to top


setType(value)

Sets the type of the physics body.
kStatic – body is static and will never be moved but other objects can collide with it. Used for ground or walls in your game.
kDynamic – body is fully dynamic and can bounce off of other object and be affected by gravity.
kKinematic – body can be moved by directly setting position and rotation and will not react to other bodies collision or gravity. Used as obstacles or elevator platforms.
kNone – no physics enabled

Parameters

string type – Possible values: kStatic, kDynamic, kKinematic, kNone

↑ Back to top


shapePosition()

Returns the position of the collision shape.

Returns

Vec3 the {x, y, z} position of the collision shape

↑ Back to top


shapeRotation()

Returns the rotation of the collision shape.

Returns

Vec3 the {x, y, z} rotation of the collision shape

↑ Back to top


shapeScale()

Returns the scale of the collision shape.

Returns

Vec3 the {x, y, z} scale of the collision shape

↑ Back to top


shapeType()

Returns the shape type of the collision shape.

Returns

string Possible values: “kCubeShape”, “kSphereShape”, “kCylinderShape”, “kHullShape”, “kMeshShape”.

↑ Back to top


type()

Returns the type of the physics body. kStatic – body is static and will never be moved but other objects can collide with it. Used for ground or walls in your game.
kDynamic – body is fully dynamic and can bounce off of other object and be affected by gravity.
kKinematic – body can be moved by directly setting position and rotation and will not react to other bodies collision or gravity. Used as obstacles or elevator platforms.
kNone – no physics enabled

Returns

string Possible values: kStatic, kDynamic, kKinematic, kNone

let ph = this.entity().physics();
if(ph && ph.type() == 'kDynamic'){
  //Dynamic mode
}else{
  //Static or Kinematic mode
}

↑ Back to top

Did you find this page useful?

Please give it a rating:

Please provide some feedback!

This is very helpful to us.

Tell us how we can improve this post?

AABB – API Reference

By |

AABB

Represents the “axis-aligned bounding box” for the object. These coordinates form a box with the minimum corner at (left, bottom, near) and the maximum corner at (right, top, far). Together this can be used to ascertain the size of the bounding box.

Property Description
max

The Vec3 {right, top, far} maximum value of the AABB.

min

The Vec3 {left, bottom, near} minimum value of the AABB.


max

The Vec3 {right, top, far} maximum value of the AABB.

↑ Back to top


min

The Vec3 {left, bottom, near} minimum value of the AABB.

↑ Back to top

Did you find this page useful?

Please give it a rating:

Please provide some feedback!

This is very helpful to us.

Tell us how we can improve this post?

Event – API Reference

By |

Event

The Event class allows you to fire (broadcast) global events and subscribe to them. Here’s an example:

//// SENDER
let data = true; // this could be any value
eventName = "Some Name";
Event.fire(eventName, data);

//// RECEIVER
let SNCallback = function(data){
  log("callback: " + data);
};

function start(){
  Event.addListener("Some Name", SNCallback);
}
function onRemove(){
  Event.removeListener("Some Name", SNCallback);
}

Did you find this page useful?

Please give it a rating:

Please provide some feedback!

This is very helpful to us.

Tell us how we can improve this post?

EasingFunctions – API Reference

By |

EasingFunctions

EasingFunctions is a helper class with a collection of easing functions. Easing functions are used to calculate interpolation to create an animation.

These functions take a value from 0 to 1 representing how far into the animation you are (0 = beginning, 1 = end). Think of this as the “percent complete”. You can use easing functions in an update loop to update your object every frame. The Animation action nodes have all this set up for you already.

This is a simplified example of how we use EasingFunctions in a position animation node. This example makes my entity fall to position {0, 0, 0} with a bounce out animation.

let duration = 5;               // length of the animation in seconds
let phaseT = 0;                 // how far into the animation we are (percentage complete)
let target = new Vec3(0, 0, 0); // the ending position of my object
let done = false;               // flag to detect when to stop animating

let animObj;                    // the object we're animating
let startPos;                   // our object's initial position

function start(){
	animObj = this.entity();
	startPos = animObj.position();
}

function update(dt) {
	if (done) return; // don't run this code if the animation is complete
	phaseT += dt / duration; // calculate the time difference since the last update call
	phaseT = Math.min(phaseT, 1); // don't allow the percentage complete to go over 100%

	// Pass the percentage complete into the EasingFunction, 
	// which will return the factor we need to multiply by to
	// find our target position for this frame:
	let anim = EasingFunctions.outBounce(phaseT); 

	// determine the new position based on the starting position, target position, and animation factor:
	let aPos = new Vec3;
	aPos.x = startPos.x * (1 - anim) + target.x * anim;
	aPos.y = startPos.y * (1 - anim) + target.y * anim;
	aPos.z = startPos.z * (1 - anim) + target.z * anim;

	// set the new position
	animObj.setPosition(aPos.x, aPos.y, aPos.z);

	if (phaseT == 1) {
		// if we reach 100% complete, set the flag to stop running the animation code
		done = true;
	}
}


Supported Easing Functions

Here is a website with graphs of all the easing functions, for visualization.

EasingFunctions = {
    linear
    inQuad
    outQuad
    inOutQuad
    inCube
    outCube
    inOutCube
    inQuart
    outQuart
    inOutQuart
    inQuint
    outQuint
    inOutQuint
    inSine
    outSine
    inOutSine
    inExpo
    outExpo
    inOutExpo
    inCirc
    outCirc
    inOutCirc
    inBack
    outBack
    inOutBack
    inBounce
    outBounce
    inOutBounce
    inElastic
    outElastic
    inOutElastic
}

Did you find this page useful?

Please give it a rating:

Please provide some feedback!

This is very helpful to us.

Tell us how we can improve this post?

Mat4 – API Reference

By |

Mat4

The Mat4 class represents a 4×4 matrix. Mat4 contains several helpful static functions, which can be called like this: Mat4.createRotation(quat)

Property Description
arr

The array that represents the matrix.

Function Description
rotate(x, y, z, angle)

Post-multiplies this matrix by the matrix corresponding to the specified rotation about the specified axis.

scale(x, y, z)

Post-multiplies this matrix by the matrix corresponding to the specified scale transformation.

translate(x, y, z)

Post-multiplies this matrix by the matrix corresponding to the specified translation.

Static Function Description
createIdentity()

Creates and returns a 4×4 identity matrix.

createOrthographic(left, right, bottom, top, near, far)

Creates an orthographic projection transformation matrix. The parameters form a rectangular cuboid that defines the visible area of rendering.

createRotation(quat)

Creates a rotation matrix based on the given Quaternion.

createTranslation(x, y, z)

Creates a translation matrix based on the given x, y, z coordinates.

inverse(matrix)

Returns the inverse of the given matrix.

multiply(matrix1, matrix2)

Multipies the given matrices together.

transformPoint(matrix, vector)

Transforms the specified point by this matrix, and returns the result.

transformVector(matrix, vector)

Transforms the specified vector by this matrix by treating the fourth (w) coordinate as zero, and returns the result.


arr

array – the array that represents the matrix

↑ Back to top


rotate(x, y, z, angle)

Post-multiplies this matrix by the matrix corresponding to the specified rotation about the specified axis.

Parameters

number x – the x-axis to rotate about
number y – the y-axis to rotate about
number z – the z-axis to rotate about
number angle – the angle of the rotation (radians)

↑ Back to top


scale(x, y, z)

Post-multiplies this matrix by the matrix corresponding to the specified scale transformation.

Parameters

number x – the amount to scale along the x-axis
number y – the amount to scale along the y-axis
number z – the amount to scale along the z-axis

↑ Back to top


translate(x, y, z)

Post-multiplies this matrix by the matrix corresponding to the specified translation.

Parameters

number x – the amount to translate along the x-axis
number y – the amount to translate along the y-axis
number z – the amount to translate along the z-axis

↑ Back to top


createIdentity()

Creates and returns a 4×4 identity matrix.

Returns

Mat4 matrix – A new identity matrix

↑ Back to top


createOrthographic(left, right, bottom, top, near, far)

Creates an orthographic projection transformation matrix. The parameters form a rectangular cuboid that defines the visible area of rendering.

Parameters

number left – farthest left on the x-axis
number right – farthest right on the x-axis
number bottom – farthest down on the y-axis
number top – farthest up on the y-axis
number near – closest on the z-axis
number far – furthest on the z-axis

Returns

Mat4 – the resulting orthographic projection matrix

↑ Back to top


createRotation(quat)

Creates a rotation matrix based on the given Quaternion.

Parameters

Quaternion quat – the Quaternion representation of the rotation

Returns

Mat4 – the resulting rotation matrix

↑ Back to top


createTranslation(x, y, z)

Creates a translation matrix based on the given x, y, z coordinates.

Parameters

number x – the translation on the x-axis
number y – the translation on the y-axis
number z – the translation on the z-axis

Returns

Mat4 – the resulting translation matrix

↑ Back to top


inverse(matrix)

Returns the inverse of the given matrix.

Parameters

Mat4 matrix – the matrix to be inverted

Returns

Mat4 – the inverted matrix

↑ Back to top


multiply(matrix1, matrix2)

Multipies the given matrices together.

Parameters

Mat4 matrix1 – the first matrix to multiply
Mat4 matrix2 – the second matrix to multiply

Parameters

Mat4 – the resulting matrix

↑ Back to top


transformPoint(matrix, point)

Transforms the specified point by this matrix, and returns the result.

Parameters

Mat4 matrix – the transformation matrix
Vec3 point – the point to transform

Returns

Vec3 – the transformed point

↑ Back to top


transformVector(matrix, vector)

Transforms the specified vector by this matrix by treating the fourth (w) coordinate as zero, and returns the result.

Parameters

Mat4 matrix – the transformation matrix
Vec3 vector – the vector to transform

Returns

Vec3 – the transformed vector

↑ Back to top

Did you find this page useful?

Please give it a rating:

Please provide some feedback!

This is very helpful to us.

Tell us how we can improve this post?

OBB – API Reference

By |

OBB

The OBB class represents an “oriented bounding box” for an object. OBB is more precise but more performance-heavy than AABB. The list below isn’t of functions but properties, so you can call them like this: this.entity().worldOBB().center

Property Description
center

Vec3 the {x, y, z} center of the OBB

extents

Vec3 the {x, y, z} extents of the OBB

xAxis

Vec3 the x-axis orientation axes

yAxis

Vec3 the y-axis orientation axes

zAxis

Vec3 the z-axis orientation axes


center

Vec3 the {x, y, z} center of the OBB

↑ Back to top


extents

Vec3 the {x, y, z} extents of the OBB

↑ Back to top


xAxis

Vec3 the x-axis orientation axes

↑ Back to top


yAxis

Vec3 the y-axis orientation axes

↑ Back to top


zAxis

Vec3 the z-axis orientation axes

↑ Back to top

Did you find this page useful?

Please give it a rating:

Please provide some feedback!

This is very helpful to us.

Tell us how we can improve this post?

Scene – API Reference

By |

Scene

The Scene API handles aspects of game at the 2D/3D world level.

Function Description
addChild(entity)

Adds the given Entity as a child of the Scene.

addLevel(name)

Adds a level to the queue of levels to be displayed. The engine will look for a Level Section (aka Scene) with the given name and schedule it for adding. As soon as the engine needs a new level section to display, it will look for scheduled ones first.

addScoreCoin(value)

Increases the user’s coins by the amount given in value. You can also pass a negative value to decrease the user’s coins. Note: A coin is typically something the user can spend, while a point is not.

addScorePoint(value)

Increases the user’s score by the amount given in value. You can also pass a negative value to decrease the user’s points. Note: A coin is typically something the user can spend, while a point is not.

bestCoins()

Returns the highest value of coins in the current 2D/3D World.

bestGlobalCoins()

Returns the highest amount of coins in the entire game.

bestGlobalPoints()

Returns the highest amount of points in the entire game.

bestPoints()

Returns the highest amount of points in the current 2D/3D World.

camera()

Returns the Camera of the Scene.

characters()

Returns an array of Characters that are currently in the Scene. Remember, there are two kinds of assets that can be placed in a Scene: characters and objects.

clone(originalEntity)

Clones originalEntity and returns a copy of it. Note that the cloned entity’s start() function will be ran when it is cloned.

create(name, parent)

Creates a new Entity using the Asset with the specified name, Asset, or id.

createLinker(name)

Creates and returns a new Linker with the given name (optional).

currentCoins()

Returns the current amount of coins in the 2D/3D World.

currentGlobalCoins()

Returns the current amount of coins in the overall game.

currentGlobalPoints()

Returns the current amount of points in the overall game.

currentLevelName()

Returns the name of the current level.

currentPoints()

Returns the current amount of points in the 2D/3D World.

decreaseCoins(value)

Decreases the user’s coins by the amount given in value.

decreaseCurrentPoints(value)

Decreases the user’s points by the amount given in value.

decreaseTotalPoints(value)

Decreases the given value from the total points in the current 2D/3D World.

entities()

Returns an array of all Entities in the Scene.

find(name)

Returns the array of Entities with the specified name.

findFirst(name)

Returns the first Entity found in the scene with the given name. Useful if you’re sure you only have one Object in the Scene with that name. Returns null if the Entity is not found.

path()

Returns Path object of the Scene.

physicsWorld()

Returns the Scene’s PhysicsWorld object. For more information, look at the PhysicsWorld API reference page.

purgeLevel()

Removes the current first level section.

pushNavigation(name)

Activates a Navigation button with the given name on the current UI, as if the user touched it.

rayTest(from, to)

Returns objects (AABBs) that collide with a ray between the two given Vec3 coordinates. The object returned has the properties bodies and sensors.

restart()

Restarts the scene.

setBackgroundColor(r, g, b)

Sets the background color of the Scene.

setGravity(x, y, z)

Sets the gravity of the Scene.

setScorePoint(value)

Sets the current points to the given value. Note: A coin is typically something the user can spend, while a point is not.

setShadowsEnabled(enabled)

Use this function to turn shadows on or off globally. This can make your game run better on certain devices. Defaults to true (shadows on).

setSpeed(value)

Sets the path speed.

shadowsEnabled()

Returns whether shadows are enabled in the Scene.

speed()

Returns the path speed.

totalCoins()

Returns the total amount of coins in the current 2D/3D World. Note: A coin is typically something the user can spend, while a point is not.

totalGlobalCoins()

Returns the total amount of coins in the overall game.

totalGlobalPoints()

Returns the total amount of points in the overall game.

totalPoints()

Returns the total amount of points in the current 2D/3D World. Note: A coin is typically something the user can spend, while a point is not.


addChild(entity)

Adds the given Entity as a child of the Scene.

Parameters

Entity entity – the Entity to add to the Scene.

↑ Back to top


addLevel(name)

Adds a level to the queue of levels to be displayed. The engine will look for a Level Section (aka Scene) with the given name and schedule it for adding. As soon as the engine needs a new level section to display, it will look for scheduled ones first.

Parameters

string name – the name of the level to be added

// scheduling levels sections ahead of time. Keep in mind that all level sections will not be placed all at once, but based on current distance.
function init(){
  this.scene().addLevel('LevelM1');
  this.scene().addLevel('LevelM2');
  this.scene().addLevel('LevelM3');
  this.scene().addLevel('LevelM2');
  this.scene().addLevel('LevelM1');
}

↑ Back to top


addScoreCoin(value)

Increases the user’s coins by the amount given in value. You can also pass a negative value to decrease the user’s coins. Note: A coin is typically something the user can spend, while a point is not.

Parameters

number value – the number to increase the coins by.

log(this.scene().totalCoins()); // output: 5
this.scene().addScoreCoin(2);
log(this.scene().totalCoins()); // output: 7

↑ Back to top


addScorePoint(value)

Increases the user’s score by the amount given in value. You can also pass a negative value to decrease the user’s points. Note: A coin is typically something the user can spend, while a point is not.

Parameters

number value – the number to increase the score by.

  this.scene().addScorePoint(45);

↑ Back to top


bestCoins()

Returns the highest value of coins in the current 2D/3D World.

Returns

number the highest value of coins in the current 2D/3D World

↑ Back to top


bestGlobalCoins()

Returns the highest amount of coins in the entire game.

Returns

number the highest amount of coins in the entire game

↑ Back to top


bestGlobalPoints()

Returns the highest amount of points in the entire game.

Returns

number the highest amount of points in the entire game

↑ Back to top


bestPoints()

Returns the highest amount of points in the current 2D/3D World.

Returns

number the highest amount of points in the current 2D/3D World

↑ Back to top


camera()

Returns the Camera of the Scene.

Returns

Camera the Camera object of the Scene

↑ Back to top


characters()

Returns an array of Characters that are currently in the Scene. Remember, there are two kinds of assets that can be placed in a Scene: characters and objects.

Returns

array an array of Entities with the Character label in the Scene.

this.scene().characters()[0].setPosition(0, 0, 0); //set the position of the first character returned by characters()

↑ Back to top


clone(originalEntity)

Clones originalEntity and returns a copy of it. Note that the cloned entity’s start() function will be ran when it is cloned.

Parameters

Entity originalEntity – the Entity you’d like to copy

Returns

Entity the new entity

// clone the current entity
let entity = this.scene().findFirst("Cone");
let copiedEntity = this.scene().clone(entity);
this.scene.addChild(copiedEntity);

↑ Back to top


create(name, parent)

Creates a new Entity using the Asset with the specified name, Asset, or id. For using an id, see attribute().

Parameters

string/Asset/number name – The asset the new Entity should use.
Scene/LevelSector parent – (Optional) the parent Entity or LevelSector

Returns

Entity The entity that was just created.

let ent = this.scene().create('Obstacle1');
ent.setPosition(0, 20, 0);

↑ Back to top


createLinker()

Creates and returns a new Linker with the given name (optional). After creation, use methods like setEntities(a, b) and setPosition(vec3) to set up your linker.

Parameters

string the name of the linker (optional)

Returns

Linker the new linker

↑ Back to top


currentCoins()

Returns the current amount of coins in the 2D/3D World.

Returns

number the current amount of coins in the 2D/3D World

↑ Back to top


currentGlobalCoins()

Returns the current amount of coins in the overall game.

Returns

number the current amount of coins in the overall game

↑ Back to top


currentGlobalPoints()

Returns the current amount of points in the overall game.

Returns

number the current amount of points in the overall game

↑ Back to top


currentLevelName()

Returns the name of the current level.

Returns

string the name of the current level

↑ Back to top


currentPoints()

Returns the current amount of points in the 2D/3D World.

Returns

number the current amount of points in the 2D/3D World

↑ Back to top


decreaseCoins(value)

Decreases the user’s coins by the amount given in value.

Parameters

number value – the amount to decrease the coins by

↑ Back to top


decreaseCurrentPoints(value)

Decreases the user’s points by the amount given in value.

Parameters

number value – the amount to decrease the points by

↑ Back to top


decreaseTotalPoints(value)

Decreases the given value from the total points in the current 2D/3D World.

Parameters

number value – the amount to decrease the total points by

↑ Back to top


entities()

Returns an array of all Entities in the Scene.

Returns

array – the entities in the Scene

↑ Back to top


find(name)

Returns the array of Entities with the specified name.

Parameters

string name – The name of the Entity to be searched for.

Returns

array The array of Entities which match that name.

let ents = this.scene().find('myObstacle');
for(let i = 0; i < ents.length; i++){
  // increase the y position of each entity
  let ent = ents[i];
  let pos = ent.position();
  ent.setPosition(pos.x, pos.y + 1, pos.z);
}

let player = this.scene().find('Character')[0]; // use this shorthand if you're confident in only getting one result from the search

↑ Back to top


findFirst(name)

Returns the first Entity found in the scene with the given name. Useful if you’re sure you only have one Object in the Scene with that name. Returns null if the Entity is not found.

Parameters

string name – The name of the Entity to be searched for.

Returns

Entity – the entity found with the given name

↑ Back to top


path()

Returns Path object of the Scene.

Returns

ScenePath the Scene’s path object

↑ Back to top


physicsWorld()

Returns the Scene’s PhysicsWorld object. For more information, look at the PhysicsWorld API reference page.

Returns

PhysicsWorld the Scene’s physics world object

↑ Back to top


purgeLevel()

Removes the current first level section.

↑ Back to top


pushNavigation(name)

Activates a Navigation button with the given name on the current UI, as if the user touched it.

Parameters

string name – the name of the button to push

↑ Back to top


rayTest(from, to)

Returns objects (AABBs) that collide with a ray between the two given Vec3 coordinates. Optionally takes a filter as the third parameter, such as: “kAll”, “kSensor”, “kEnemy”, “kPlatform”, “kCoin”, “kCharacter”.

The object returned by this function has the properties {bodies, sensors} which are each arrays. The bodies and sensors objects have the properties {object, hitPoint}.

Parameters

Vec3 from – the starting coordinate
Vec3 to – the ending coordinate
string filter – optional

Returns

Object with properties {bodies, sensors}.

// choose an object as the Selected Character with ray testing. pt is where the user tapped.

let ray = cam.screenRay(pt);
let rtst = this.scene().rayTest(
        ray.origin,
        ray.origin.add(ray.direction.scale(100))
    );
    
    for (let i = 0; i < rtst.bodies.length; ++i) {
        let hit = rtst.bodies[i];
        Settings.selectedCharacter = hit.object.parentEntity().name();
        return;
    }
    

↑ Back to top


restart()

Restarts the scene.

↑ Back to top


setBackgroundColor(r, g, b)

Sets the background color of the Scene.

Parameters

number r – the red component of the color
number g – the green component of the color
number b – the blue component of the color

↑ Back to top


setGravity(x, y, z)

Sets the gravity of the Scene.

Parameters

number x – the x-axis component of the new gravity
number y – the y-axis component of the new gravity
number z – the z-axis component of the new gravity

↑ Back to top


setScorePoint(value)

Sets the current points to the given value. Note: A coin is typically something the user can spend, while a point is not.

Parameters

number value – the new score value

↑ Back to top


setShadowsEnabled(enabled)

Use this function to turn shadows on or off globally. This can make your game run better on certain devices. Defaults to true (shadows on).

Parameters

boolean enabled – turn on/off shadows globally.

↑ Back to top


setSpeed(value)

Sets the path speed.

Parameters

number value – the new path speed

↑ Back to top


shadowsEnabled()

Returns whether shadows are enabled in the Scene.

Returns

boolean – true if shadows are enabled, false if not.

↑ Back to top


speed()

Returns the path speed.

Returns

number the current path speed

↑ Back to top


totalCoins()

Returns the total amount of coins in the current 2D/3D World. Note: A coin is typically something the user can spend, while a point is not.

Returns

number the total amount of coins in the current 2D/3D World

↑ Back to top


totalGlobalCoins()

Returns the total amount of coins in the overall game.

Returns

number the total amount of coins in the overall game

↑ Back to top


totalGlobalPoints()

Returns the total amount of points in the overall game.

Returns

number the total amount of points in the overall game

↑ Back to top


totalPoints()

Returns the total amount of points in the current 2D/3D World. Note: A coin is typically something the user can spend, while a point is not.

Returns

number the total amount of points in the current 2D/3D World

↑ Back to top

Did you find this page useful?

Please give it a rating:

Please provide some feedback!

This is very helpful to us.

Tell us how we can improve this post?

UI – API Reference

By |

Ui

Function Description
camera()

Returns the Ui’s Camera object. The Ui has an independent camera from the 3D world it’s attached to. It’s recommended to only use the Ui’s Camera for things like screenToWorld() (See the Camera API for more info).

create(name, parent)

Create a new Entity within the Ui based on the given asset name. A parent entity can be passed optionally.

find(name)

Returns the array of Entities, Buttons, or Images with the specified name.

playBackgroundMusic()

Plays the background music of this Ui.

stopBackgroundMusic()

Stops playing the background music of this Ui.


camera()

Returns the Ui’s Camera object. The Ui has an independent camera from the 3D world it’s attached to. It’s recommended to only use the Ui’s Camera for things like screenToWorld() (See the Camera API for more info).

Returns

Camera the Ui’s Camera object

↑ Back to top


create(name, parent)

Create a new Entity within the Ui based on the given asset name. A parent entity can be passed optionally.

Parameters

string name – the asset the new Entity should contain
Entity parent (optional) the parent of the newly created Entity

↑ Back to top


find(name)

Returns the array of Entities, Buttons, or Images with the specified name.

Parameters

string name – the name of the objects you wish to find

Returns

array the array of Ui objects with the specified name

↑ Back to top


playBackgroundMusic()

Plays the background music of this Ui.

↑ Back to top


stopBackgroundMusic()

Stops playing the background music of this Ui.

↑ Back to top

Did you find this page useful?

Please give it a rating:

Please provide some feedback!

This is very helpful to us.

Tell us how we can improve this post?

Making a Simple Game – Buildbox 3 Manual

By |

Making a Simple Game

If you have explored Buildbox and want to see how the tasks explained and demonstrated by the interactive and video tutorials and templates come together when building a game, you’ve come to the right place!

The instructions below consolidate most important tasks into a single, comprehensive guide. This guide walks you step by step through the game creation process from start to finish and allows you to learn Buildbox at your own pace.

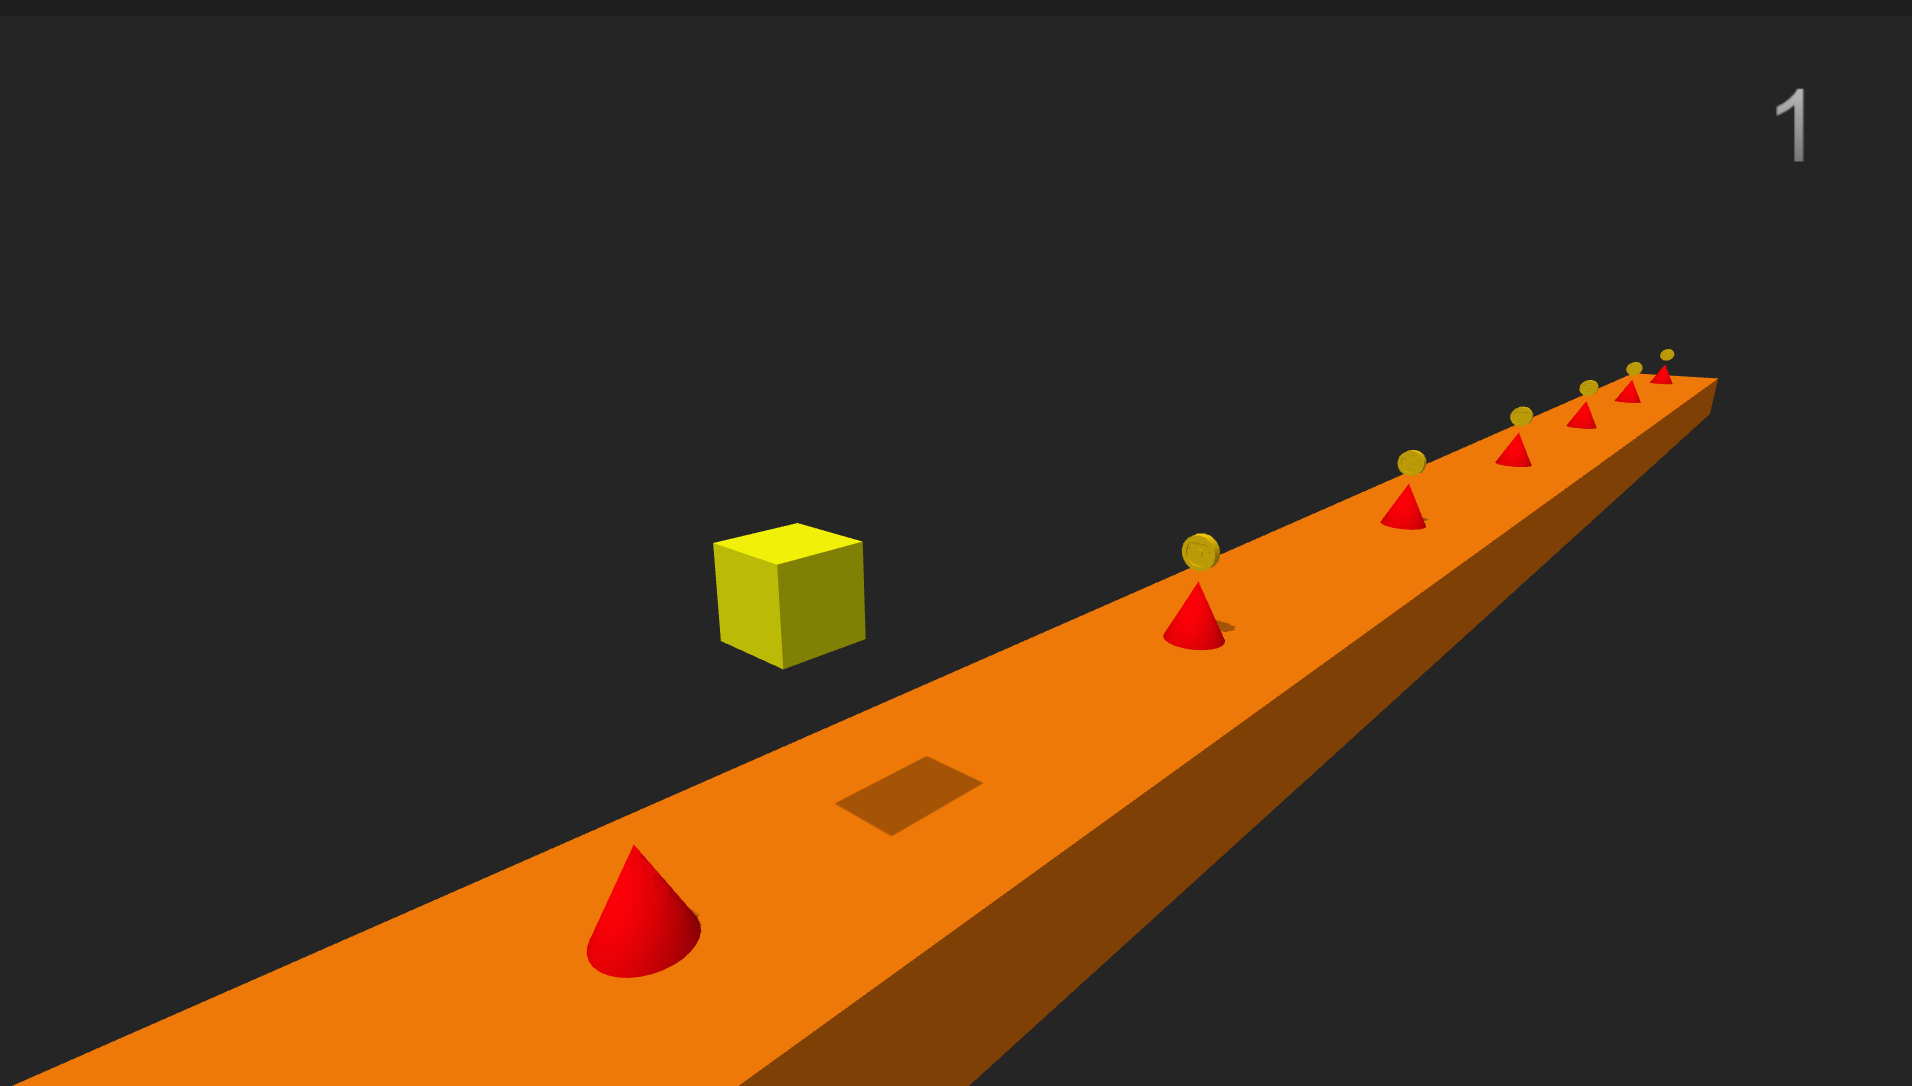
After completing the steps below, you will create a simple game, in which players control a cube character that moves along a platform (ground) and jumps to avoid enemy cone obstacles while collecting reward coins.

What You Need to Know

  • There are more than one way of doing things in Buildbox, such as selecting and manipulating objects or entering values.
    Each procedure intentionally demonstrates various ways of setting desired values, for example, by entering them in the respective fields or by manipulating the objects in an Editor.
    Experiment and choose your preferred way!
  • Images are provided for your reference only.
    Your view of the scenes on the screen may differ based on the zoom level and angle you choose using the spacebar and left and right mouse clicks.
    It is the position and scale values that you will be instructed to enter that matter.
  • The order of procedures is intended to maximize efficiency and reduce the number of tedious, repetitive tasks. Yet some of them are unavoidable.
    Practice makes perfect! Your patience and diligence will result in mastery of skills.
  • The steps below tell you only what to do, not why.
    For details and explanations of tools and features, see the respective sections in this documentation.

Let’s Get Started!

1. Create your project
  1. On the Getting Started screen, click Create New at the top left.
  2. On the displayed page, click Create 3D Game under the New Game option.
    A new project loads with two nodes on the Mind Map.
  3. On the Buildbox menu bar, select File > Project Settings  to open the Project Settings window.
  4. In the Full Game Name field, type a name for your game.
  5. In the Orientation drop-down list, select Landscape. Click OK.
  6. On the menu bar, click File and select Save As.
  7. Choose a location and type a name for your project.
  8. Click Save.
2. Add a 3D World
  1. On the Mind Map, select the 3D World and press Delete on your keyboard.
  2. From the Node panel on the left, drag a 3D World node to the Mind Map grid and place it to the right of the Start node.
  3. On the Start node, click the Load output and drag a connector to the Load input of the 3D World.
  4. Click the 3D World and in the Options panel, in the Gravity Y axis field, type -30.
  5. Double-click the 3D World  node to go inside it. The World workspace is displayed.
3. Create a solid ground
  1. In the Asset panel on the left, click Asset Library.
  2. Double-click the Cube shape.
    It appears under the Objects category in the Asset panel.
  3. Click Asset Library to close it.
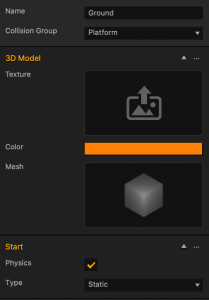
  4. In the Asset panel, click the Cube object and in the Options panel on the far right, do the following:
    1. In the Name field, type Ground.
      The name is automatically updated in the Asset panel.
    2. In the Collision Group list, select Platform.
    3. Expand the 3D Model drop-down list.
    4. Click Color and in the displayed window, choose an orange color, and click OK.
    5. Select the Physics checkbox.
    6. In the Type list, select Static.
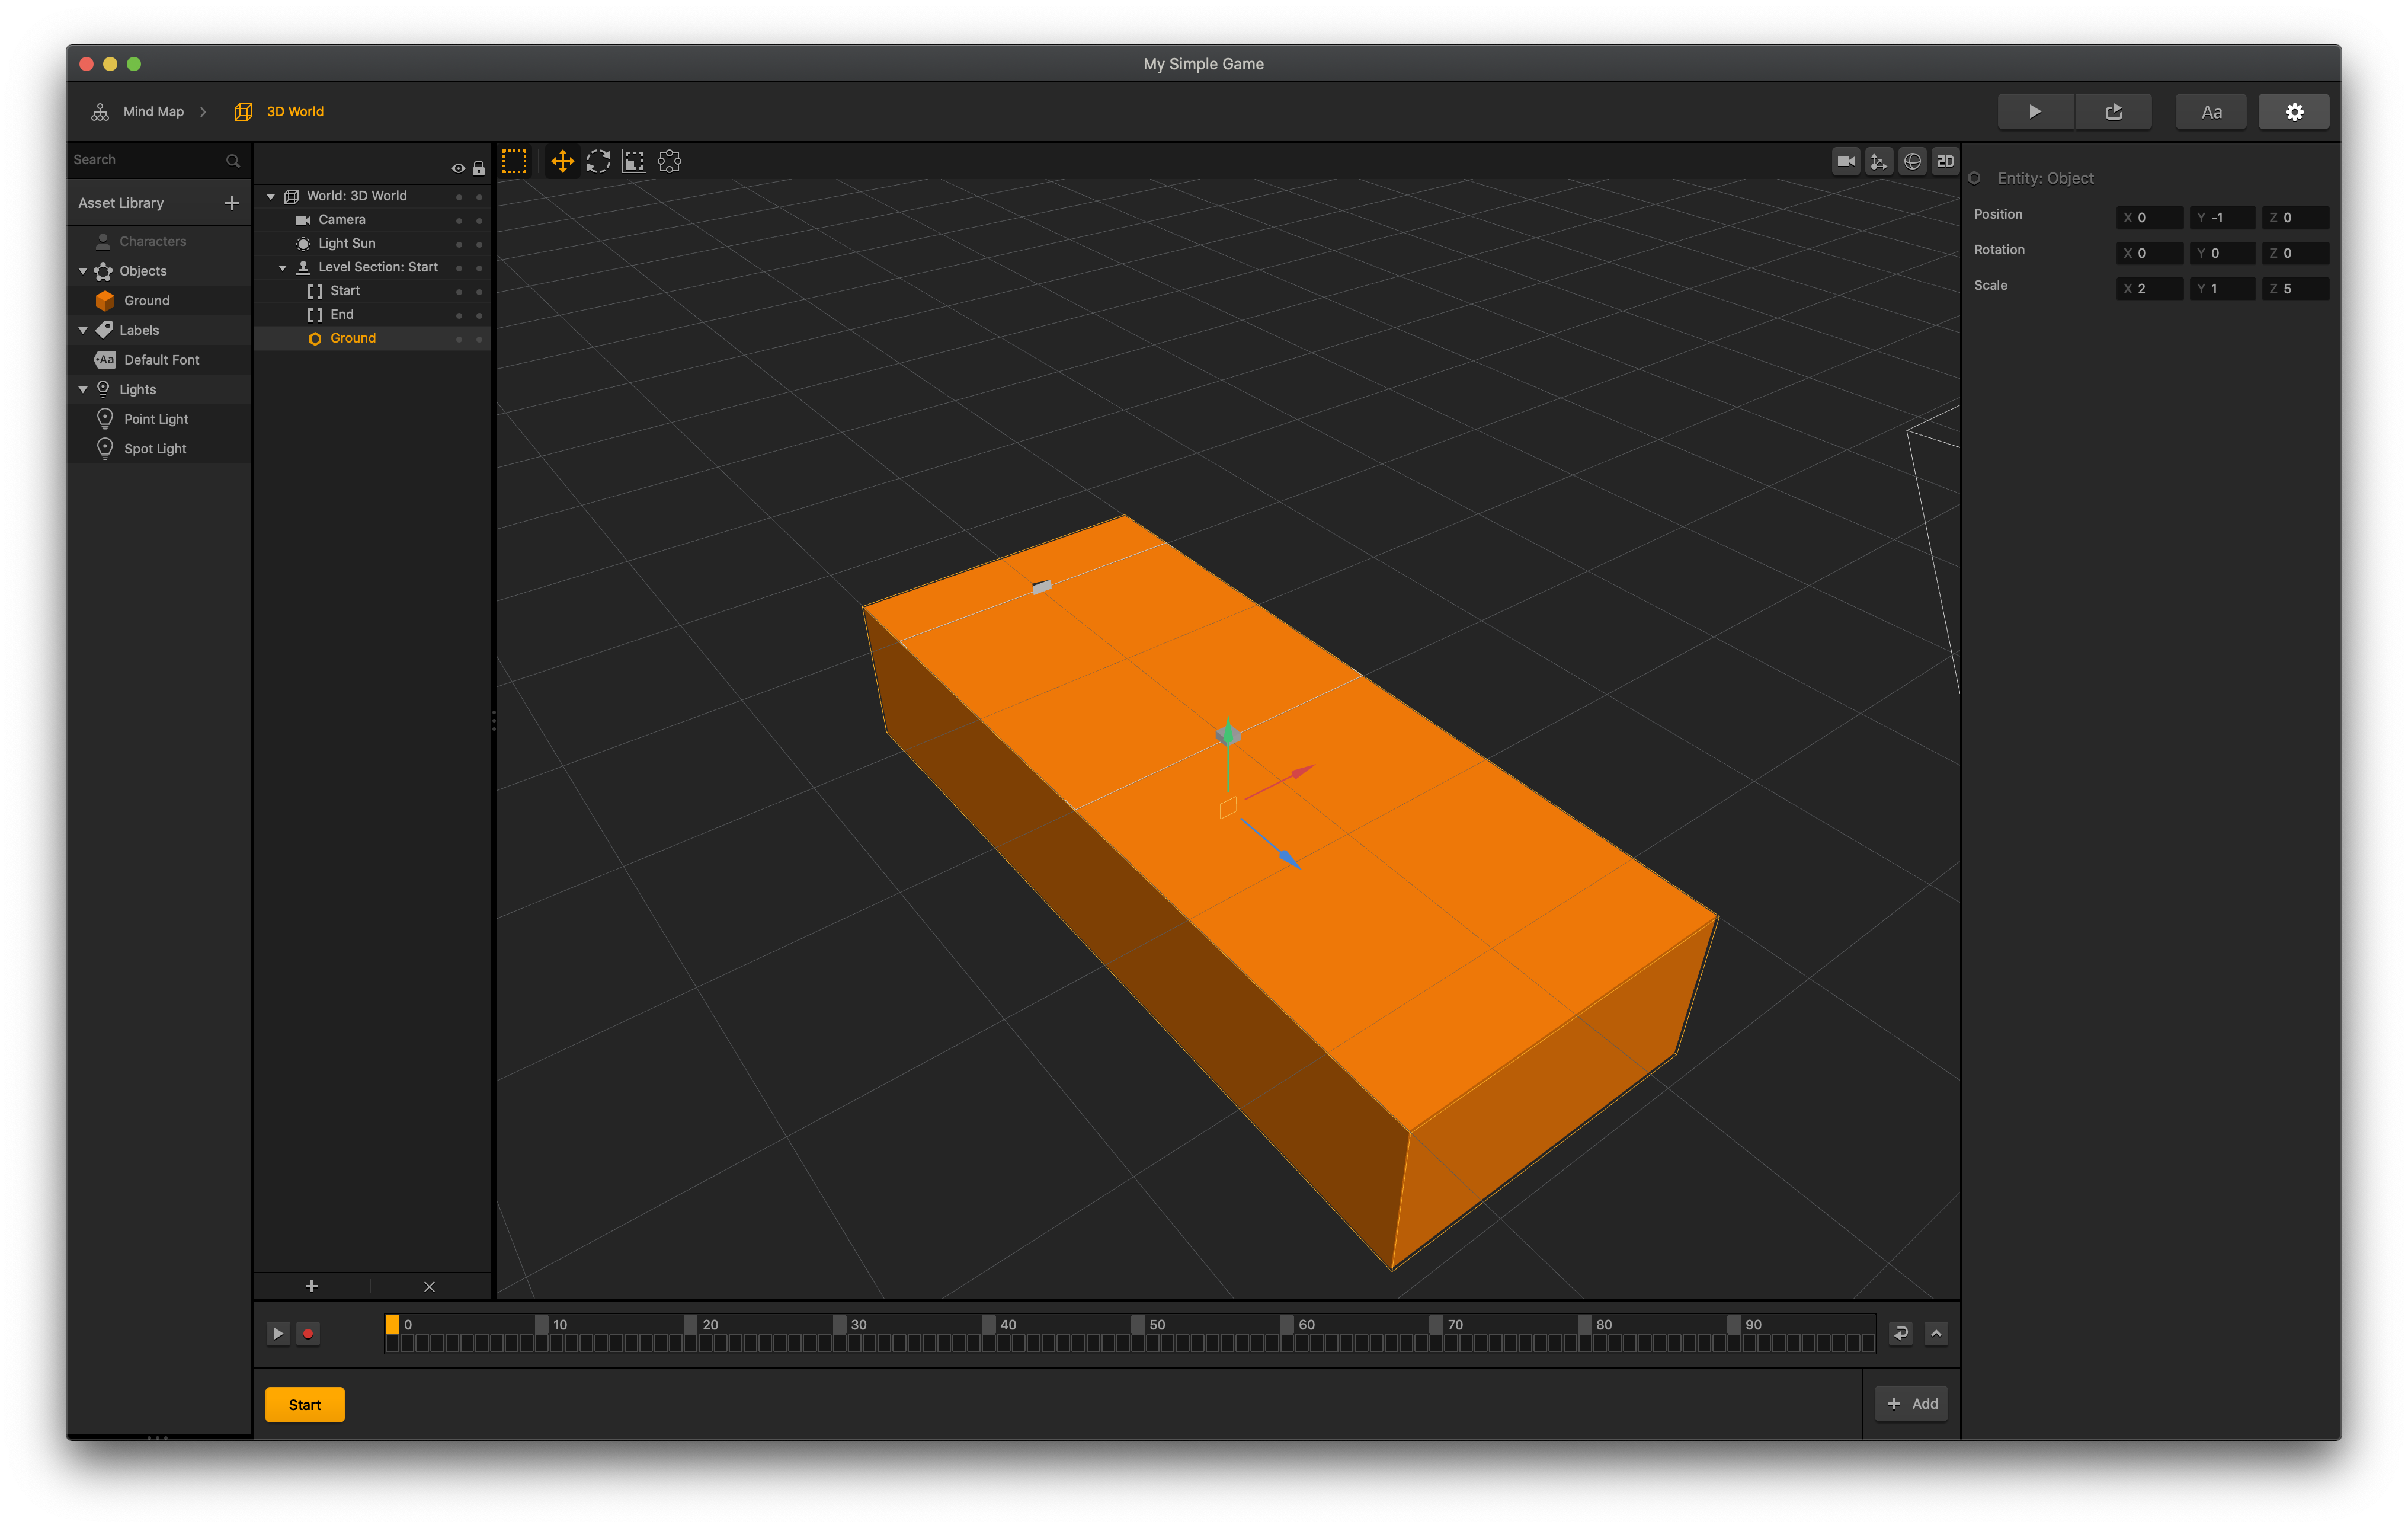
  5. From the Asset panel, drag the Ground asset to the Scene Editor.
  6. In the Options panel, in the Position X, Y, and Z axis fields, enter 0, -1, 0 respectively.
  7. In the Scale axis fields, enter the following values: 2, 1, 5.

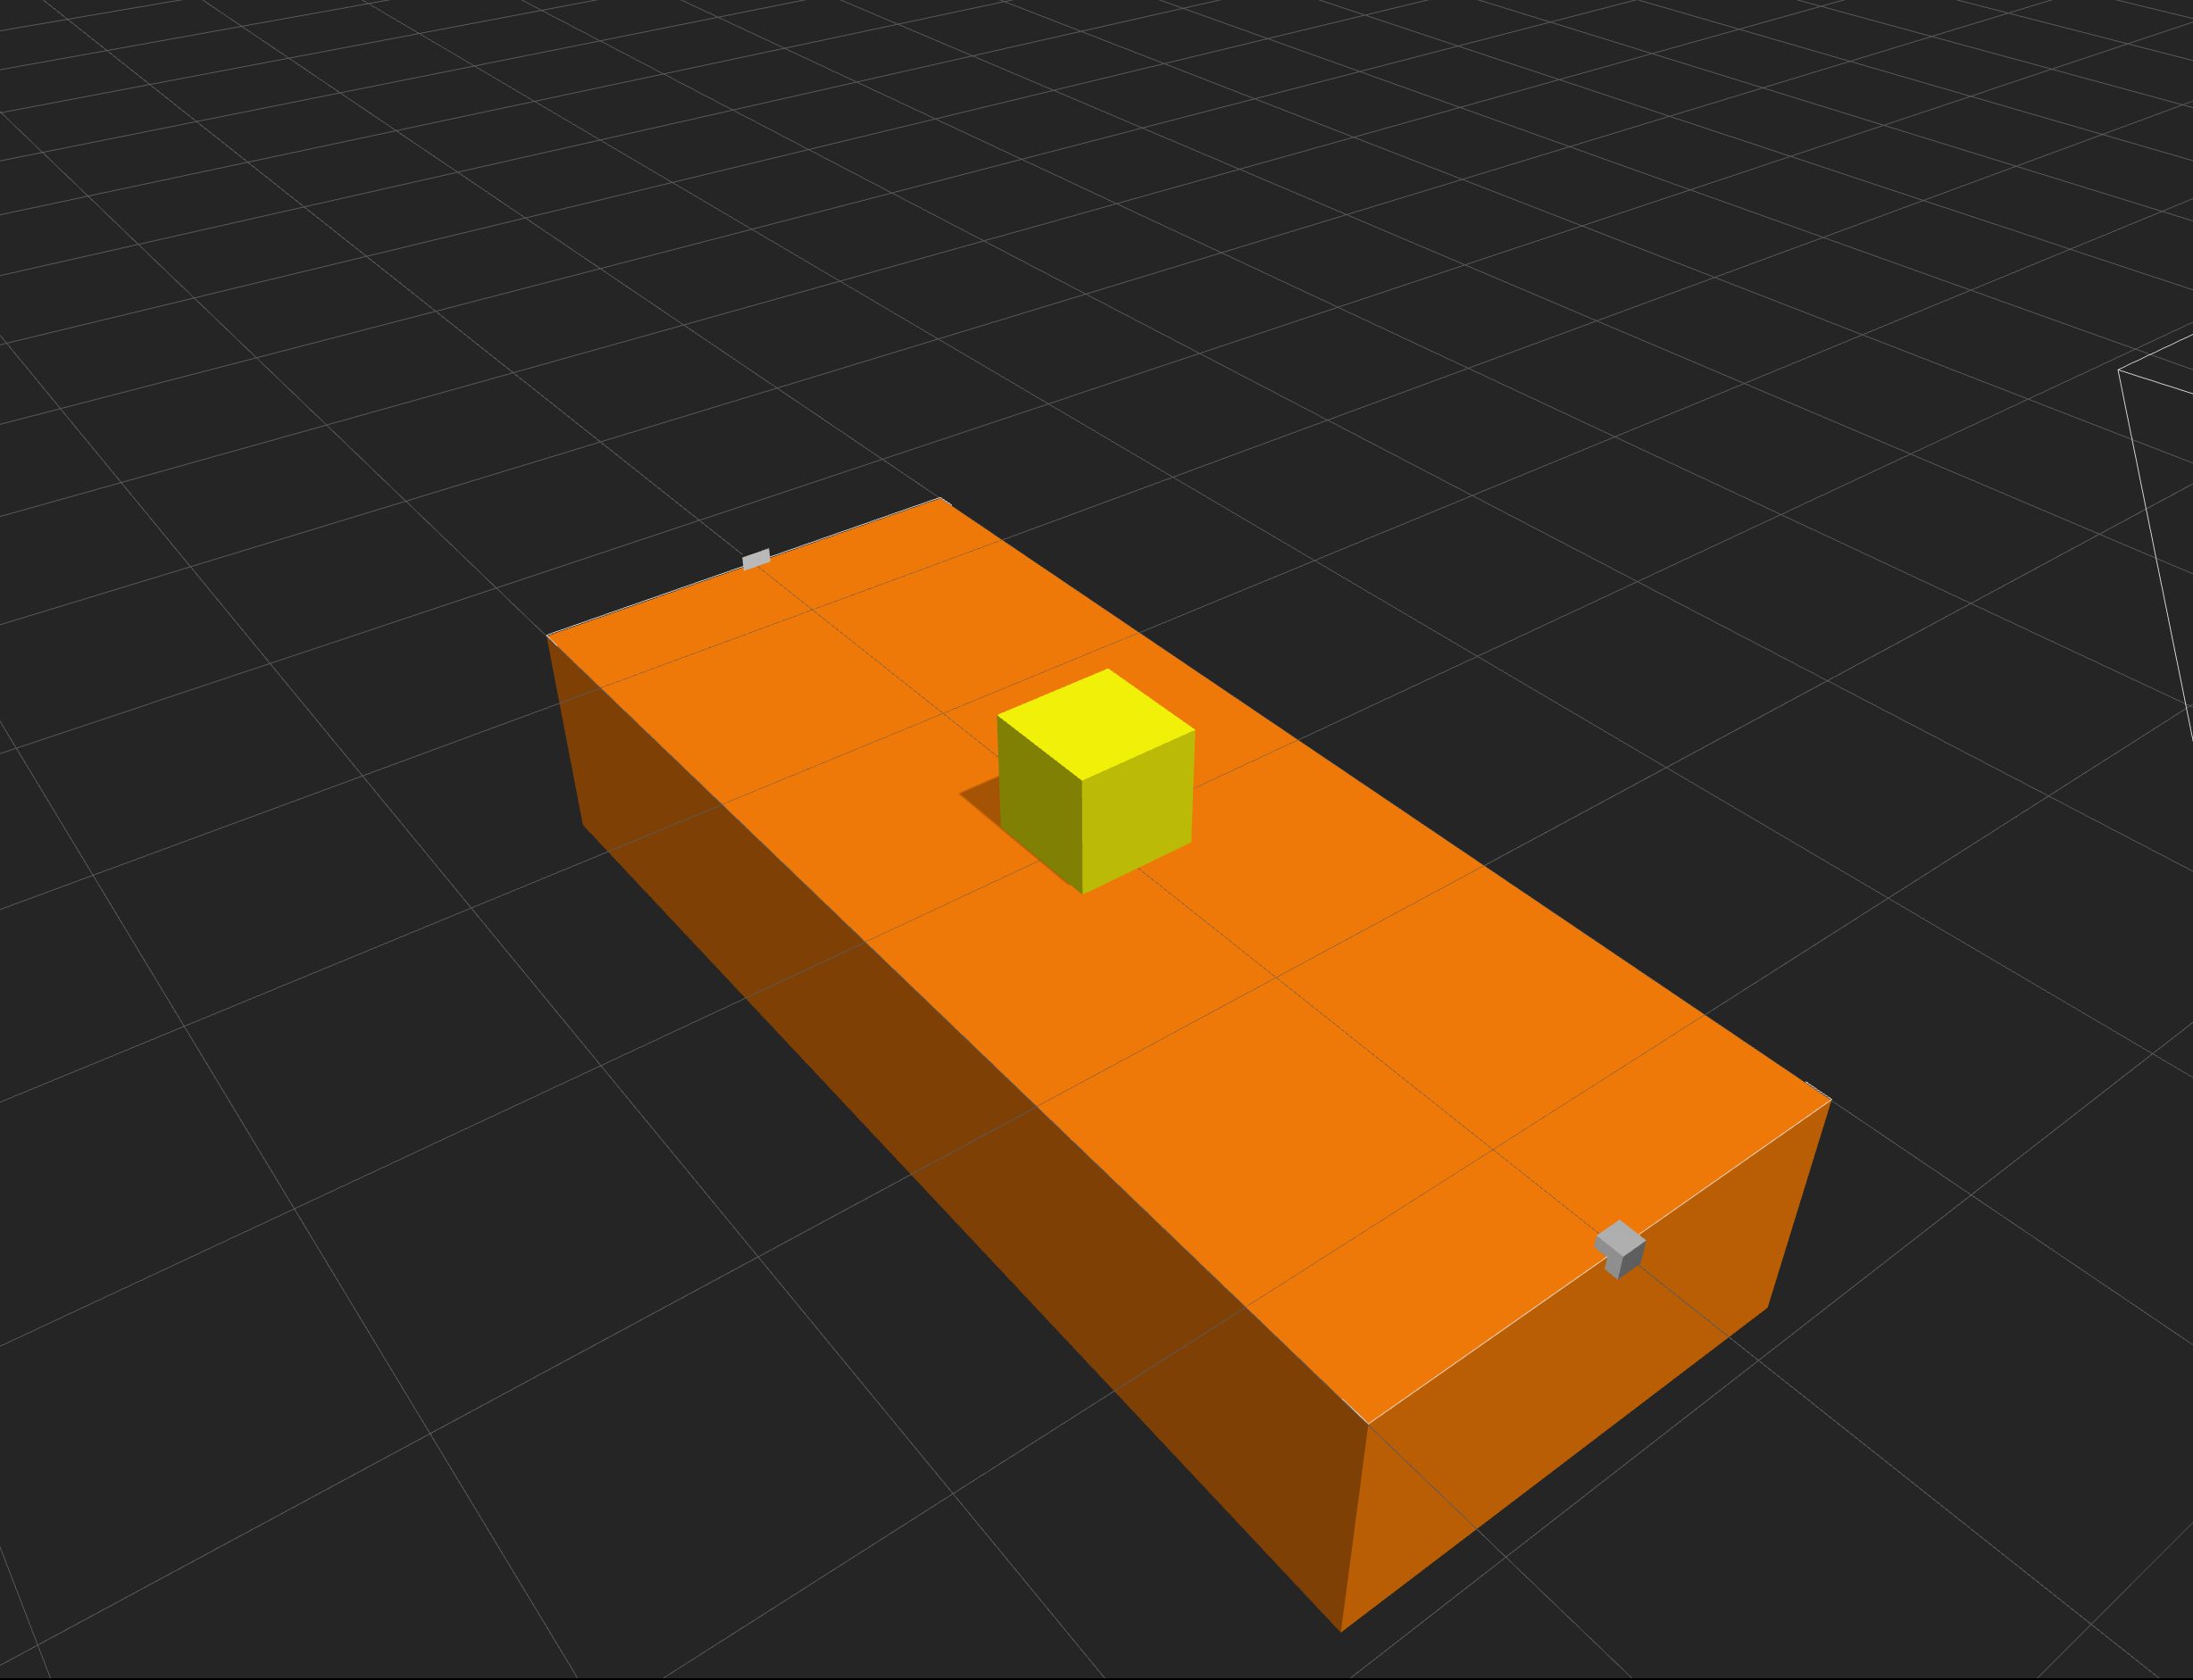
This is what your ground would look like in the Scene Editor:

4. Create your character
  1. In the Asset panel on the left, click Asset Library.
  2. Double-click the Cube shape.
    It appears under the Objects category in the Asset panel.
  3. Click Asset Library to close it.
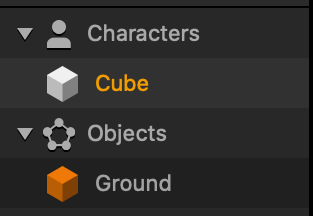
  4. In the Asset panel, drag the Cube object to the Characters category.
    The Characters category changes to a drop-down list with the Cube asset in it.
  5. Drag the Cube character to the Scene Editor.
  6. In the Options panel, enter the following values in the Position axis fields: 0, 0.5, 0.
  7. In the Scale axis fields, enter the following values: 0.5, 0.5, 0.5.

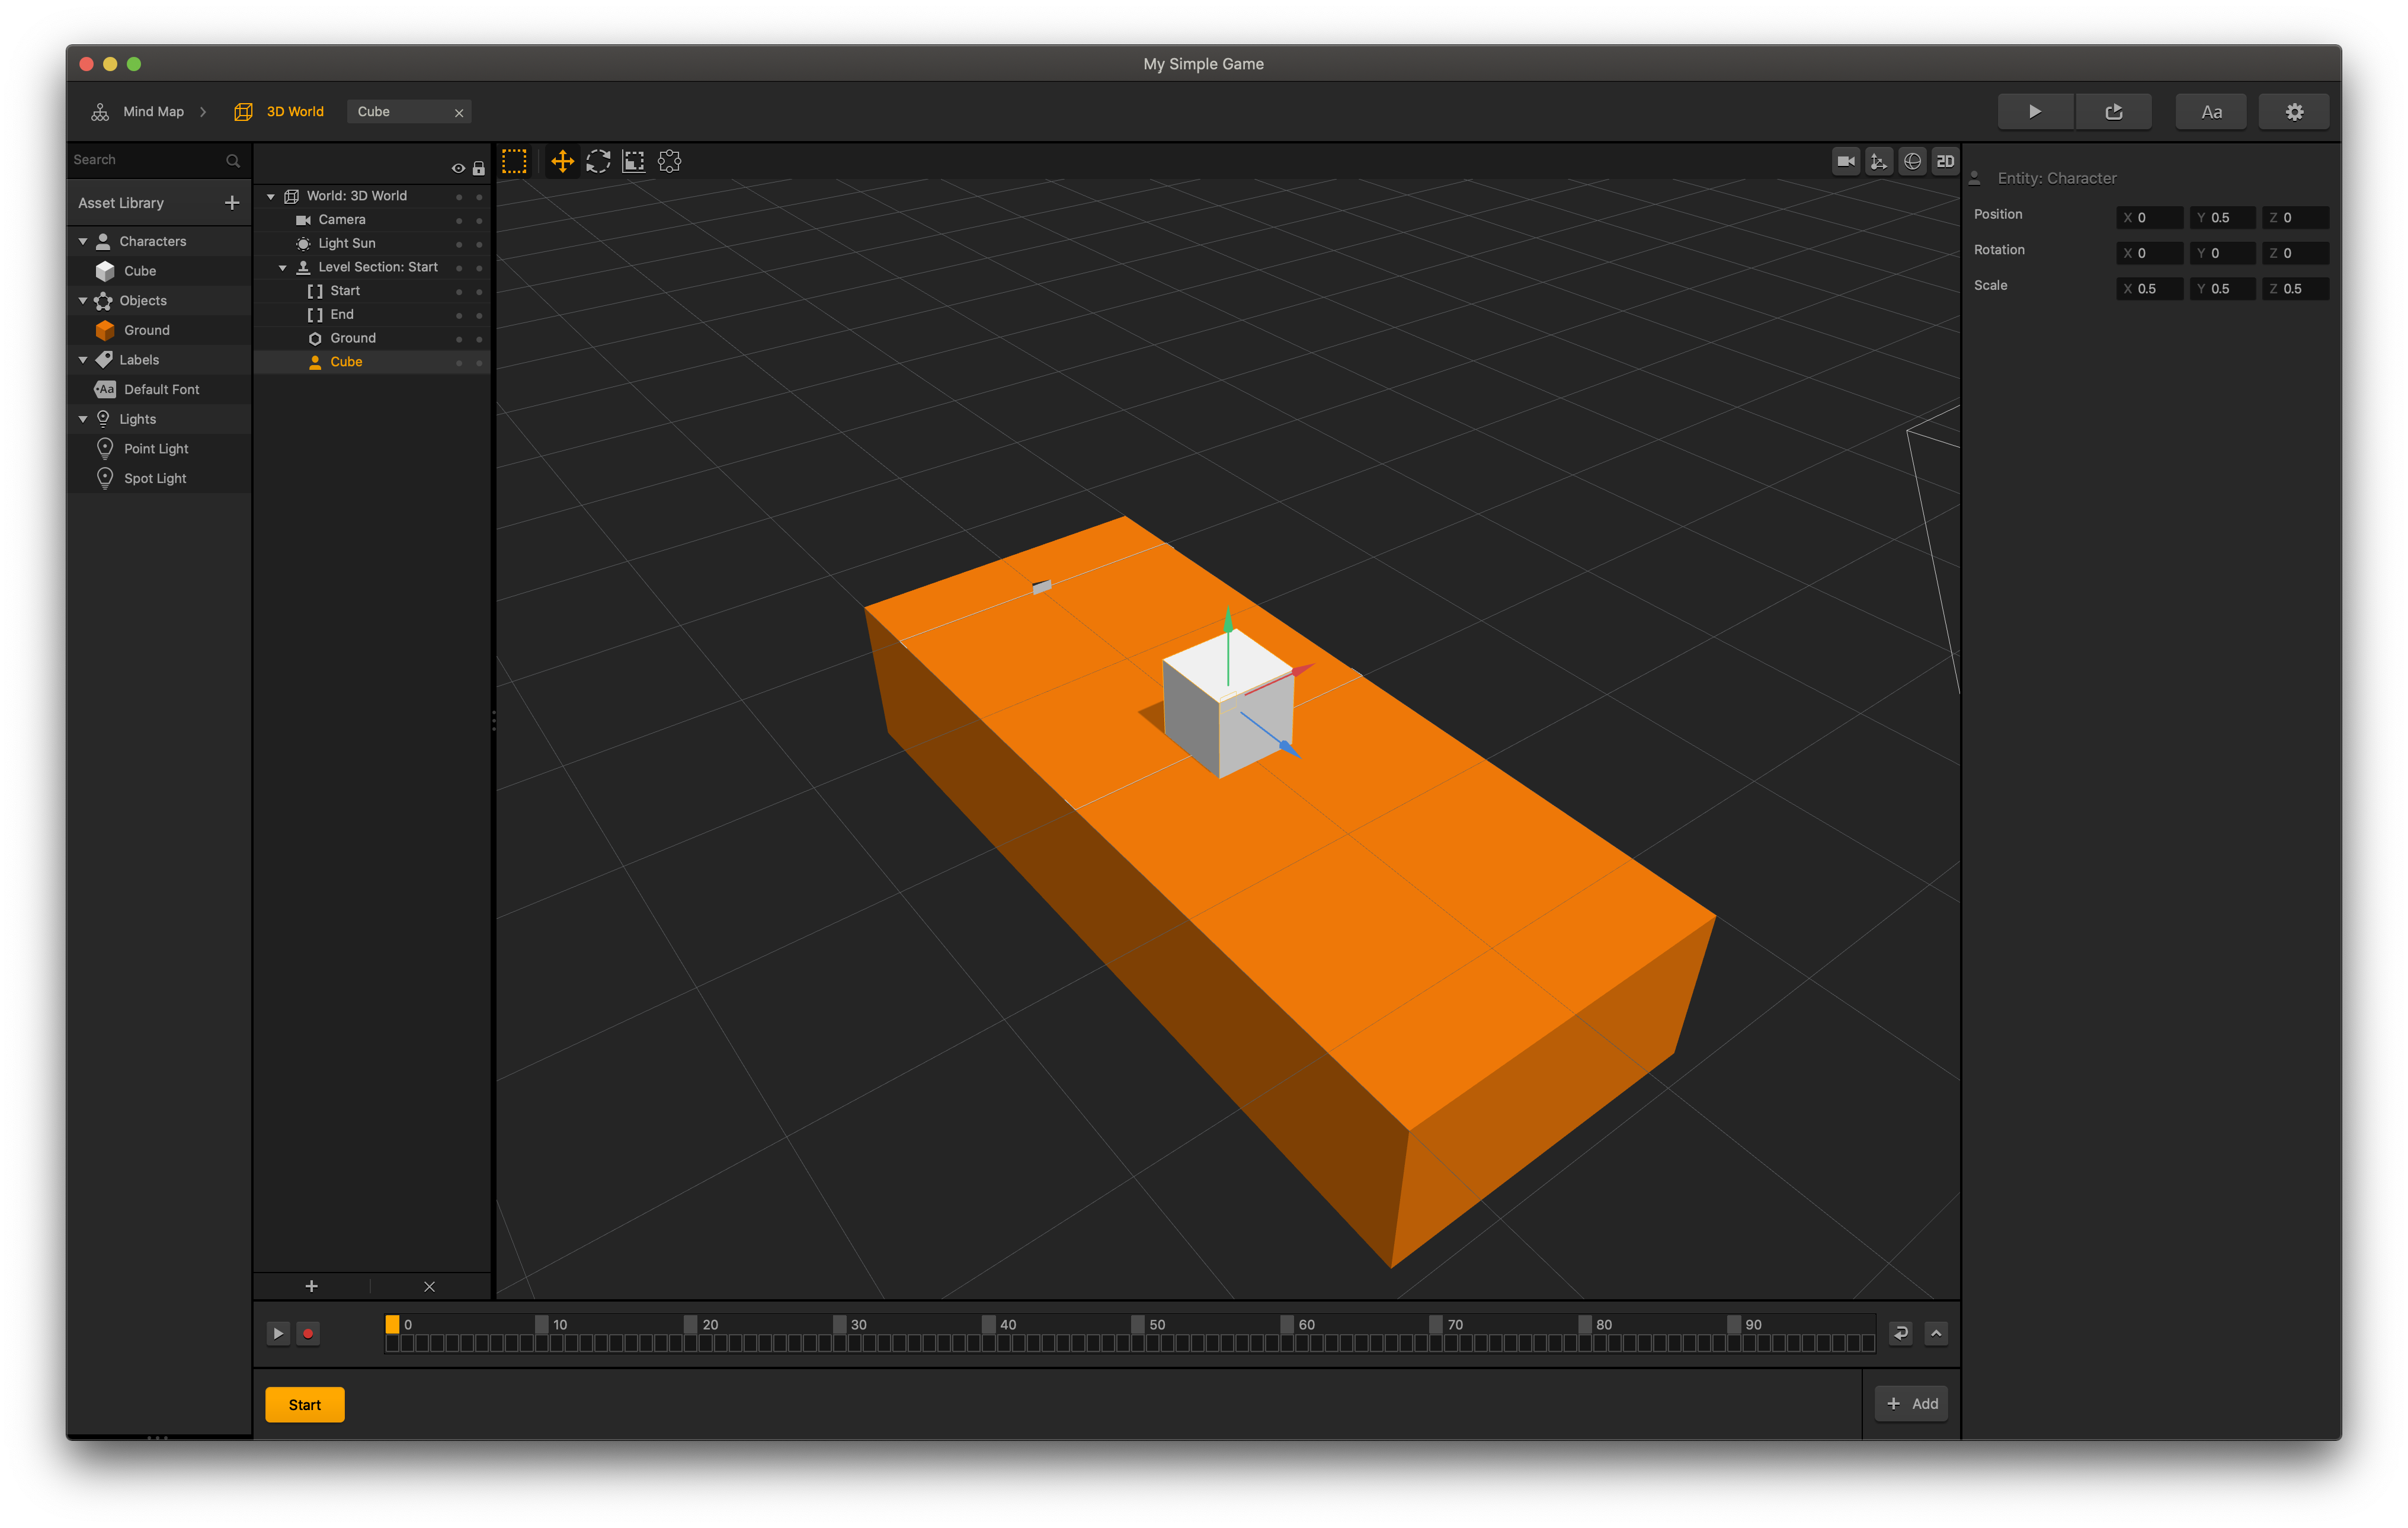
This is what your character would look like in the Scene Editor:

5. Define the character's appearance and behavior
  1. In the Asset panel, click the Cube character.
  2. In the Options panel on the far right, do the following:
    1. In the Name field, type Player.
      The name is automatically updated in the Asset panel.
    2. In the Collision Group list, select Character.
    3. Expand the 3D Model drop-down list.
    4. Click Color and in the displayed window, choose a yellow color, and click OK.
    5. Select the Physics checkbox.
    6. In the Type list, which appears underneath the checkbox, select Dynamic.
    7. To make the character move and jump, at the bottom of the panel, click Add Brain Box.
      1. Scroll to find the Move box and click it.

        The expanded Move drop-down list is added to the attributes in the Options panel.
      2. In the Speed Y axis field, delete the 0 value (this sets its value to none) and in the Z axis field, type -10.
      3. Click Add Brain Box and add the Jump box.
      4. In the Jump Force fields, set the Y axis value to 10.
    8. To manage the character’s defeat, click Add Brain Box and add the Health Brain box.
    9. In the Affected Attribute list, select Enemy.
  3. To finalize the movement and defeat behavior, in the Asset panel, double-click the Player character.
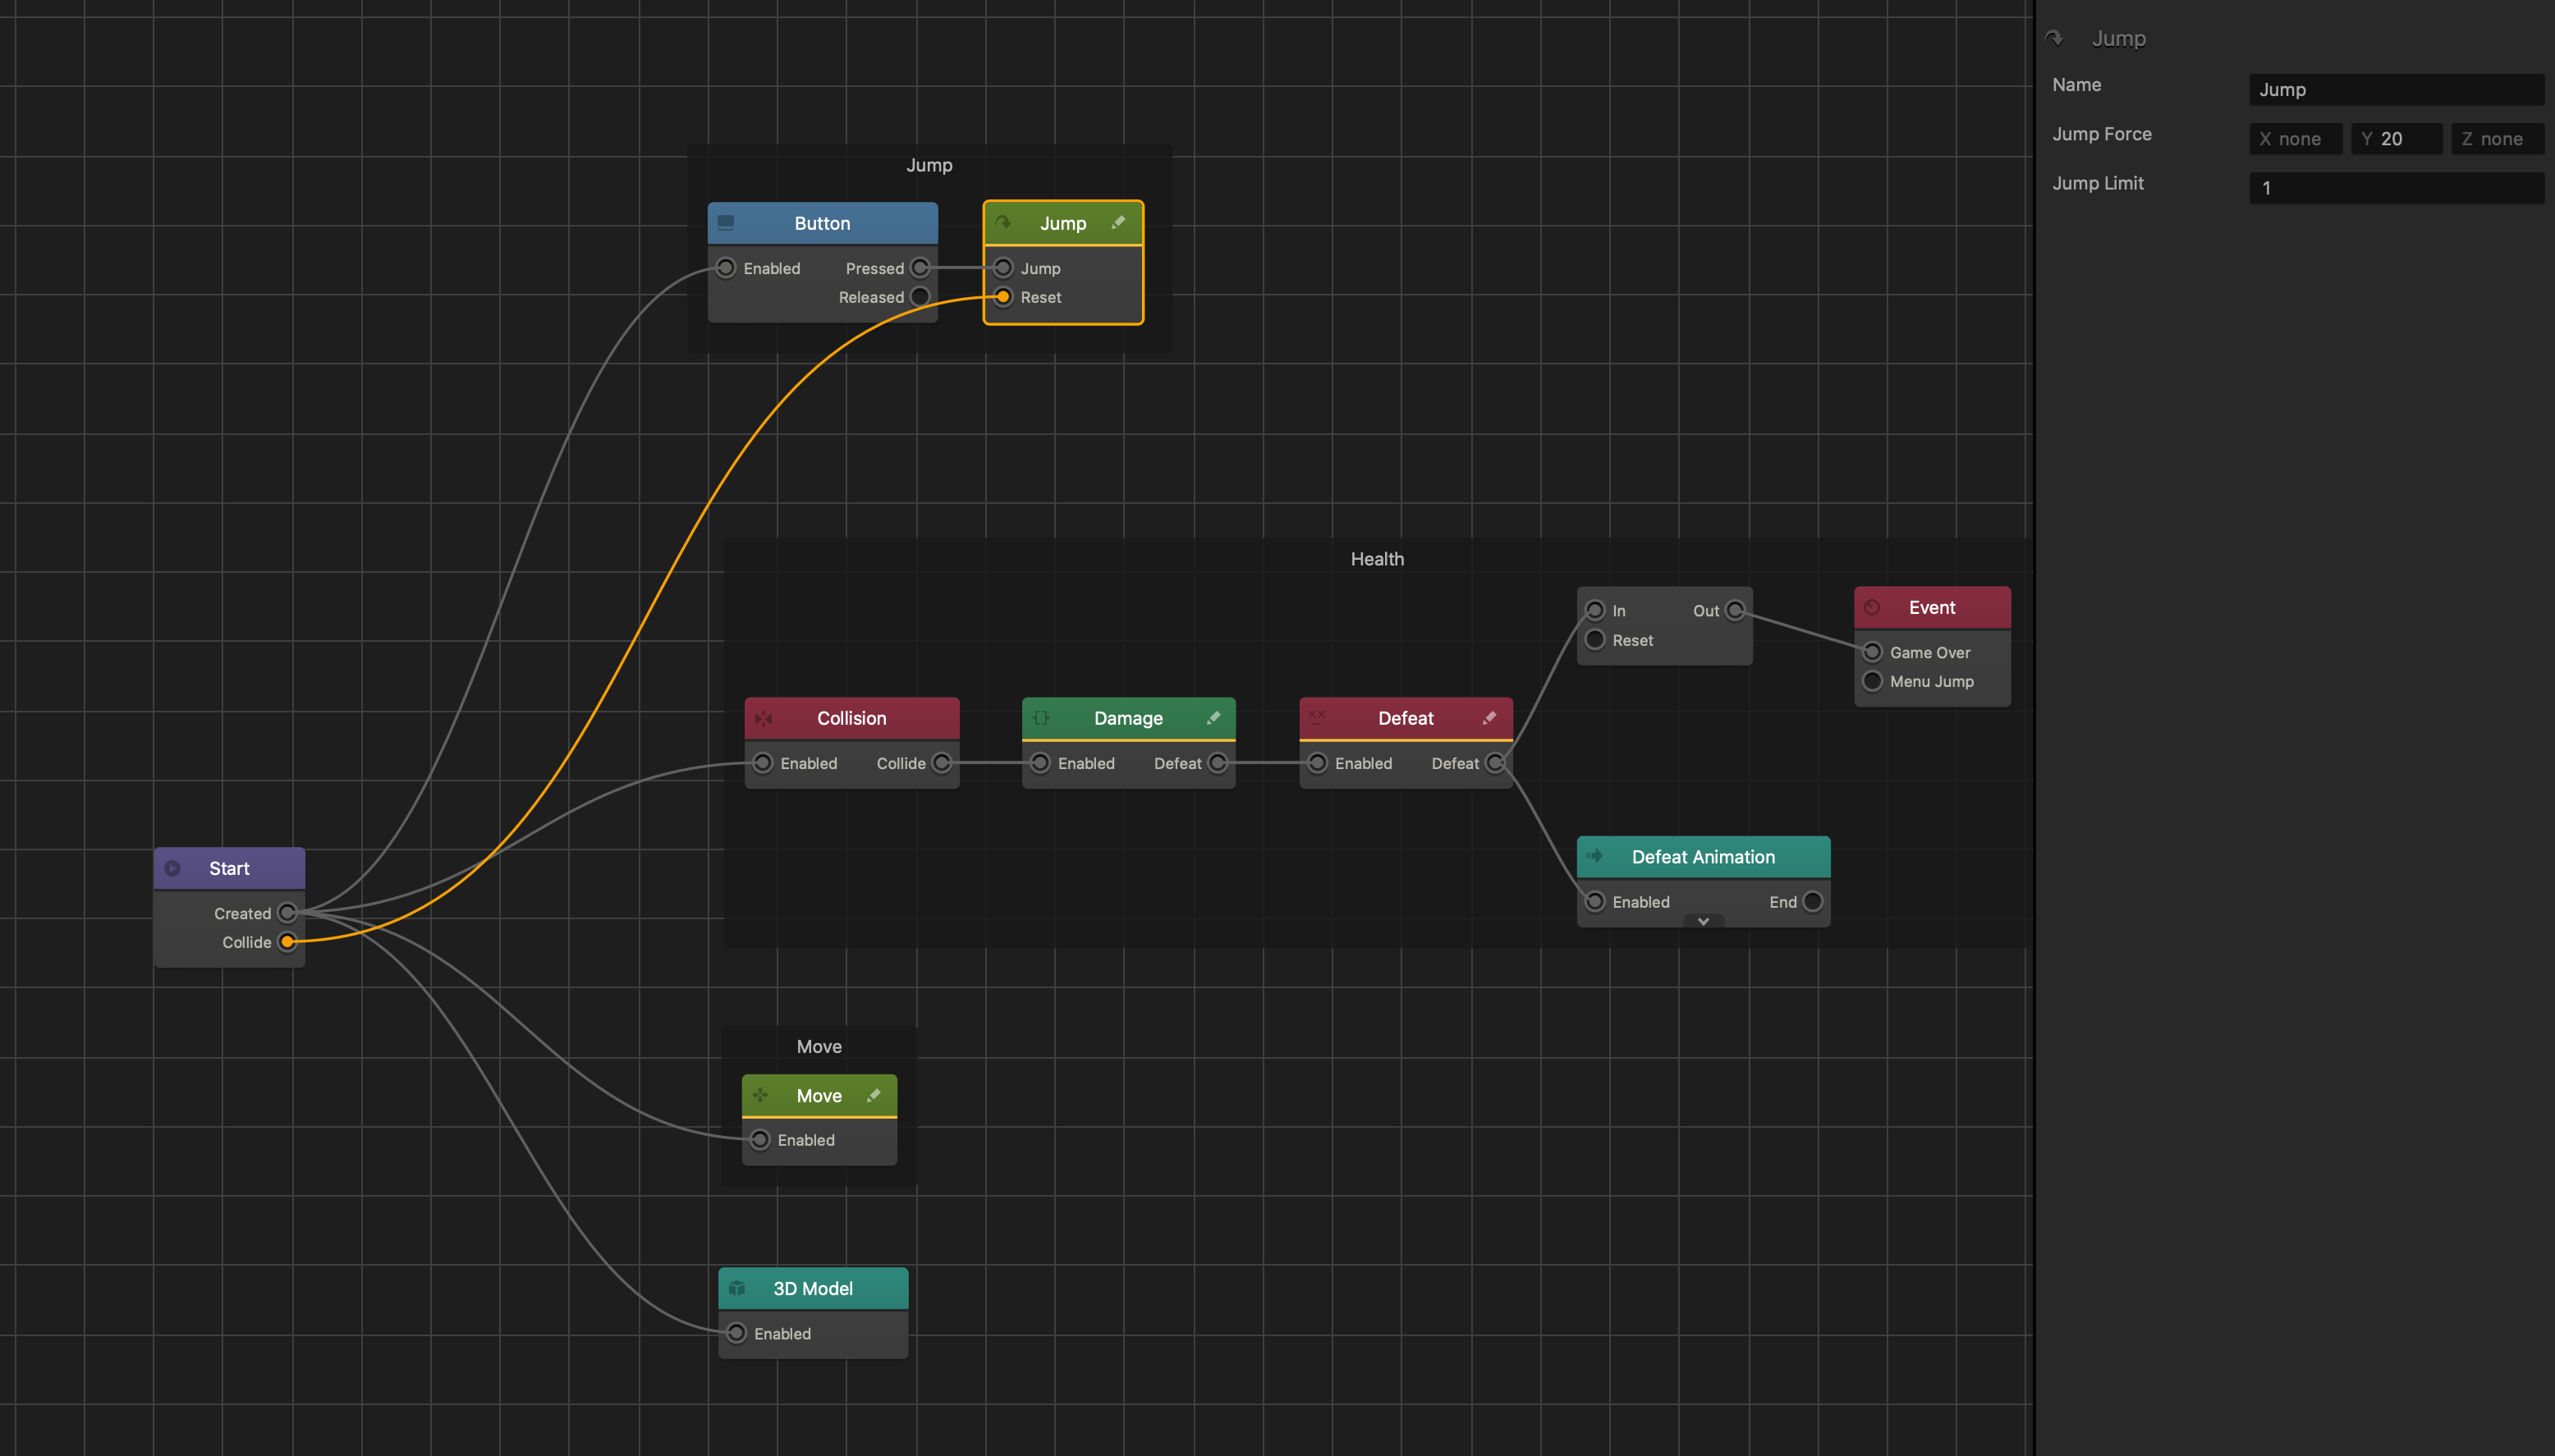
    The character’s Node Map opens with the added Jump and Defeat boxes and their nodes connected to the Start node.

    1. On the Start node, click the Collide output and drag the connector to the Reset input of the Jump node.
    2. Click the Jump node.
    3. In the Options panel, in the Jump Limit field, type 1.
    4. To prevent gravity from affecting the horizontal movement and rotation of the character, click the Start node and do the following:
      1. In the Options panel, enter the following values in the Position Factor axis fields: 0, 1, 1.
      2. In the Rotation Factor axis fields, enter the following values: 0, 0, 0.
  4.  To return to the World workspace, on the Navigation bar, click 3D World.
6. Extend the path and scene length

A game World consists of sections called Scenes. Every scene in a world has a Start point and an End point that define the length and direction of a scene.

  1. In the Outliner panel, select the End point.
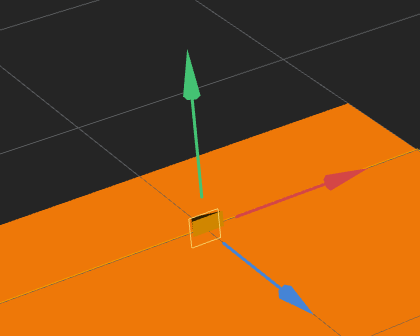
    Three colored axis arrows appear around the End point in the Scene Editor.
  2. In the Scene Editor, drag the blue arrow forward so that in the Options panel on the right, the Position Z axis field value is set to -5.
  3. Repeat the above steps for the Start point. Drag the blue arrow backward so that the Position Z axis field value is set to 5.
7. Adjust the camera
  1. To Zoom out in the scene view, scroll down so that you can see the Camera and select it.
    The colored axis arrow appear around the camera with its attributes displayed in the Options panel.
  2. On the Scene Editor toolbar, click the Camera button to turn on the camera view of the game.
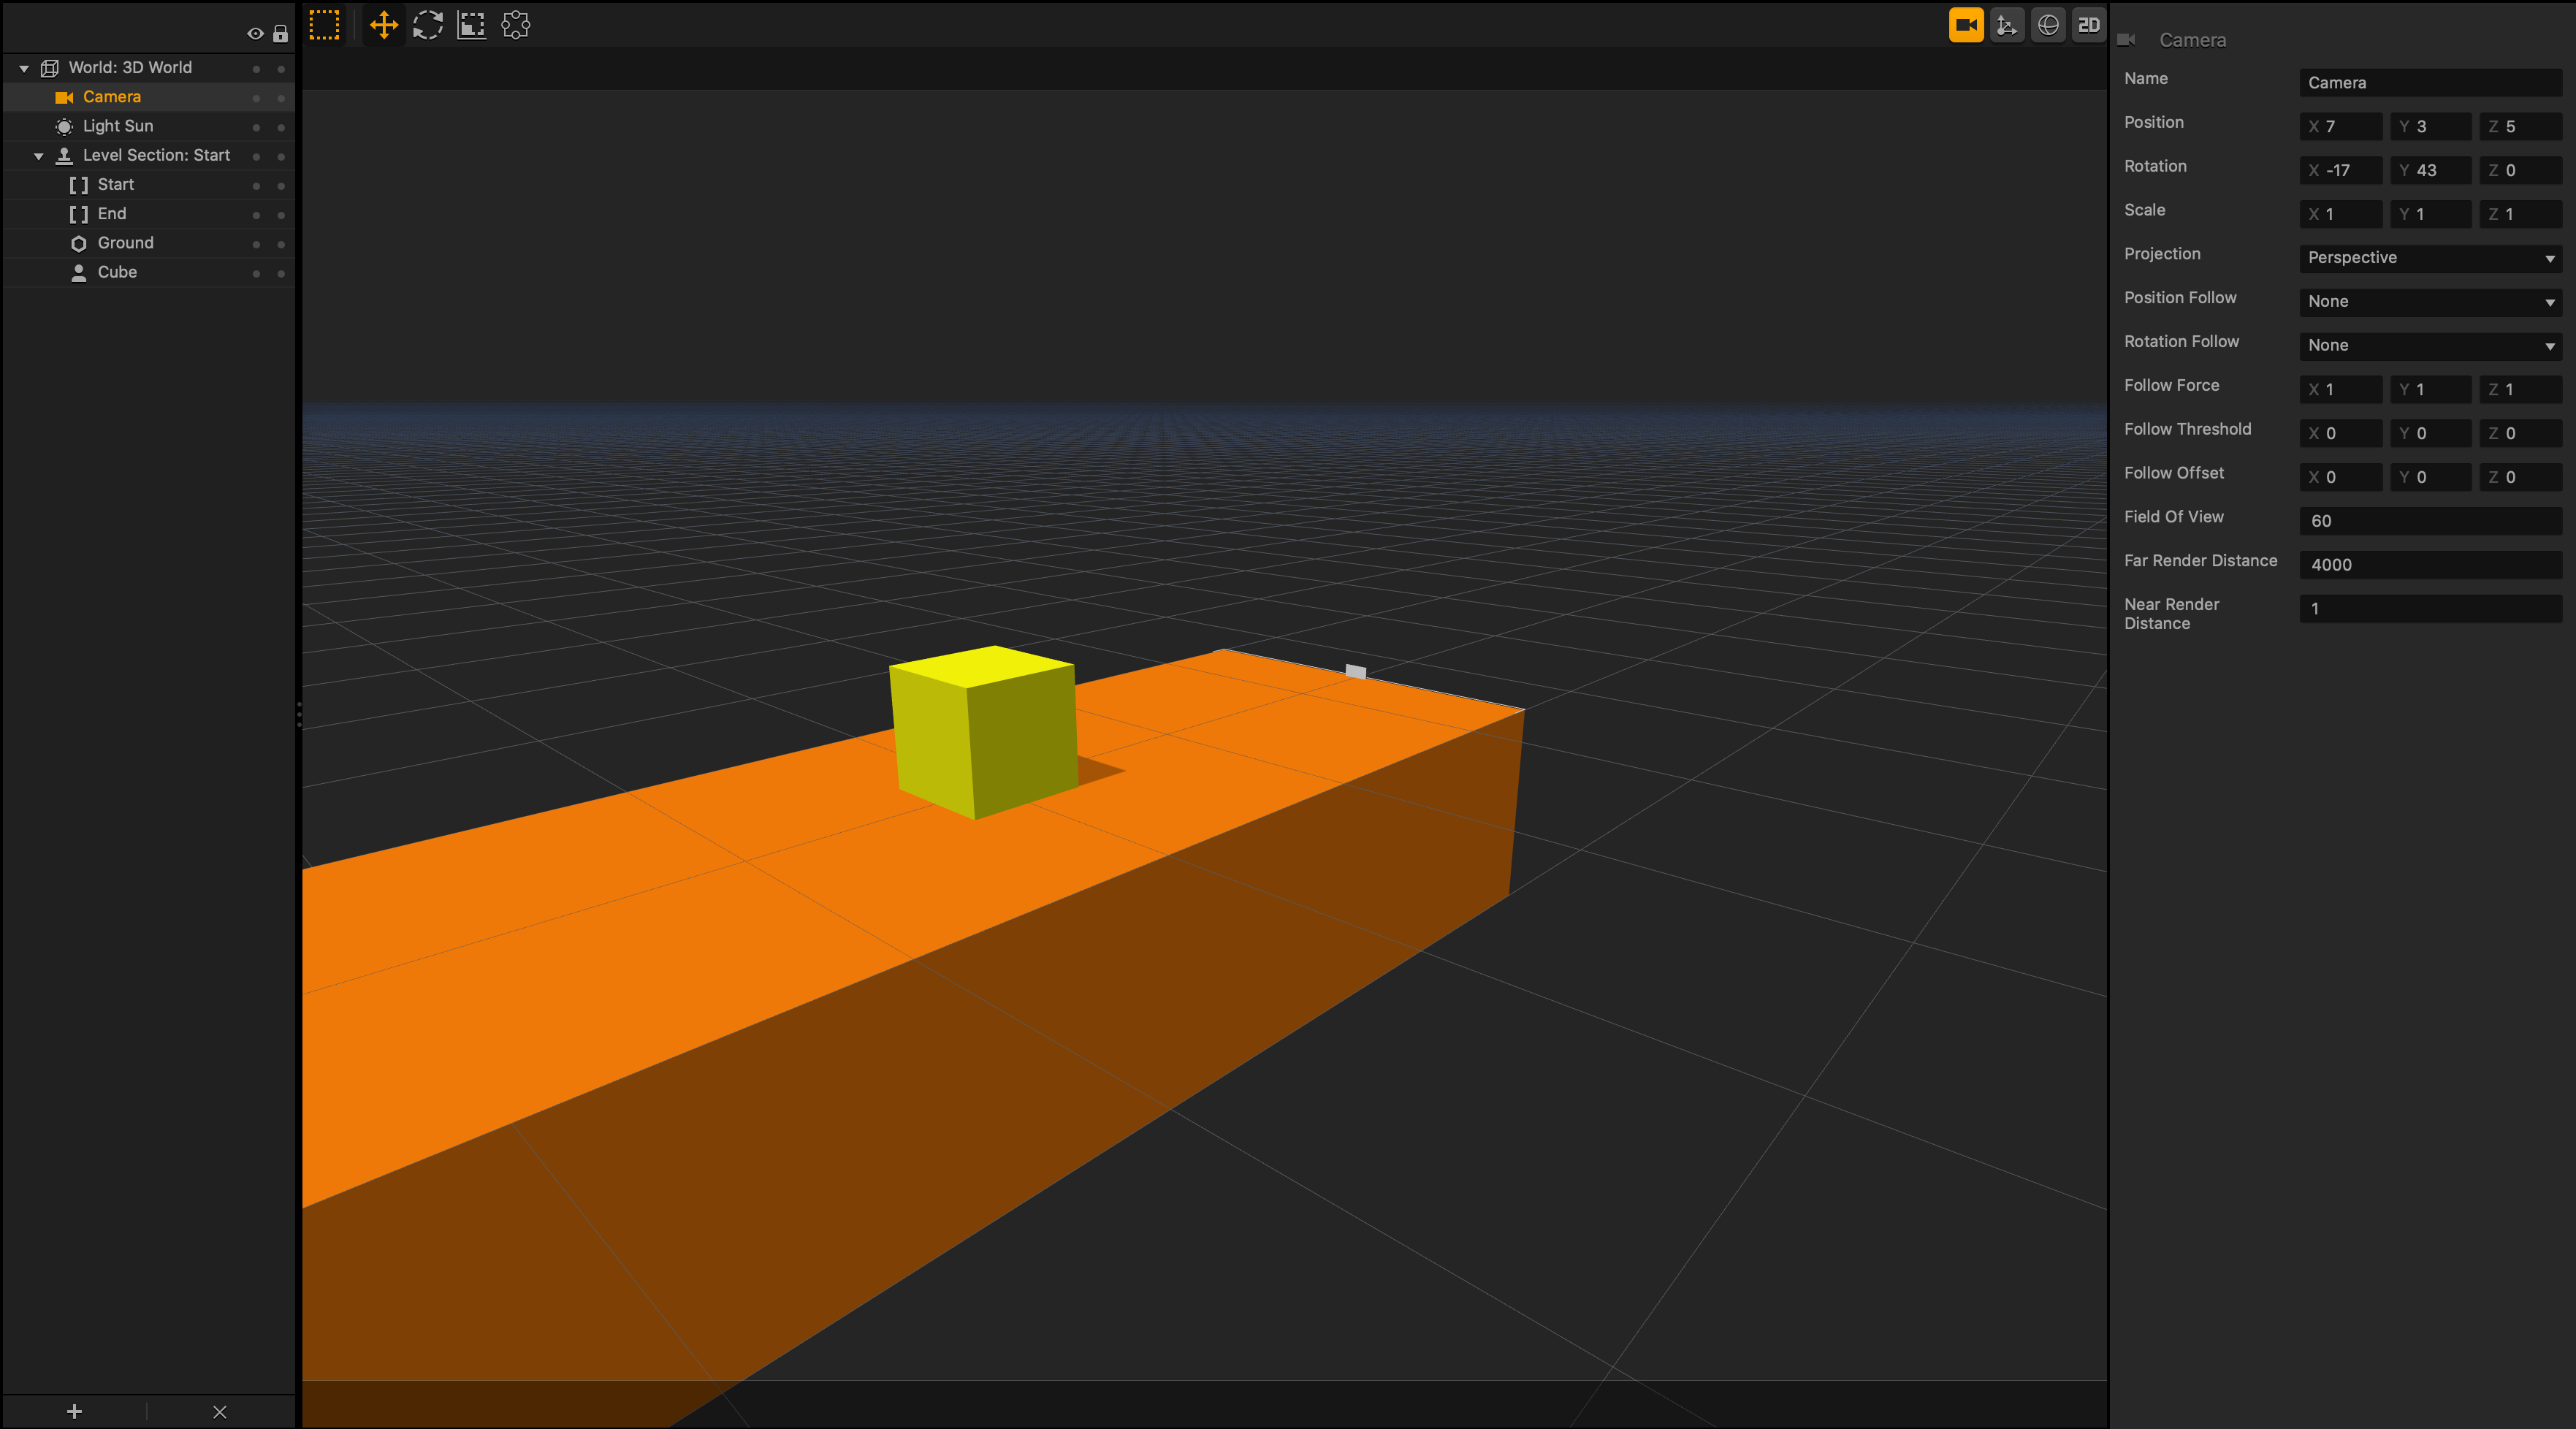
  3. With the Camera selected, practice the camera view controls below to adjust the camera position and rotation. Watch how the values change in the Position and Rotation axis fields in the Options panel as you move the camera.
    • To pan the camera, hold the spacebar on your keyboard and drag the grid.
    • To rotate the camera, hold the spacebar, right-click, and drag the grid.
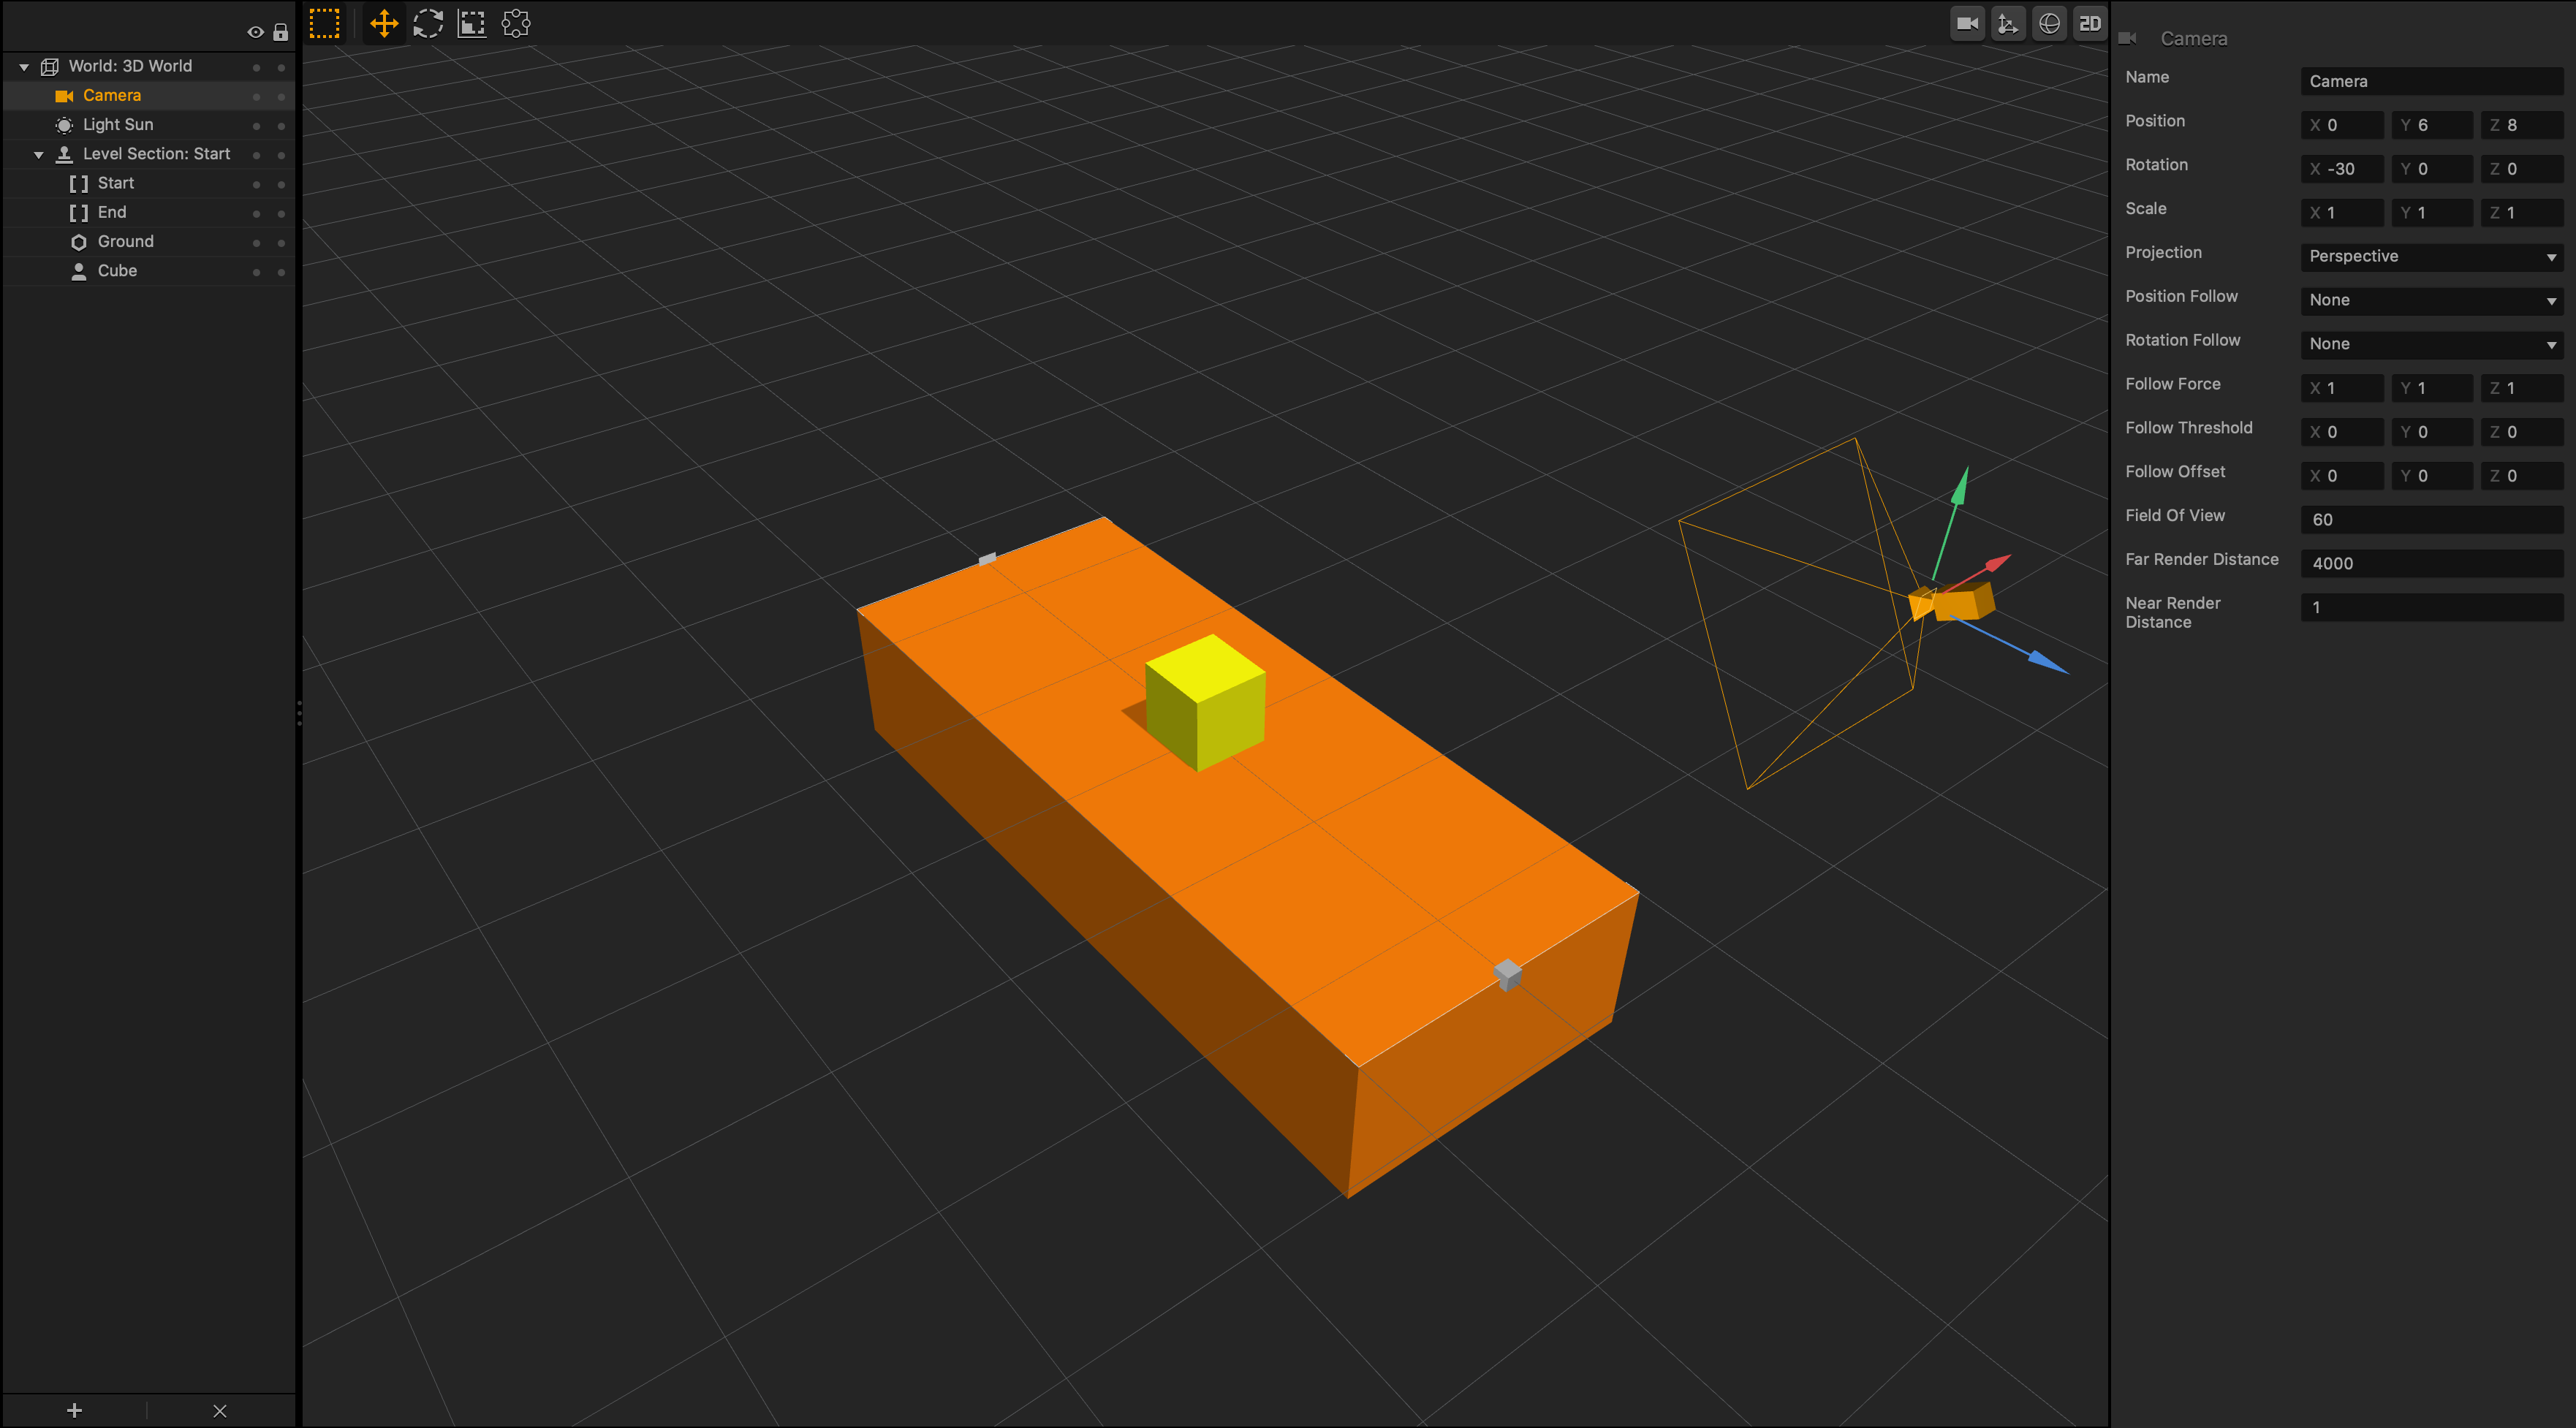
  4. To set the appropriate angle for the game, enter the following values for the camera directly in the Position and Rotation axis fields or use the above controls to set them:
    • Position X, Y, and Z values: 7, 3, 5.
    • Rotation X, Y, and Z values: -17, 43, 0.

    This is how your game camera view would look:

  5. In the Options panel, click the Position Follow drop-down list and select Character.
  6. To turn off the camera view in the Scene Editor, click the Camera button on the toolbar.
8. Add a new scene
  1. In the Scene Selector at the bottom, click Start, and press D on the keyboard.
    A duplicate Start scene is added to the World.
  2. In the Options panel, in the Name field type Scene 1.
    The scene name in the Scene Selector automatically updates as you continue.
  3. In the Outliner, select Player and press Delete on the keyboard.
9. Create your enemy obstacles
  1. In the Asset panel on the left, click Asset Library.
  2. Double-click the Cone shape.
    It appears under the Objects category in the Asset panel.
  3. Click Asset Library to close it.
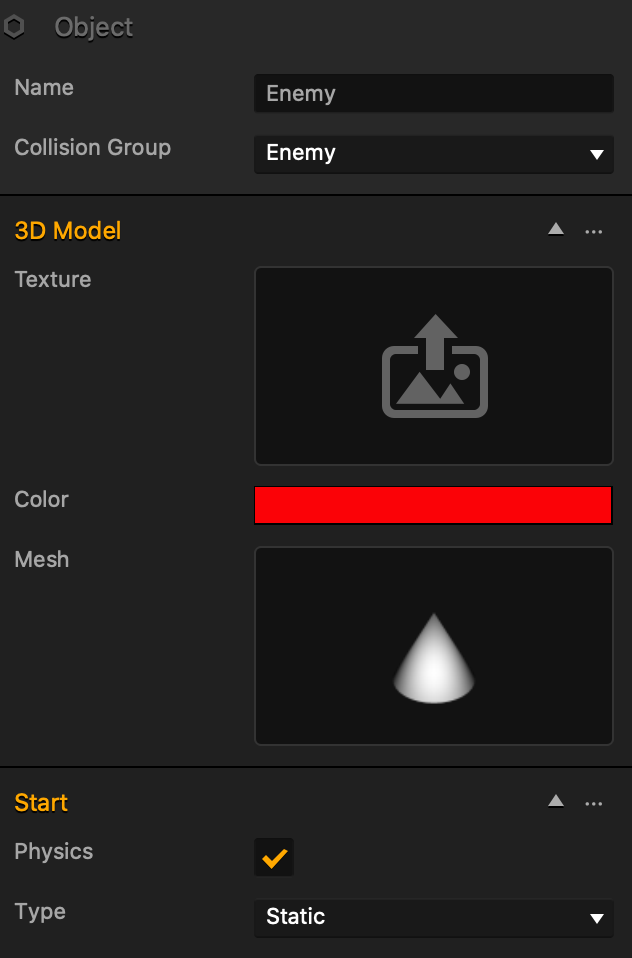
  4. In the Asset panel, click the Cone object and in the Options panel on the far right, do the following:
    1. In the Name field, type Enemy. The name is automatically updated in the Asset panel.
    2. In the Collision Group list, select Enemy.
    3. Expand the 3D Model drop-down list.
    4. Click Color and in the displayed window, choose a red color, and click OK.
    5. Select the Physics checkbox.
    6. In the Type list, select Static.
  5. Make sure you are in Scene 1.
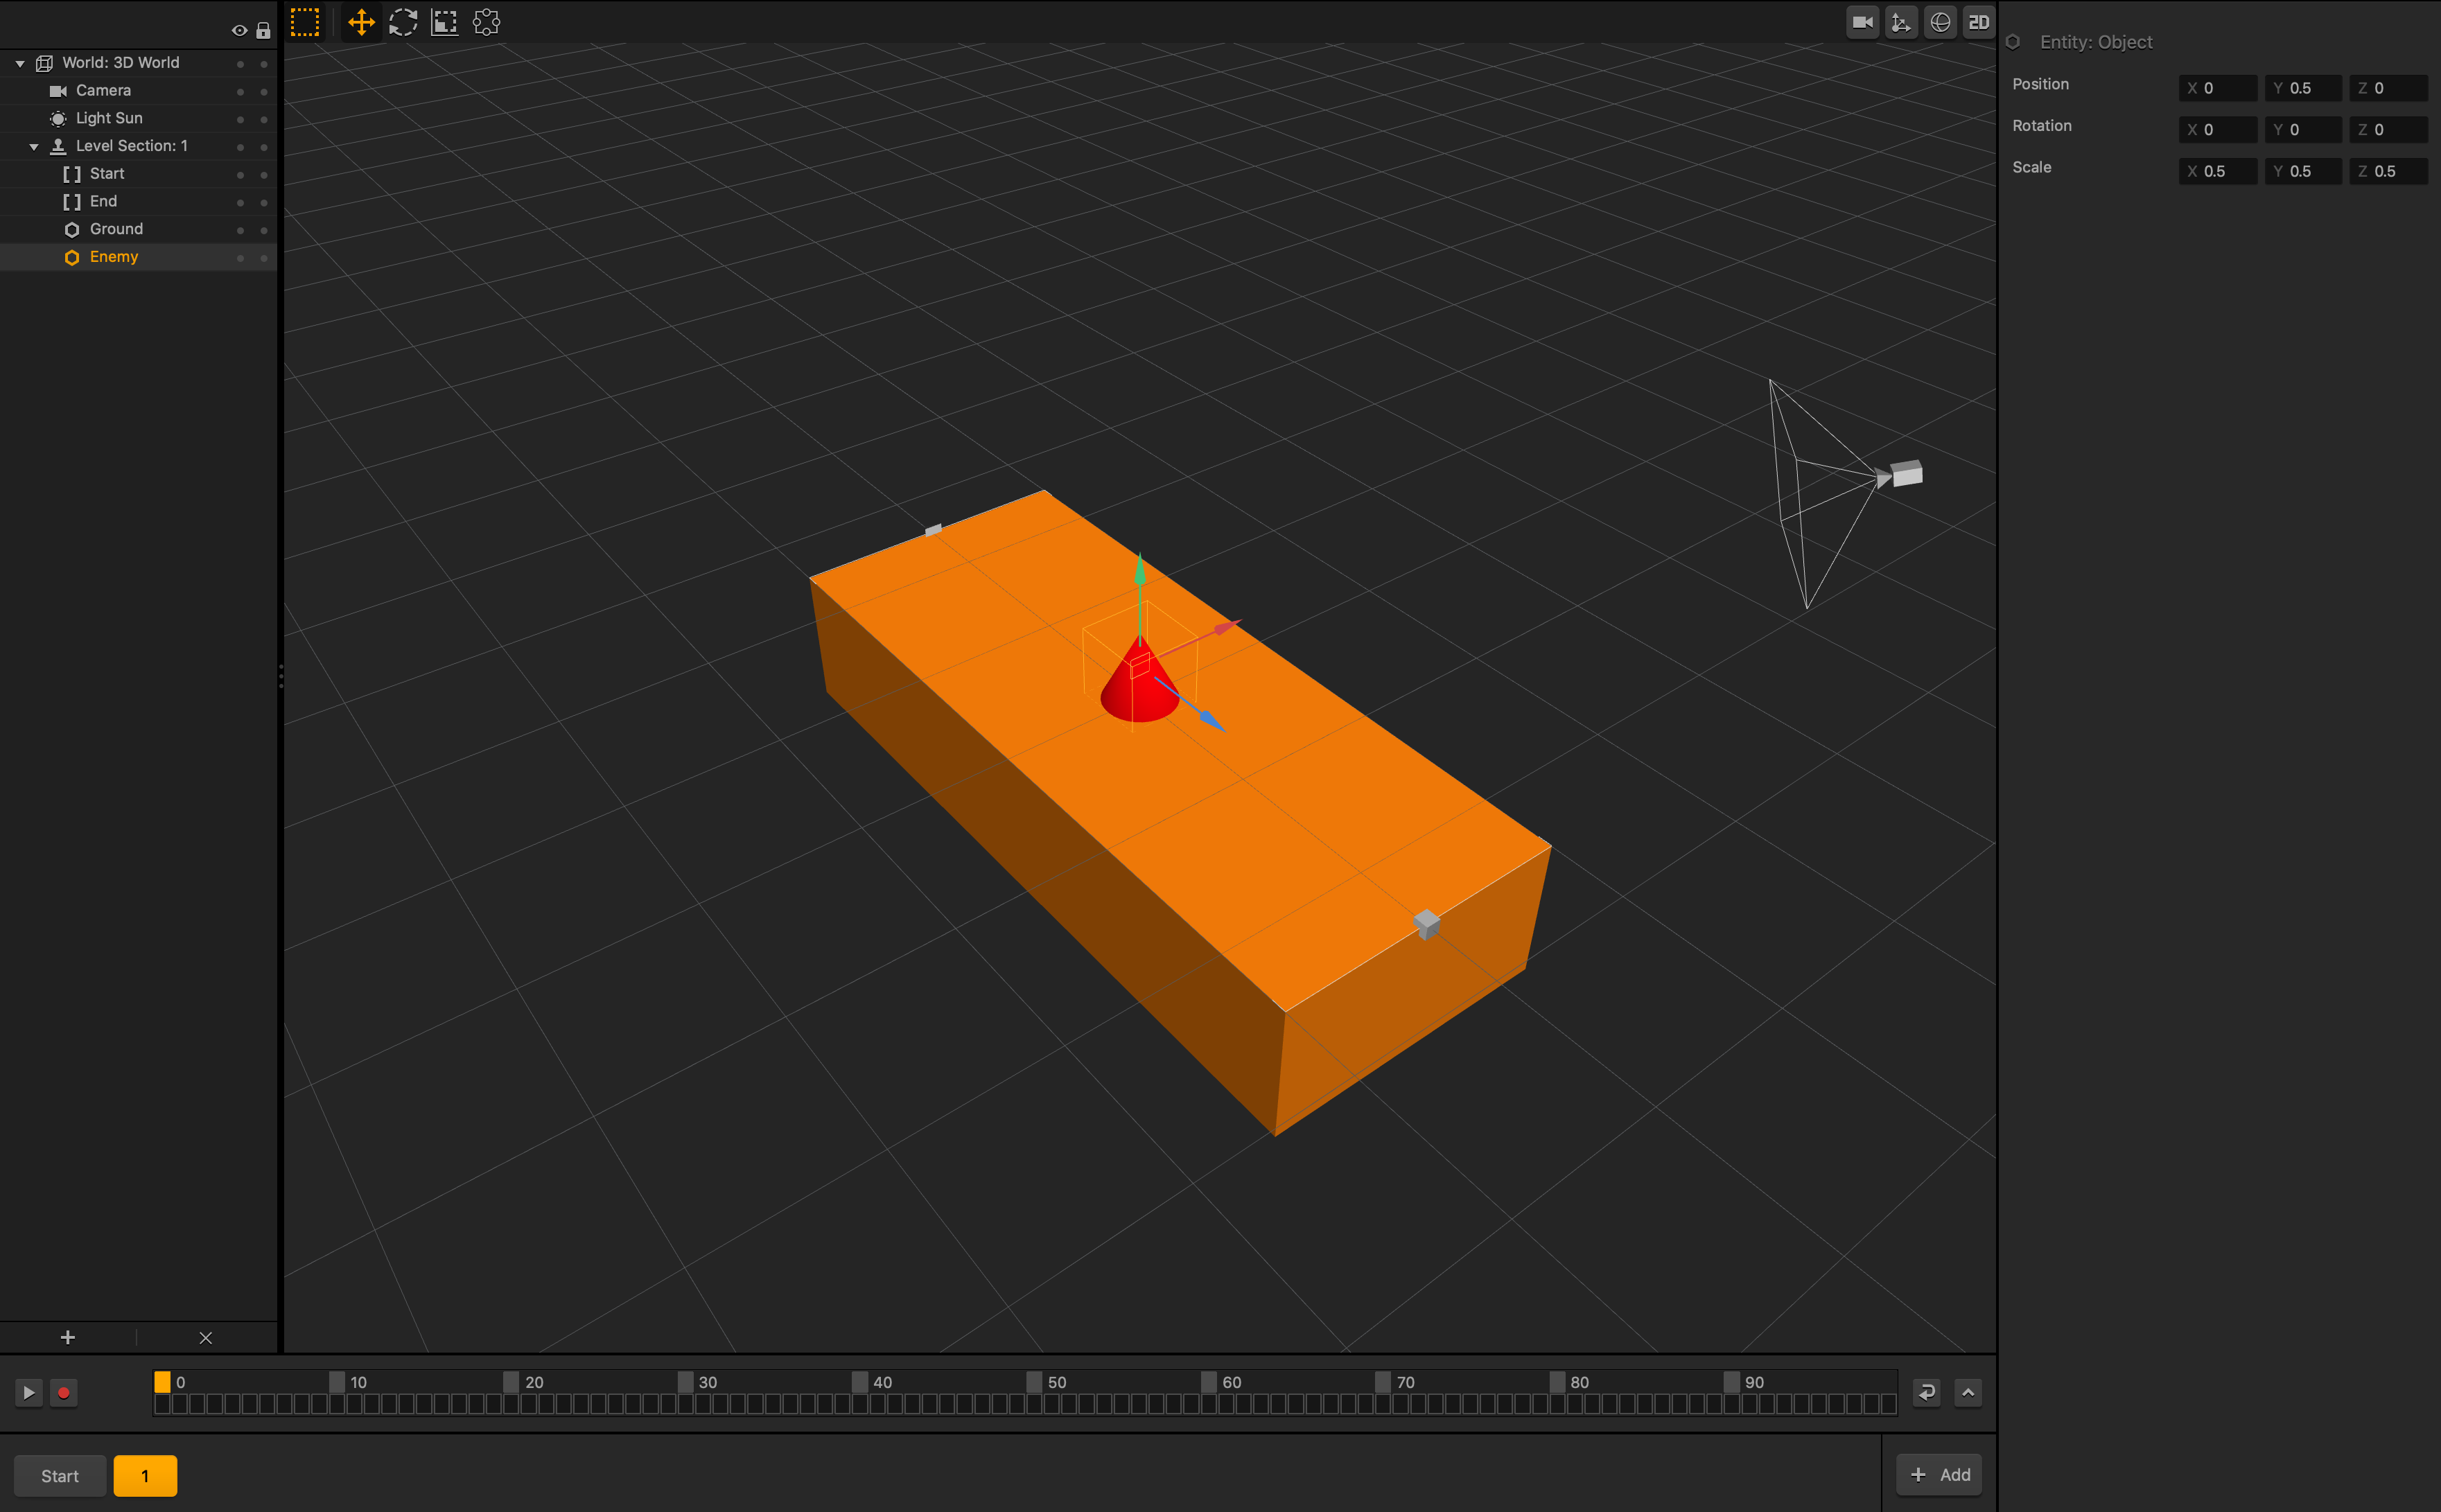
  6. From the Asset panel, drag the Enemy asset to the Scene Editor.
  7. In the Options panel, in the Position X, Y, and Z axis fields, enter 0, 0.5, 0 respectively.
  8. In the Scale axis fields, enter the following values: 0.5, 0.5, 0.5.
10. Add game coins
  1. In the Asset panel, click Asset Library.
  2. Click the Assets tab.
  3. Double-click the Coin smart asset.
    It appears under the Objects category in the Asset panel.
  4. Click Asset Library to close it.
  5. Make sure you are in Scene 1.
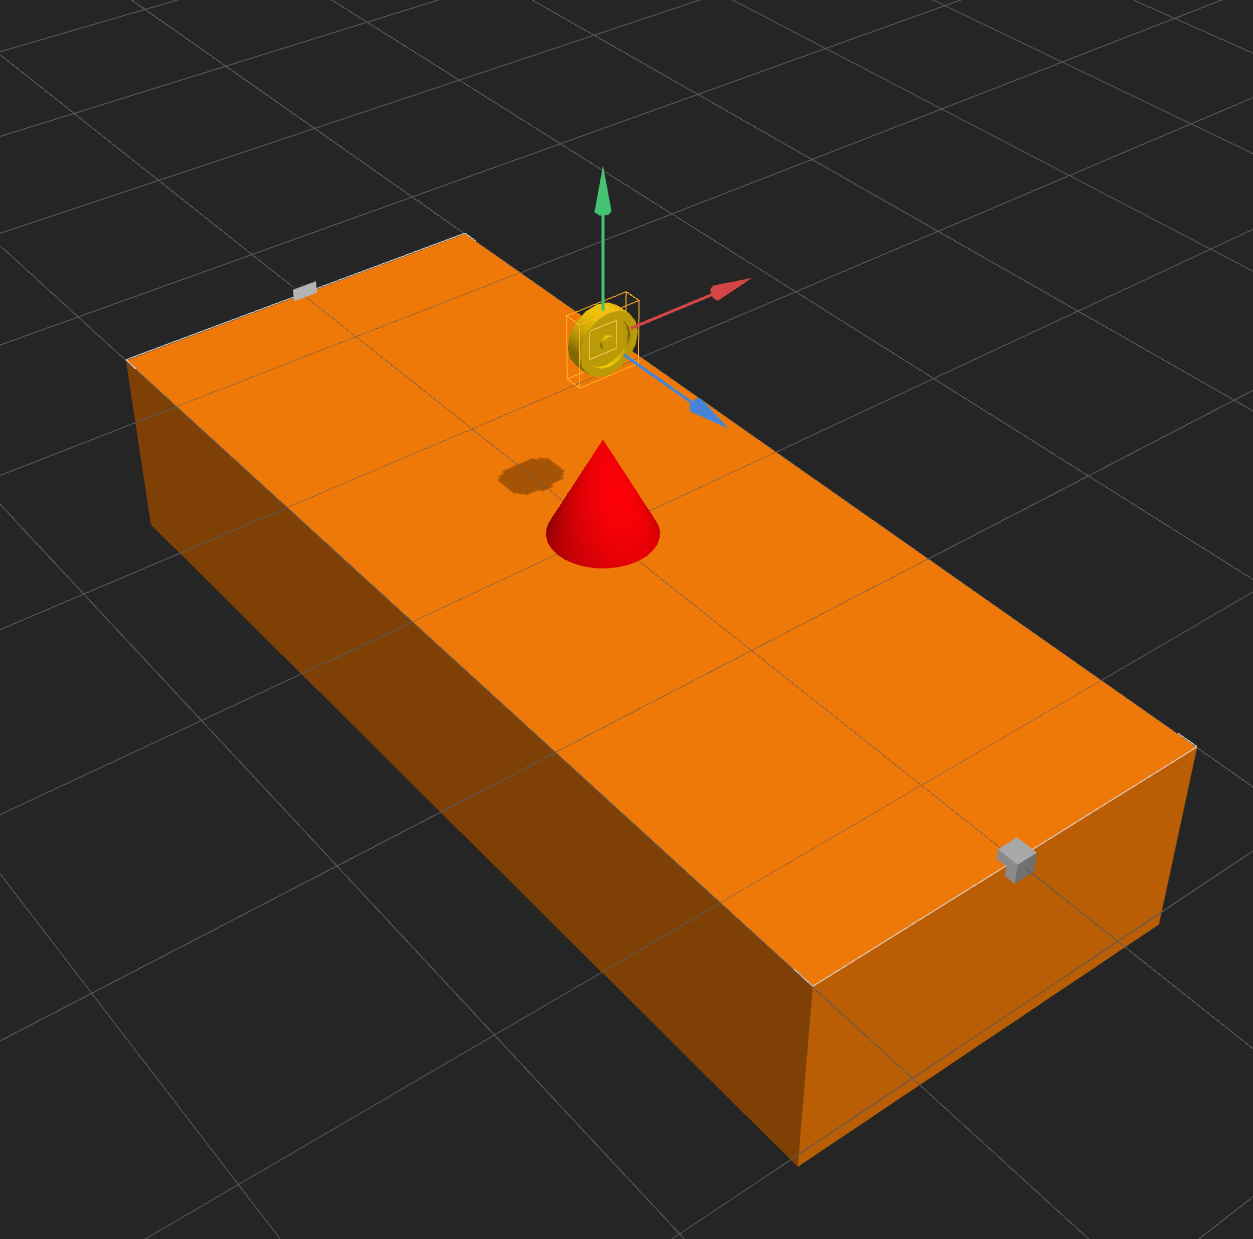
  6. From the Asset panel, drag the Coin asset to the Scene Editor.
  7. In the Position axis fields, enter the following values: 0, 2, 0.
    This places the coin above the Enemy cone.
11. Add more scenes
  1. In the Scene Selector, select Scene 1 and press D on the keyboard.
    A duplicate Scene 1 is added to the World.
  2. In the Options Panel, in the Name field, type Scene 2.
  3. In the Scene Editor, click the Enemy, hold the Shift key, and click the Coin.
    The two objects are selected as a group with the colored arrows between them.
  4. Drag the blue arrow backward until the value in the Position Z axis field is set to 2 in the Options panel. Alternatively, type the value.
  5. Repeat the above steps to duplicate Scene 2.
  6. Rename the new scene to Scene 3, select the Enemy and Coin, and set their Position Z axis field value to -2 in the Options panel.
  7. On the Buildbox menu bar, select Run > Preview  and preview the level.
12. Add the in-game score display
  1. On the Navigation bar, click Mind Map.
  2. From the Node panel, drag the UI Screen node to the grid and place it next to the 3D World.
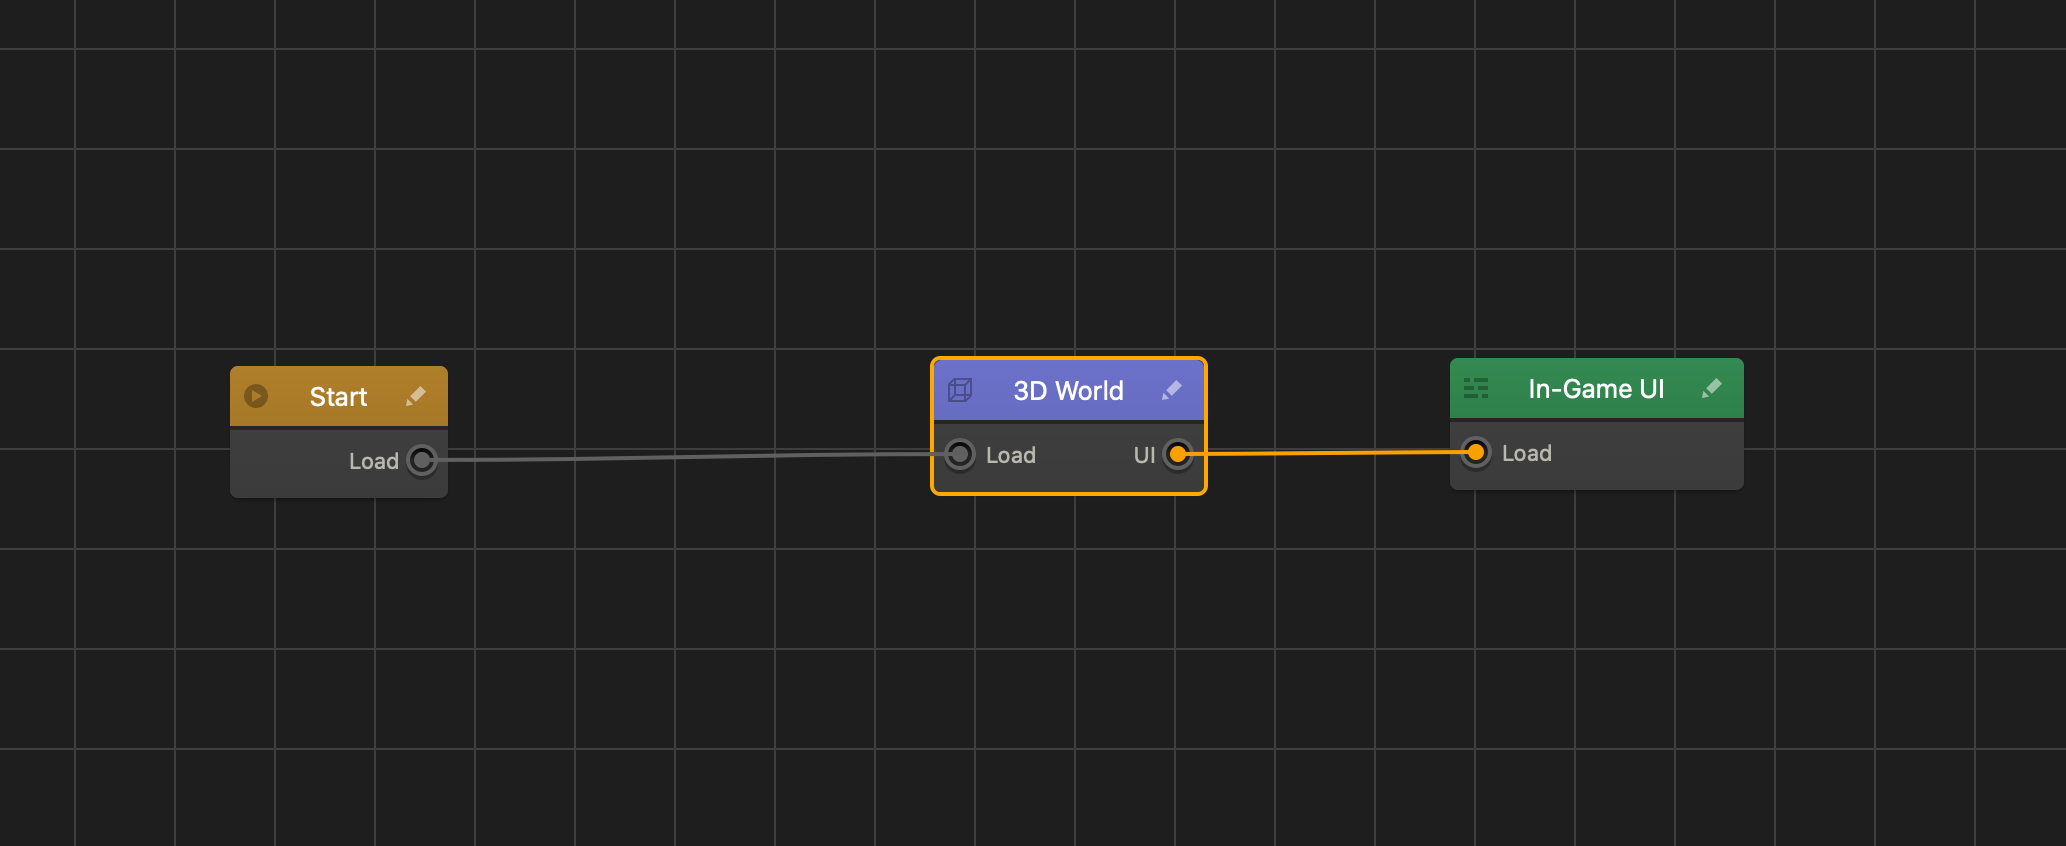
  3. In the Options panel, in the Name field, type In-Game UI.
    The name of the node on the Map is automatically updated.
  4. On the 3D World node, click the UI output and drag a connector to the Load input of the In-Game UI.
  5. Double-click the In-Game UI node to open its UI workspace.
  6. In the Asset panel, from the Labels category, drag the Default Font label to the top-right corner of the grid.
  7. In the Options panel, do the following:
    1. In the Name field, type Score Display.
    2. In the Function list, select Score.
    3. In the Score Type list, select Points.
    4. In the Amount list, select Current.

13. Create the Game Over screen
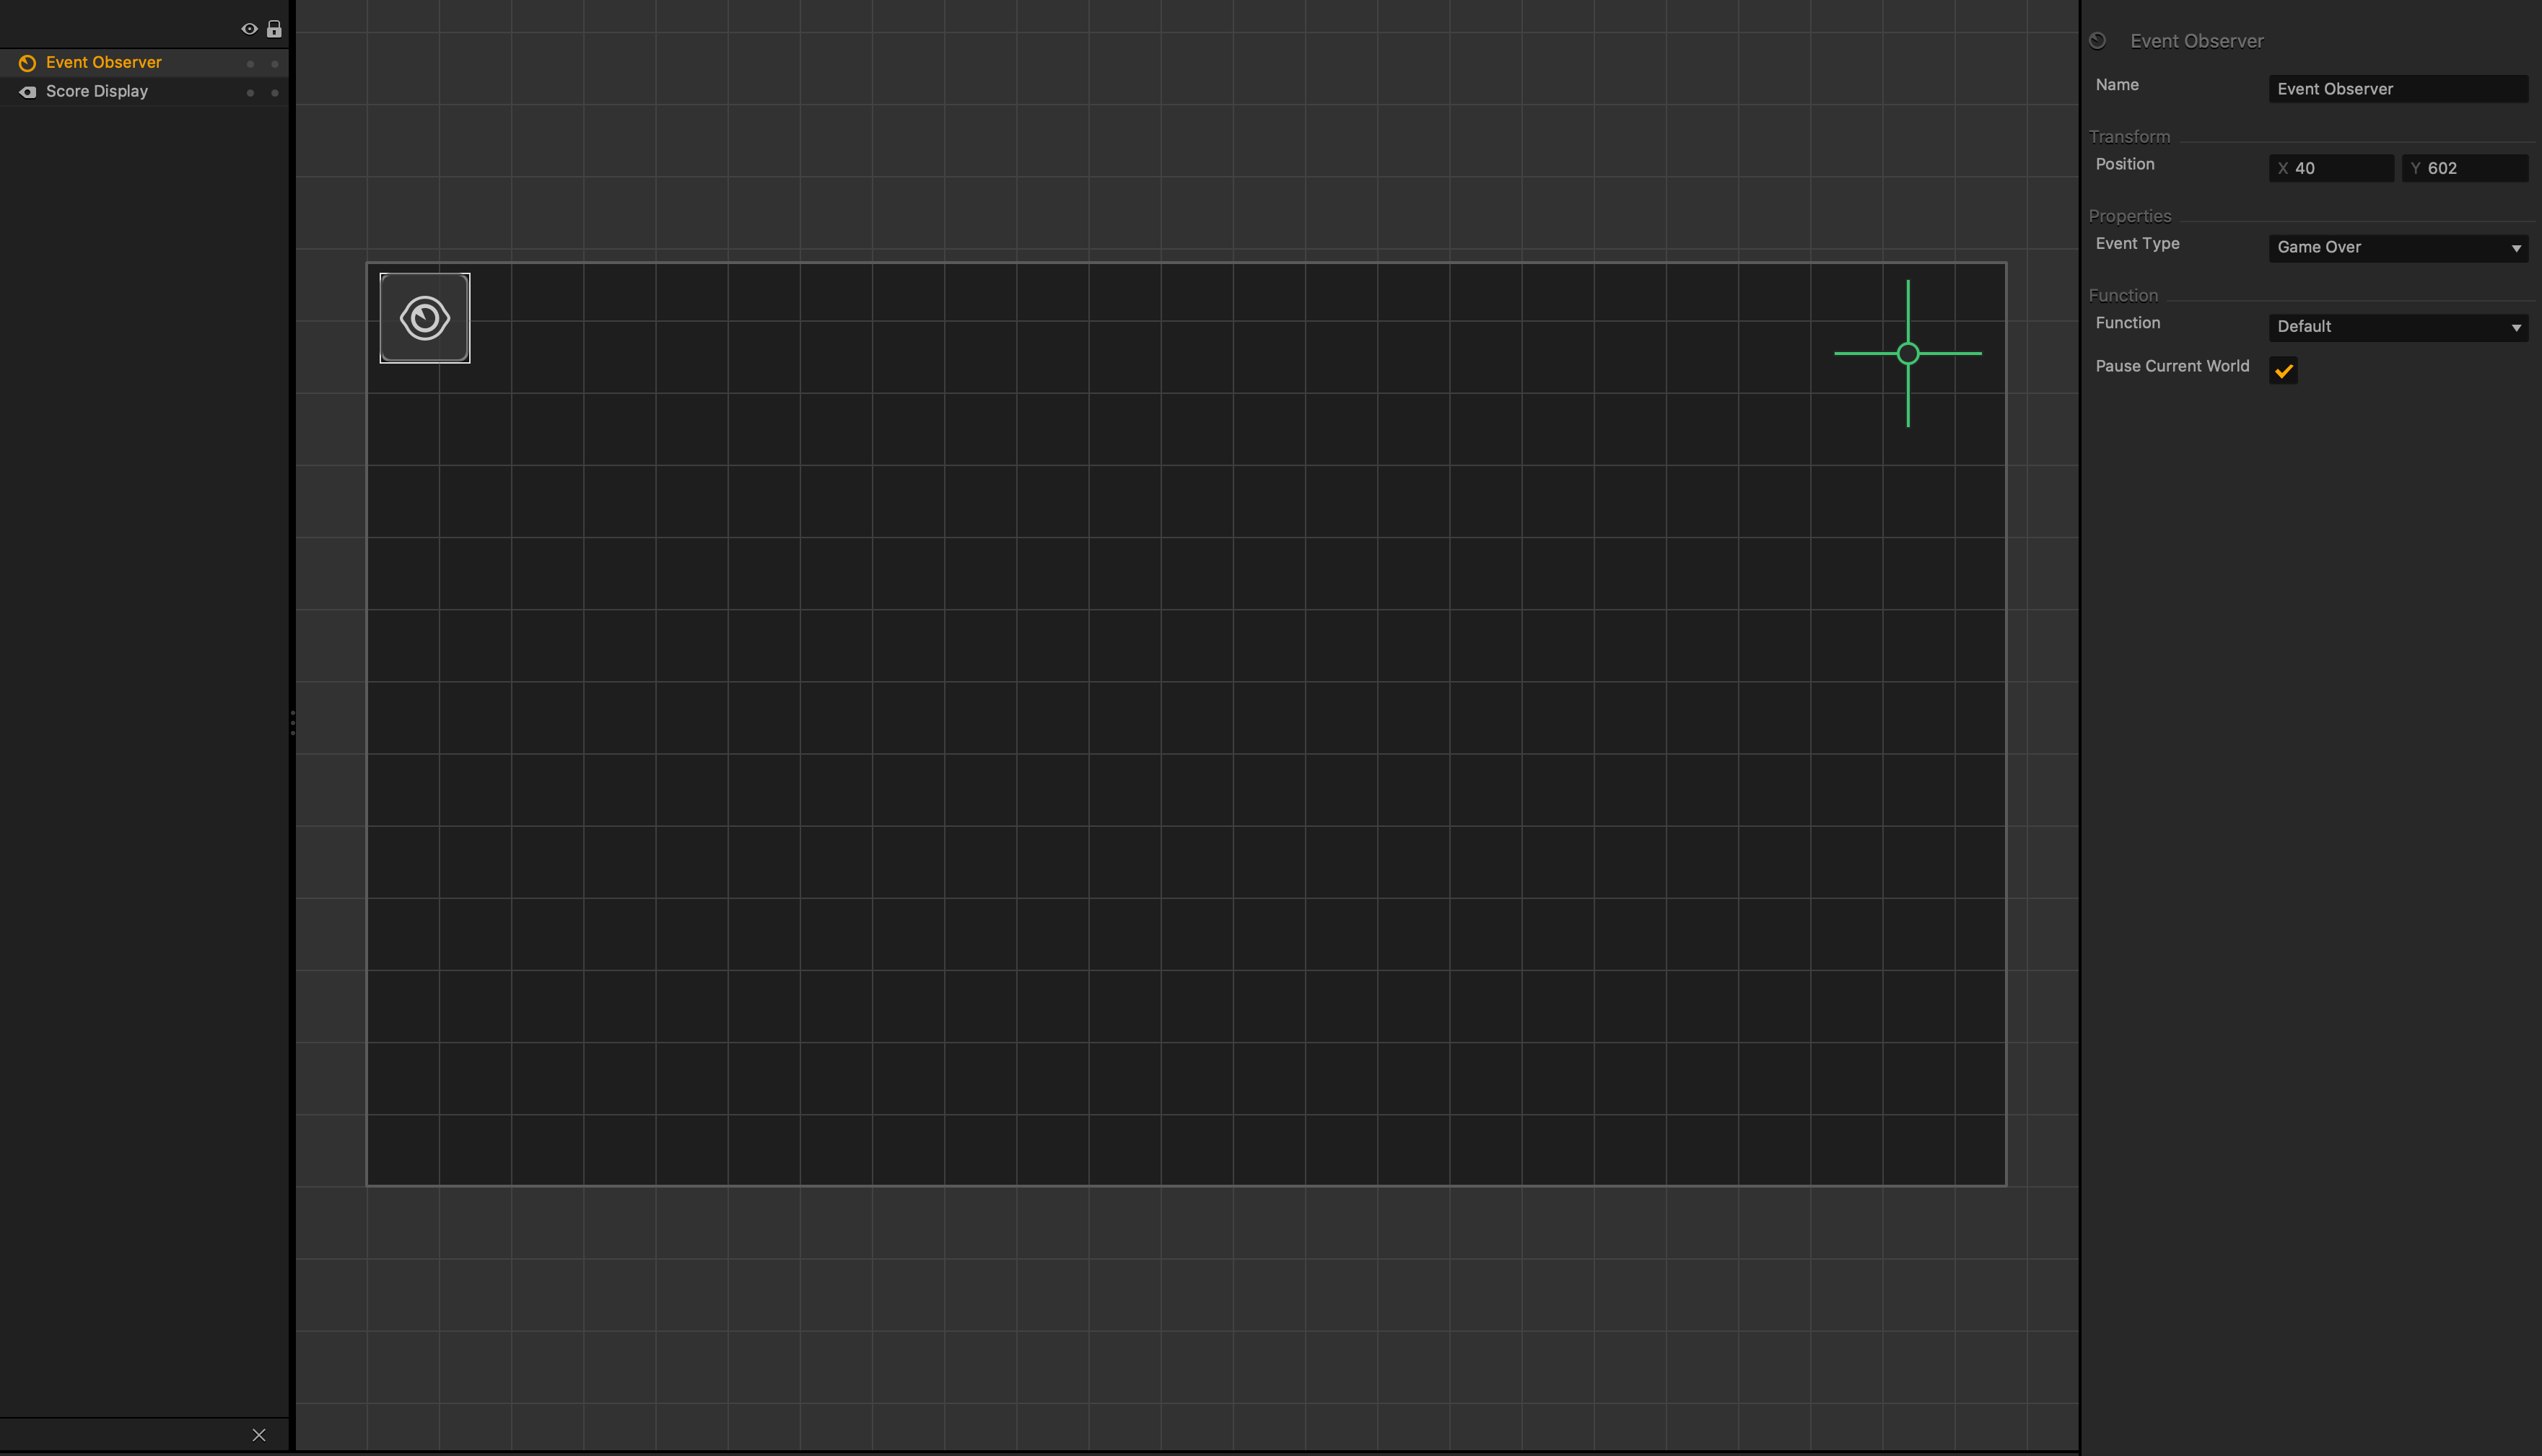
  1. In the In-Game UI node workspace, from the Logic category in the Asset panel, drag the Event Observer asset to the UI Editor and place it in the top-left corner of the screen.
  2. In the Options panel, in the Name field, type Game Over.
  3. On the Navigation bar, click Mind Map.
  4. From the Node panel, drag the UI Screen node to the grid and place it next to the In-Game UI node.
  5. In the Options panel, in the Name field, type Game Over UI.
  6. On the In-Game UI node, click the Game Over output and drag a connector to the Load input of the Game Over UI node.
14. Add the game-over score displays
  1. On the Mind Map, double-click the Game Over UI node to open its UI workspace.
  2. In the Asset panel, from the Labels category, drag the Default Font label to the top of the grid and center it.
  3. In the Options panel, do the following:
    1. In the Name field, type Game Over Title.
    2. In the Scale axis fields, set both values to 1.5.
    3. In the Text field, type Game Over.
      The label text is updated.
  4. To add the best score title, do the following:
    1. Select the Game Over label on the grid and press S on the keyboard.
      A duplicate label appears underneath.
    2. In the Options panel, in the Name field, type Best Score Title.
    3. Change both Scale axis values to 1.
    4. In the Text field, type Best Score.
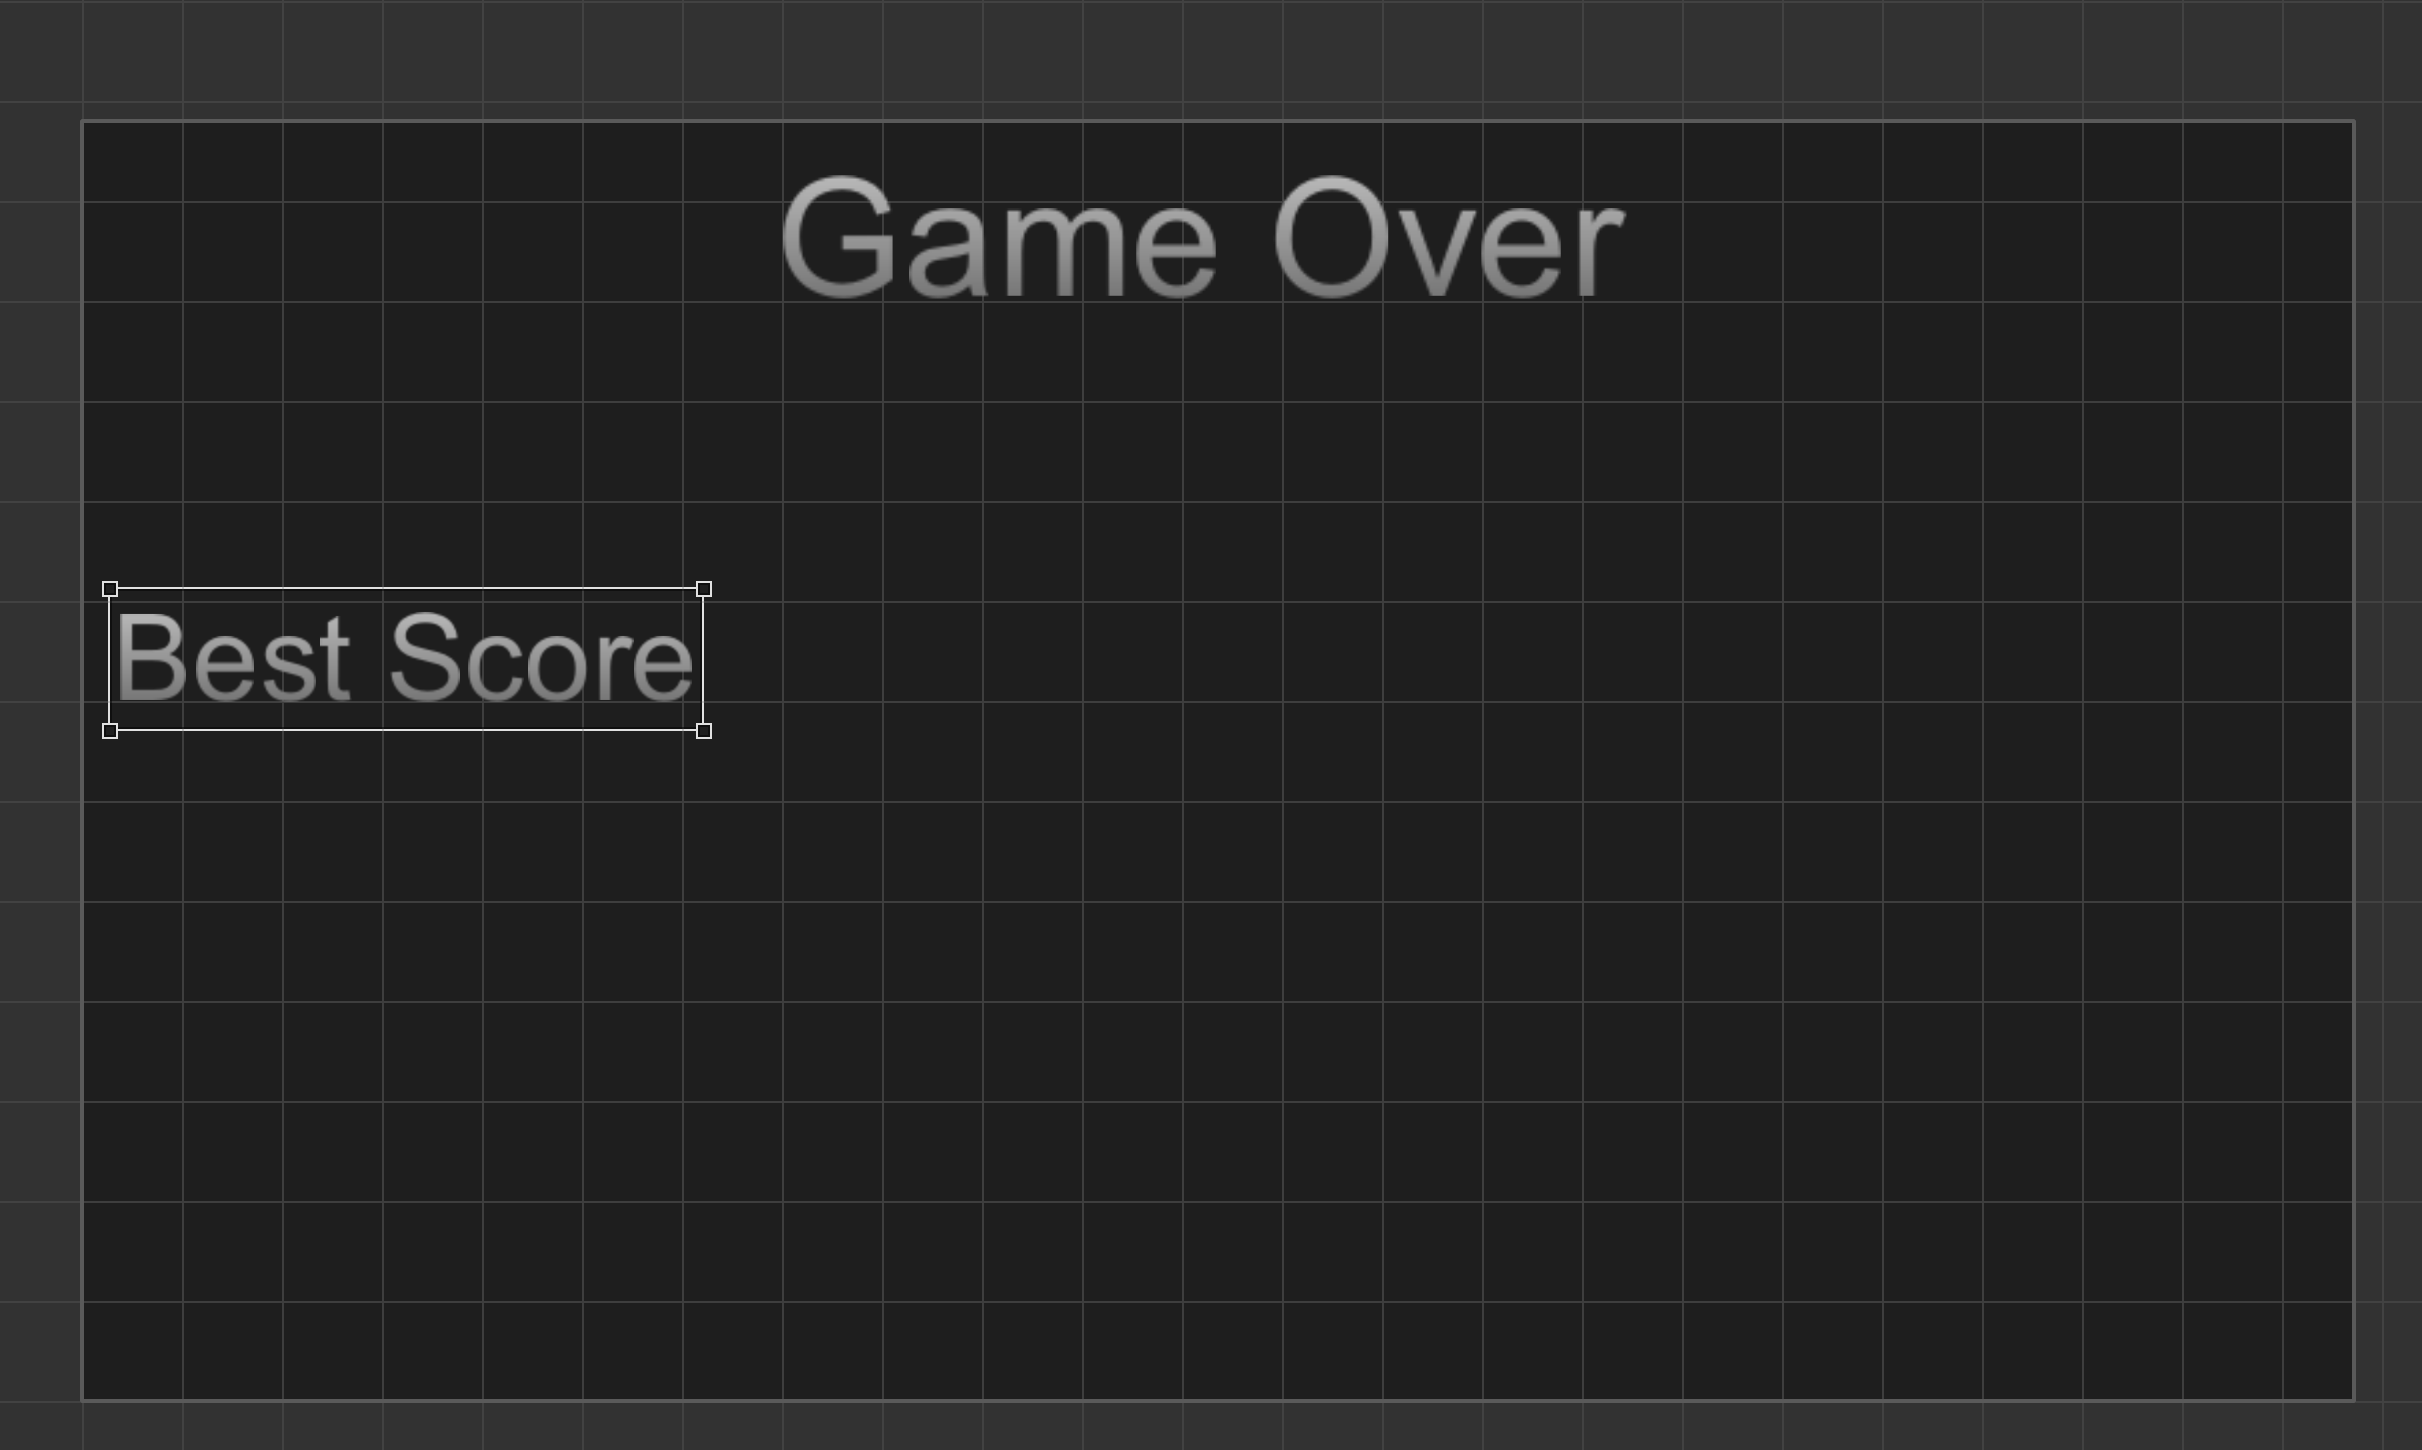
    5. Drag the Best Score label to the left side of the grid and make it vertically aligned in the middle of the screen.
  5. To add the current score title, do the following:
    1. Select the Best Score label and press D on the keyboard.
      A duplicate label appears on the right.
    2. In the Options panel, in the Name field, type Current Score Title.
    3. In the Text field, type Current Score.
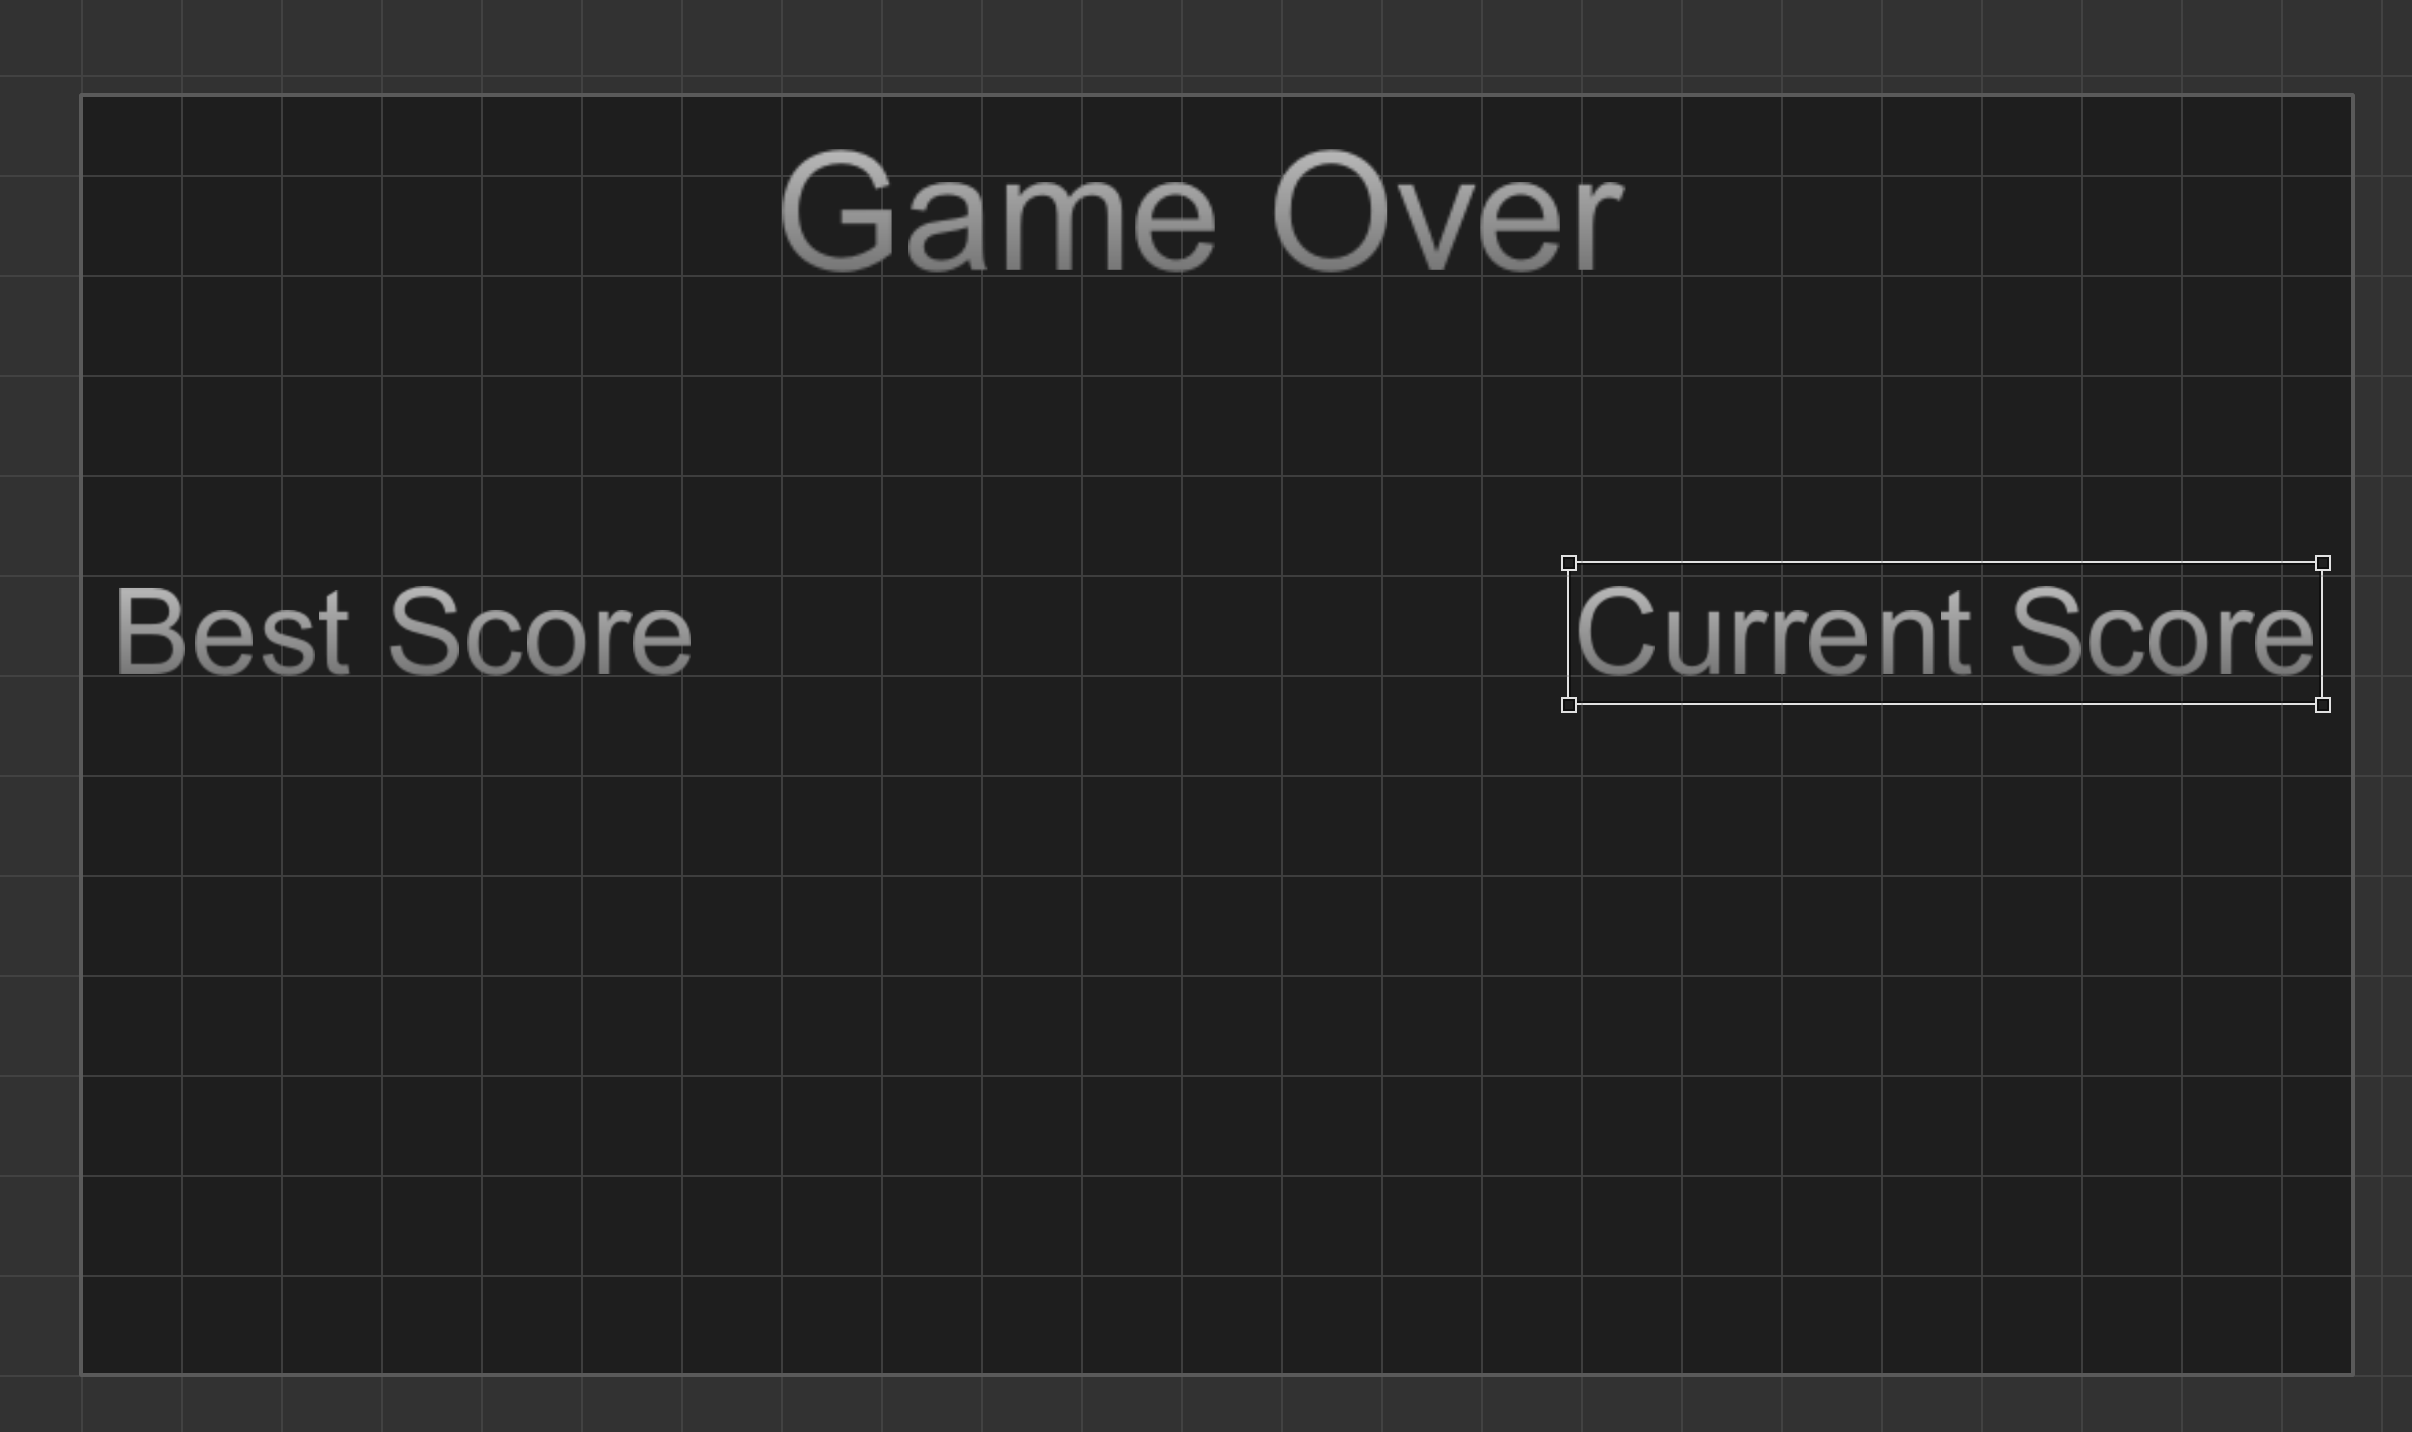
    4. Hold the Shift key and drag the Current Score label to the right side of the screen.
  6. To add best and current score displays, do the following:
    1. Holding the Shift key, select the Best Score and the Current Score labels.
    2. Press S on the keyboard.
      A duplicate set appears underneath.
    3. Keeping both labels selected, go to the Options panel and in the Function list, select Score.
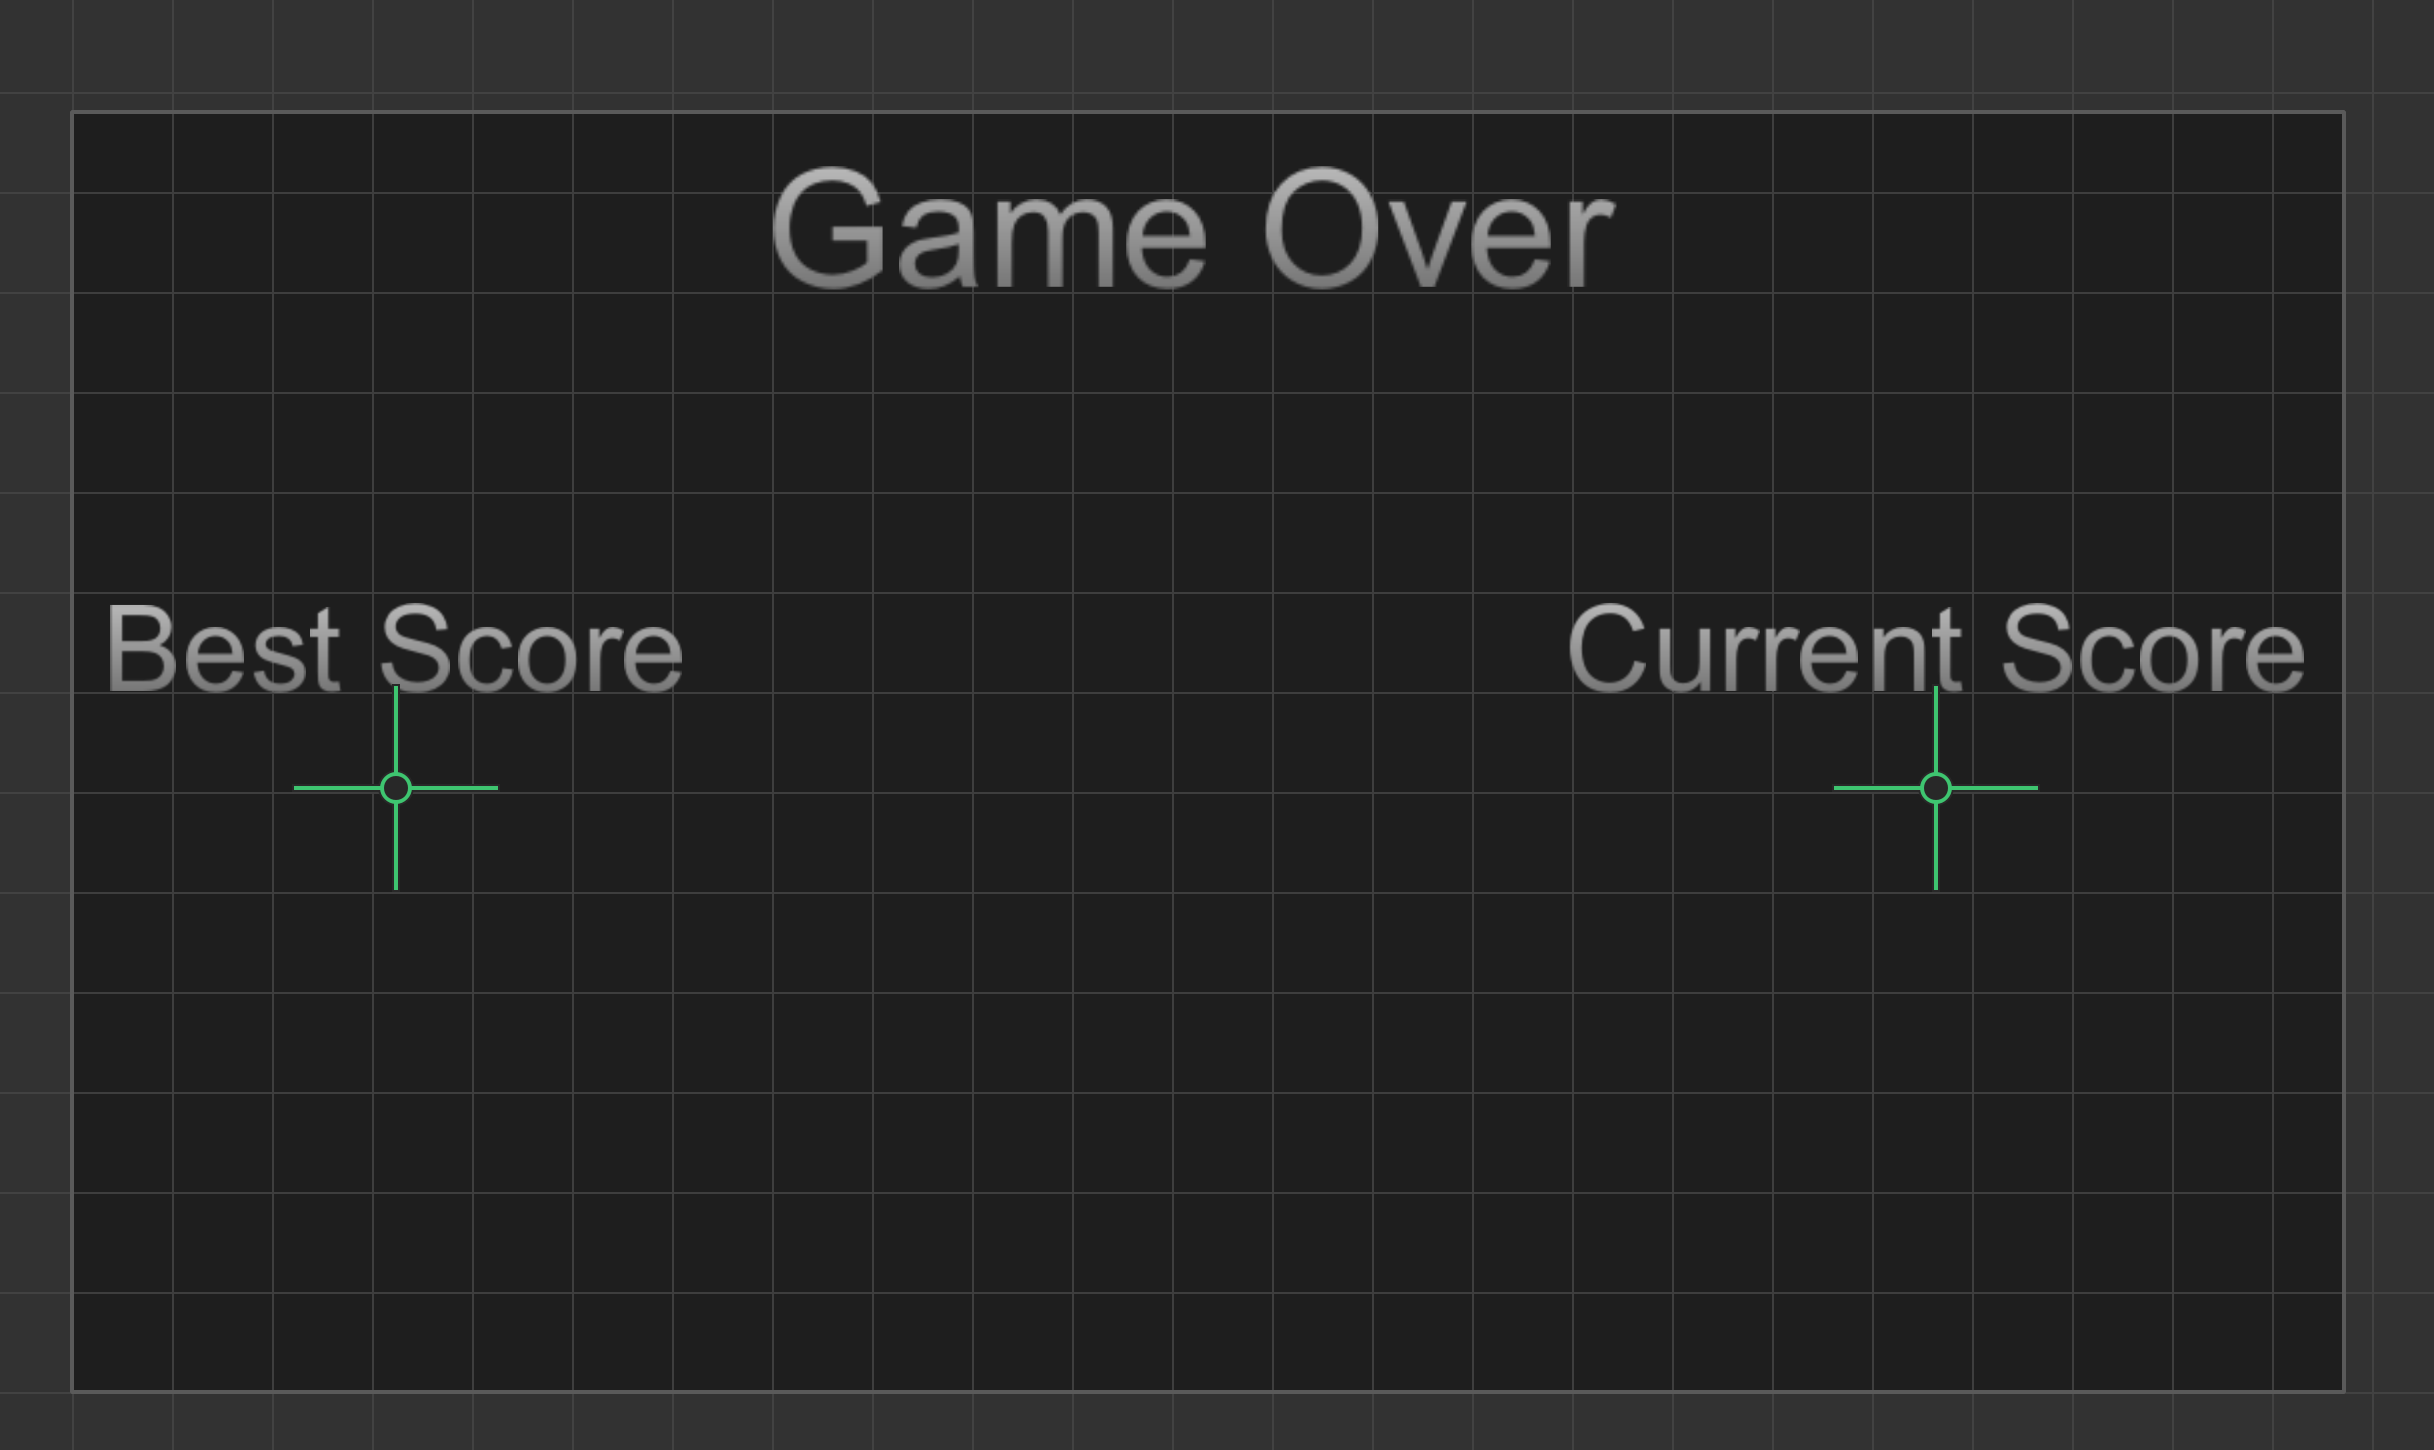
      In the UI Editor, the text labels are displayed as the score icons under their titles.
    4. In the Score Type list, select Points.
    5. In the UI Editor, select the duplicate Best Score icon and in the Options panel, in the Name field, type Best Score Amount.
    6. In the UI Editor, select the duplicate Current Score icon and in the Options panel, do the following:
      1. In the Name field, type Current Score Amount.
      2. In the Amount list, select Current.
  7. To make the game restart when players interact with the screen, do the following:
    1. In the Asset panel from the Buttons category, drag a Navigation button to the center and drag the corners to resize it so that it covers the entire screen.
    2. In the Options panel, in the Name field, type Restart.
    3. In the Function drop-down list, select Restart.

The Game Over UI screen should look similar to the one shown below.
<image>

15. Create the main menu UI screen
  1. On the Navigation bar, click Mind Map.
  2. Between the Start node and the 3D World node, click the connector and drag it away to disconnect the nodes.
  3. From the Node panel, drag the UI Screen node to the grid and place it between the Start and the 3D World nodes.
  4. In the Options panel, in the Name field, type Main Menu UI.
  5. On the Start node on the Mind Map, click the Load output and drag a connector to the Load input of the Main Menu UI node.
  6. Double-click the Main Menu UI node to open its UI workspace.
  7. In the Asset panel, from the Labels category, drag the Default Font label to the top of the grid and center it.
  8. In the Options panel, do the following:
    1. In the Name field, type Main Menu Title.
    2. Set both Scale axis values to 1.5.
    3. In the Text field, type the name of your game, for example, My First Buildbox Game.
  9. In the Outliner, click the Main Menu Title label and press S on the keyboard.
    A duplicate label appears underneath.
  10. In the Options panel, do the following:
    1. In the Name field, type Tap to Play Title.
    2. Change both Scale axis values to 1.
    3. In the Text field, type Tap to Play.
  11. In the Asset panel, from the Buttons category, drag the Navigation Button to the UI Editor and place it anywhere on the screen.
  12. Drag the corners of the Navigation Button to cover the entire UI screen.
  13. On the Navigation bar, click Mind Map.
  14. On the Main Menu UI node, click the Navigation Button input and drag a connector to the Load input of the 3D World node.
  15. On the Buildbox menu bar, select Run > Preview and play your game.

Congratulations! You’ve built your first game. Now that you’ve learned the key tasks required to get started on your own, the sky is your limit! We are looking forward to seeing your games hitting the top charts!