Sub Scene – API Reference

By |

Sub Scene

A Sub Scene is used to control an imported FBX asset. Check the Manual page for more information.

Function Description
animationSpeed(anim)

This method takes a Keyframe Animation Model object and returns the animation’s speed. It will return 0 if the animation isn’t currently active.

animationTimeElapsed(anim)

This method takes a Keyframe Animation Model object and returns the time elapsed as an active animation. The time elapsed is a value from 0-1, 1 being the completion of the animation. This method will return -1 if the animation isn’t currently active.

animationTransitionTime(anim)

Returns the transition time of the animation. This is the time during which this animation and the next one will be blended in transition.

animations()

Returns an array of the currently active Keyframe Animation Models.

attachEntity(joint, entity)

This method is used to attach an Entity to a joint of your Sub Scene. For example, it can be used to attach an item to the hand of your character.

isAnimationPlaying(anim)

Returns true if the given animation is playing, false if not.

jointRotation(name)

Returns the rotation of the given joint in degrees. Joints are named within the 3D modeling software used to create the fbx file.

jointRotationQuat(name)

Returns the rotation of the given joint in Quaternion. Joints are named within the 3D modeling software used to create the fbx file.

jointScale(name)

Returns the scale of the given joint. Joints are named within the 3D modeling software used to create the fbx file.

jointTranslation(name)

Returns the translation of the given joint. Joints are named within the 3D modeling software used to create the fbx file.

jointWeight(name)

Returns the weight of the given joint. Joints are named within the 3D modeling software used to create the fbx file.

meshComponents()

Returns an array containing all the 3D Models associated with the Sub Scene.

playAnimation(anim)

Plays the given Keyframe Animation Model. Optionally takes a second parameter bool looped to make the animation loop.

position()

Returns the position of the Sub Scene. The Sub Scene’s position is relative to its parent Entity.

rotation()

Returns the rotation of the Sub Scene in degrees. The Sub Scene’s rotation is relative to its parent Entity.

rotationQuat()

Returns the rotation of the Sub Scene in Quaternion. The Sub Scene’s rotation is relative to its parent Entity.

scale()

Returns the scale of the Sub Scene. The Sub Scene’s scale is relative to its parent Entity.

setAnimationSpeed(anim, speed)

This method sets the animation speed for the given Keyframe Animation Model.

setAnimationTransitionTime(anim, value)

Sets the transition time of the animation. This is the time during which this animation and the next one will be blended in transition.

setColor(r, g, b, a)

Sets the RGB color of the Sub Scene. Alpha is optional.

setJointRotation(name, value)

Sets the rotation of the given joint in degrees. Joints are named within the 3D modeling software used to create the fbx file.

setJointRotationQuat(quat)

Sets the rotation of the given joint in Quaternion. Joints are named within the 3D modeling software used to create the fbx file.

setJointScale(name, value)

Sets the scale of the given joint. Joints are named within the 3D modeling software used to create the fbx file. The scale can be given in Vec3 or as setJointScale(name, x, y, z).

setJointTranslation(name, value)

Sets the translation of the given joint. Joints are named within the 3D modeling software used to create the fbx file. The translation can be given in Vec3 or as setJointTranslation(name, x, y, z).

setJointWeight(name, value)

Sets the weight of the given joint. Joints are named within the 3D modeling software used to create the fbx file.

setPosition(value)

Sets the position of the Sub Scene. The Sub Scene’s position is relative to its parent Entity. The position can be given as Vec3 or as setPosition(x, y, z).

setRotation(value)

Sets the rotation of the Sub Scene in degrees. The Sub Scene’s rotation is relative to its parent Entity. The rotation can be given as Vec3 or as setRotation(x, y, z).

setRotationQuat(quat)

Sets the rotation of the Sub Scene in Quaternion. The Sub Scene’s rotation is relative to its parent Entity.

setScale(value)

Sets the scale of the Sub Scene. The Sub Scene’s scale is relative to its parent Entity. The scale can be given as Vec3 or as setScale(x, y, z).

stopAnimation(anim)

Stops the given Keyframe Animation Model.


animationSpeed(anim)

This method takes a Keyframe Animation Model object and returns the animation’s speed. It will return 0 if the animation isn’t currently active.

Parameters

Keyframe Animation Model – the animation

Returns

number the speed of the animation

↑ Back to top


animationTimeElapsed(anim)

This method takes a Keyframe Animation Model object and returns the time elapsed as an active animation. The time elapsed is a value from 0-1, 1 being the completion of the animation. This method will return -1 if the animation isn’t currently active.

Parameters

Keyframe Animation Model – the animation

Returns

number the time elapsed of the animation

↑ Back to top


animationTransitionTime(anim)

Returns the transition time of the animation. This is the time during which this animation and the next one will be blended in transition.

Parameters

Keyframe Animation Model – the animation

Returns

number the transition time

↑ Back to top


animations()

Returns an array of the currently active Keyframe Animation Models.

Returns

Array the array of currently active Keyframe Animation Models.

↑ Back to top


attachEntity(joint, entity)

This method is used to attach an Entity to a joint of your Sub Scene. For example, it can be used to attach an item to the hand of your character.

Parameters

string joint – the joint name
Entity entity – the entity

↑ Back to top


isAnimationPlaying(anim)

Returns true if the given animation is playing, false if not.

Parameters

Keyframe Animation Model anim – the animation to check

Returns

boolean true if the animation is playing, false if not

↑ Back to top


jointRotation(name)

Returns the rotation of the given joint in degrees. Joints are named within the 3D modeling software used to create the fbx file.

Parameters

string name – the name of the joint

Returns

Vec3 the rotation of the joint in degrees

↑ Back to top


jointRotationQuat(name)

Returns the rotation of the given joint in degrees. Joints are named within the 3D modeling software used to create the fbx file.

Parameters

string name – the name of the joint

Returns

Quaternion the rotation of the joint in Quaternion

↑ Back to top


jointScale(name)

Returns the scale of the given joint. Joints are named within the 3D modeling software used to create the fbx file.

Parameters

string name – the name of the joint

Returns

Vec3 the {x, y, z} scale of the joint

↑ Back to top


jointTranslation(name)

Returns the translation of the given joint. Joints are named within the 3D modeling software used to create the fbx file.

Parameters

string name – the name of the joint

Returns

Vec3 the translation of the joint

↑ Back to top


jointWeight(name)

Returns the weight of the given joint. Joints are named within the 3D modeling software used to create the fbx file.

Parameters

string name – the name of the joint

Returns

number the weight of the joint

↑ Back to top


meshComponents()

Returns an array containing all the 3D Models associated with the Sub Scene.

Returns

Array – an array of 3D Models

Returns

number the weight of the joint

↑ Back to top


playAnimation(anim)

Plays the given Keyframe Animation Model. Optionally takes a second parameter bool looped to make the animation loop.

Parameters

Keyframe Animation Model anim – the animation
bool looped – (optional) true if the animation should loop, false if not

↑ Back to top


position()

Returns the position of the Sub Scene. The Sub Scene’s position is relative to its parent Entity.

Returns

Vec3 the {x, y, z} position of the Sub Scene

↑ Back to top


rotation()

Returns the rotation of the Sub Scene in degrees. The Sub Scene’s rotation is relative to its parent Entity.

Returns

Vec3 the {x, y, z} rotation of the Sub Scene

↑ Back to top


rotationQuat()

Returns the rotation of the Sub Scene in Quaternion. The Sub Scene’s rotation is relative to its parent Entity.

Returns

Quaternion the rotation of the Sub Scene in Quaternion

↑ Back to top


scale()

Returns the scale of the Sub Scene. The Sub Scene’s scale is relative to its parent Entity.

Returns

Vec3 the {x, y, z} scale of the Sub Scene

↑ Back to top


setAnimationSpeed(anim, speed)

This method sets the animation speed for the given Keyframe Animation Model.

Parameters

Keyframe Animation Model anim – the animation
number speed – the speed

↑ Back to top


setAnimationTransitionTime(anim, value)

Sets the transition time of the animation. This is the time during which this animation and the next one will be blended in transition.

Parameters

Keyframe Animation Model anim – the animation number value the transition time

↑ Back to top


setColor(r, g, b, a)

Sets the RGB color of the Sub Scene. Alpha is optional.

Parameters

number r – the red component of the color range 0-255
number g – the green component of the color range 0-255
number b – the blue component of the color range 0-255
number a – (optional) the alpha component of the color range 0-255

↑ Back to top


setJointRotation(name, value)

Sets the rotation of the given joint in degrees. Joints are named within the 3D modeling software used to create the fbx file.

Parameters

string name – the name of the joint
Vec3 value – the rotation in degrees

// example: rotate the models head to follow the players touch
let subScene;
let prev;
let delta = new Vec2(0,0);

function init(){
    subScene = this.attribute('Scene')[0]; // the sub scene is connected to this node by reference
    this.enableTouch(true);
}

function touchBegan(point){
    // save the point where the touch started
    prev = point;
}
component.touchBegan = touchBegan;

function touchMove(point){
    // calculate the distance between this touch point and the last one
    delta = new Vec2 ( delta.x + prev.x - point.x, 
                       delta.y + prev.y - point.y);
    prev = point;
}
component.touchMove = touchMove;

function update(dt){
    // change the rotation of the head joint based on the touch
    subScene.setJointRotation('head', new Vec3(-delta.x,0,-delta.y));
}

↑ Back to top


setJointRotationQuat(quat)

Sets the rotation of the given joint in Quaternion. Joints are named within the 3D modeling software used to create the fbx file.

Parameters

string name – the name of the joint
Quaternion value – the rotation in Quaternion

↑ Back to top


setJointScale(name, value)

Sets the scale of the given joint. Joints are named within the 3D modeling software used to create the fbx file. The scale can be given in Vec3 or as setJointScale(name, x, y, z).

Parameters

string name – the name of the joint
Vec3 value – the {x, y, z} scale of the joint

↑ Back to top


setJointTranslation(name, value)

Sets the translation of the given joint. Joints are named within the 3D modeling software used to create the fbx file. The translation can be given in Vec3 or as setJointTranslation(name, x, y, z).

Parameters

string name – the name of the joint
Vec3 value – the {x, y, z} translation of the joint

↑ Back to top


setJointWeight(name, value)

Sets the weight of the given joint. Joints are named within the 3D modeling software used to create the fbx file.

Parameters

string name – the name of the joint
number value – the weight of the joint

↑ Back to top


setPosition(value)

Sets the position of the Sub Scene. The Sub Scene’s position is relative to its parent Entity. The position can be given as Vec3 or as setPosition(x, y, z).

Parameters

Vec3 value – the position of the Sub Scene

↑ Back to top


setRotation(value)

Sets the rotation of the Sub Scene in degrees. The Sub Scene’s rotation is relative to its parent Entity. The rotation can be given as Vec3 or as setRotation(x, y, z).

Parameters

Vec3 value – the rotation of the Sub Scene

↑ Back to top


setRotationQuat(quat)

Sets the rotation of the Sub Scene in Quaternion. The Sub Scene’s rotation is relative to its parent Entity.

Parameters

Quaternion quat – the rotation of the Sub Scene

↑ Back to top


setScale(value)

Sets the scale of the Sub Scene. The Sub Scene’s scale is relative to its parent Entity. The scale can be given as Vec3 or as setScale(x, y, z).

Parameters

Vec3 value – the {x, y, z} scale of the Sub Scene

↑ Back to top


stopAnimation(anim)

Stops the given Keyframe Animation Model.

Parameters

Keyframe Animation Model anim – the animation to stop

↑ Back to top

Did you find this page useful?

Please give it a rating:

Please provide some feedback!

This is very helpful to us.

Tell us how we can improve this post?

Keyframe Animation Node – Buildbox 3 Manual

By |

Keyframe Animation Node

This content node plays a 3D animation for a connected Sub Scene node.

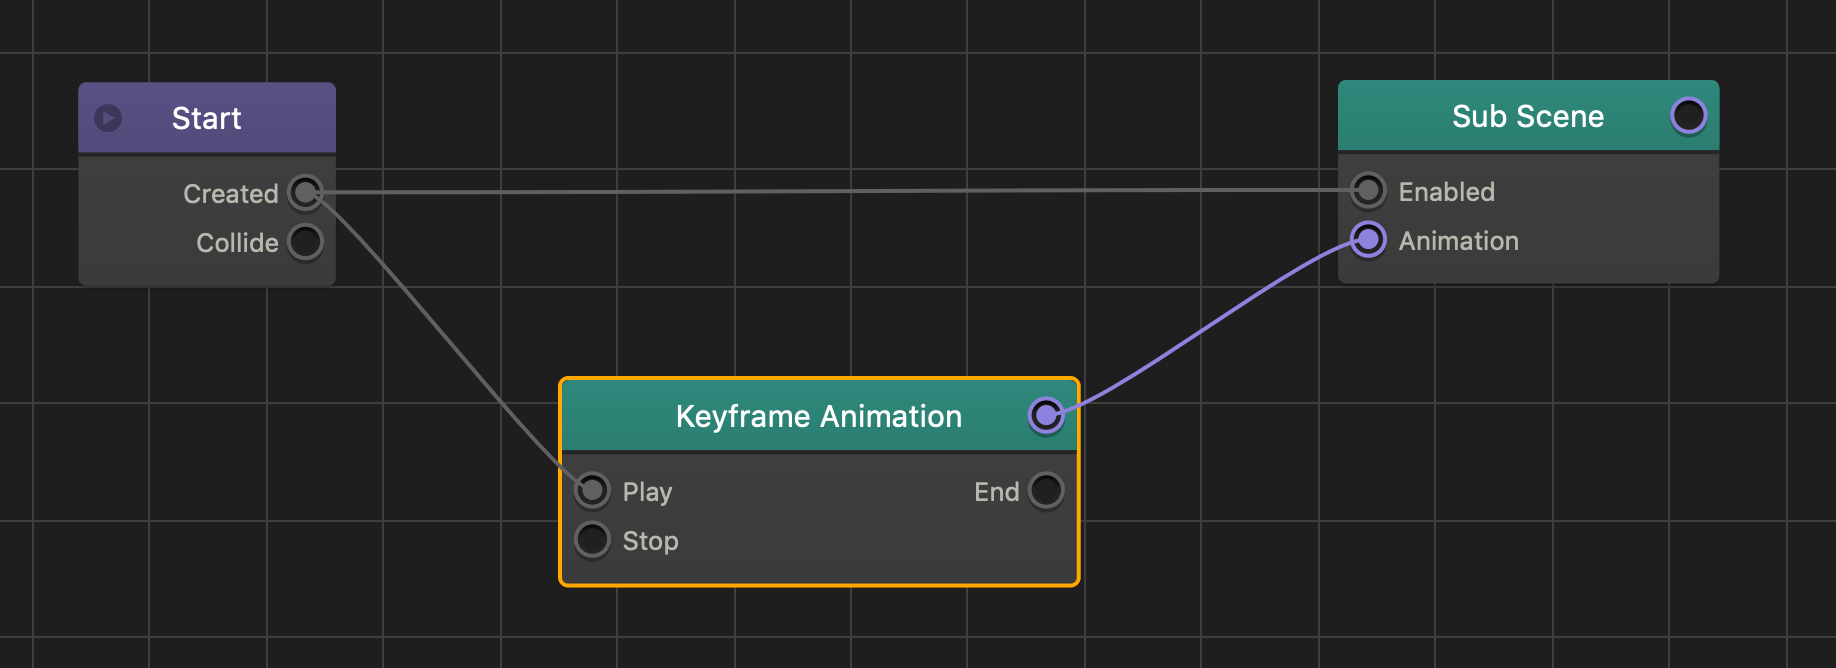
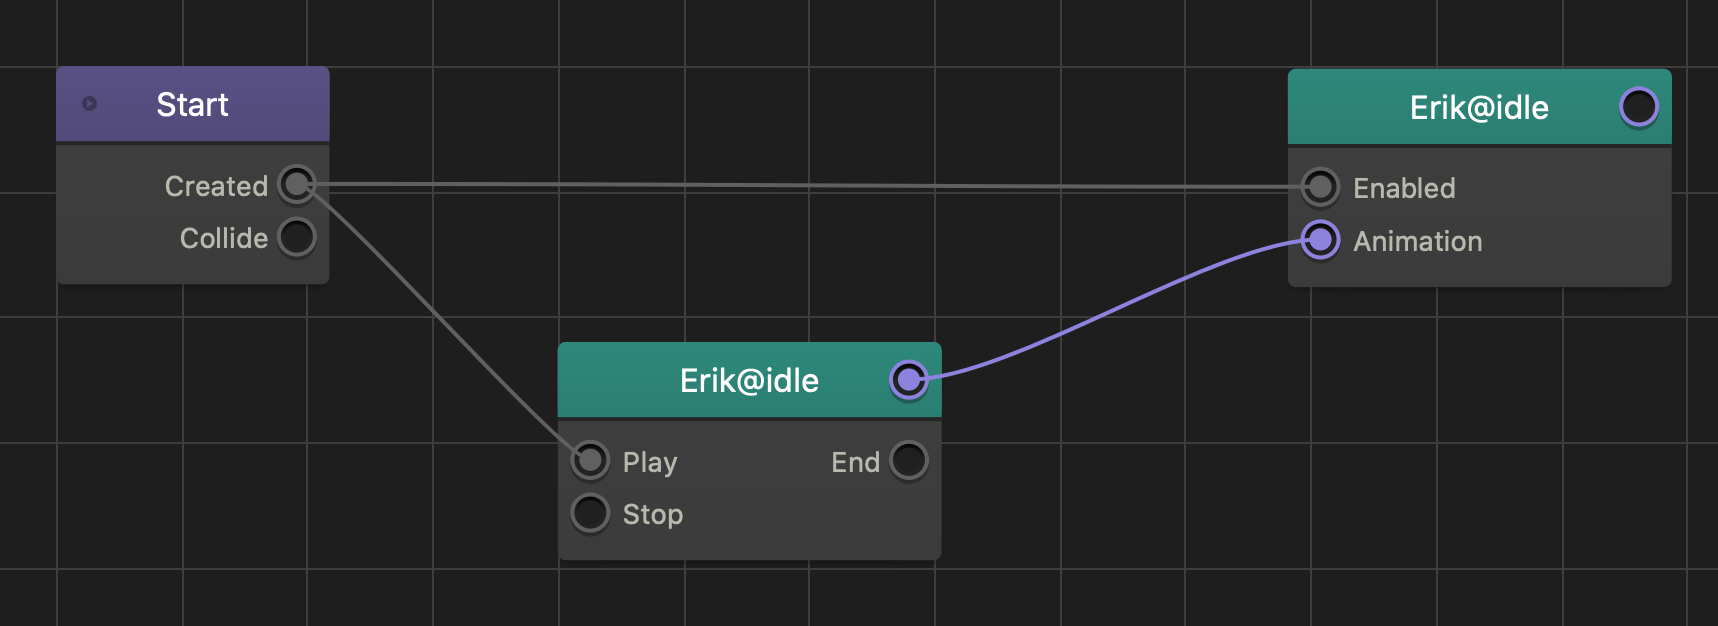
  • To apply an animation to a Sub Scene that contains a 3D model with a skeleton, connect the purple reference output on the Keyframe Animation node to the Animation input of the desired Sub Scene node.
  • To play a 3D animation, connect the Play input of the Keyframe Animation node to the output of the desired node.
    • The example below shows a 3D animation playing when the asset is created or spawned.
  • To pause an animation, connect the Stop input of the Keyframe Animation node to an output of the desired node.

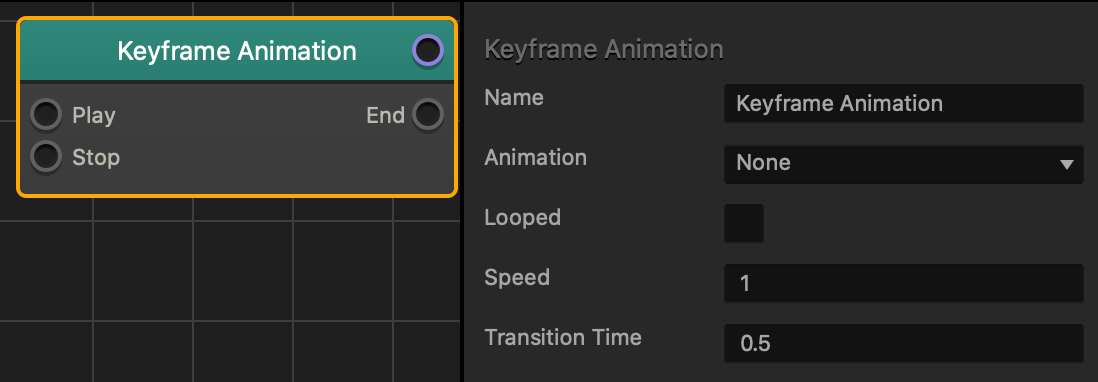
Node Attributes

Option Description
Name To create a custom name, type it here.
Animation After you import the desired 3D animation, click the drop-down and select the animation that you want to play. For more on importing animations, see Importing FBX with 3D Animations.
Looped Select the checkbox to make this animation play again every time it finishes playing.
Speed Enter a numeric value to determine the playback speed. For example:

  • A value of 1—normal speed.
  • A value of 2—double the speed.
Transition Time Enter a numeric value in seconds to set the time before playing a different animation.

See also, Importing 3D Animations.

Sub Scene Node – Buildbox 3 Manual

By |

Sub Scene Node

This content node contains a 3D mesh with a skeleton that can be animated by a Keyframe Animation node.

  • To apply a mesh and skeleton to an asset, connect the Enabled input to the Created output of the Start node.
  • To apply an animation to the model and skeleton, connect the Animation input of the Sub Scene to the purple reference output next to the name of a Keyframe Animation node.

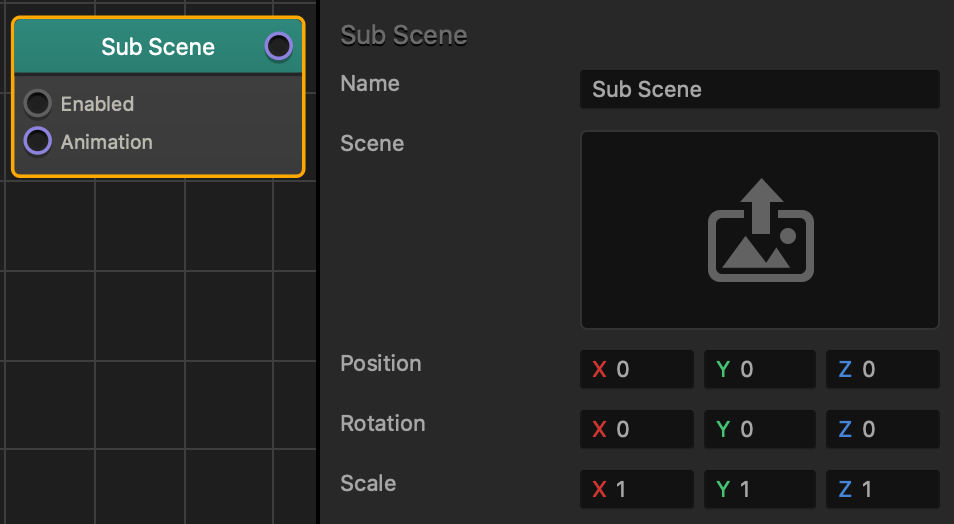
Option Description
Name To create a custom name, type it here.
Scene To replace the current model and skeleton or choose a new one:

  1. Click the edit button in the field to open the Sub Scene Manager window,
  2. Select the name of the model on the left.
  3. Click Save.
Position To move and offset the 3D model from the center of the asset, enter the appropriate X, Y, or Z axis values.
Rotation To rotate the 3D model without rotating the entire asset, enter the appropriate X, Y, or Z axis values.
Scale To change the size of the 3D model, enter the appropriate X, Y, or Z axis values.

See also, Importing 3D Animations.

Importing 3D Animations – Buildbox 3 Manual

By |

Importing FBX Files with 3D Animations

To add a 3D animated model to your game, drag an FBX file that contains any of the following into a scene.

  • Model—mesh or shape of the asset.
  • Skeleton—joint or bone hierarchy bound to the model and allows it to bend, twist, and change shape during an animation.
  • Animation—motion and timing of the skeleton or model.

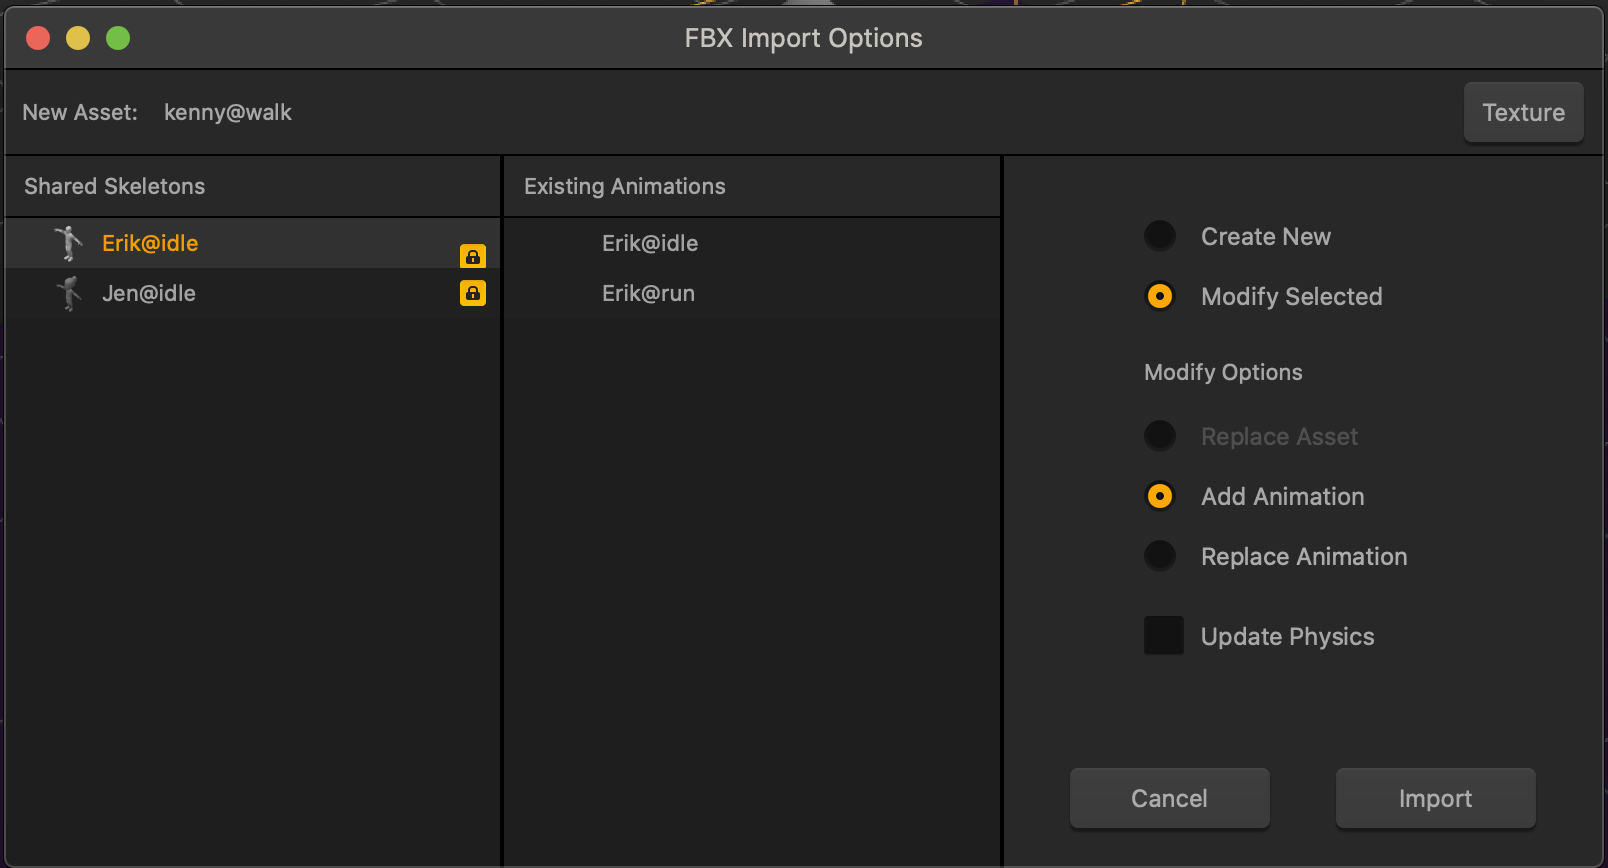
FBX Import Options Window

When you drag another animation FBX file that contains the same skeleton as another animation, you need to choose to either create a brand new asset, or apply the animation to an existing asset.

  • When you import an FBX file that has a similar skeleton as another asset, it will appear in the Shared Skeletons panel.
  • To apply a texture to the model, click the Texture button, then select the desired texture image.
    If a model that has vertex color applied to a surface, it will only show as grey. To apply a color to an FBX asset without using a texture, see Sub Scene.
  • When you select a skeleton from the Shared Skeletons panel, a list of all the animations associated with that skeleton displays in the Existing Animations panel.
  • To add the animation to a skeleton:
    • Select the skeleton in the Shared Skeletons panel.
    • Click Modify Selected and Add Animation.
    • Click Import.
  • To replace an animation:
    1. Make sure the animation FBX file has the same skeleton and file name and drag it to the scene editor.
    2. In the Shared Skeletons panel, select the skeleton associated with the original animation.
    3. In the Existing Animations panel, select the name of the animation you want to replace.
    4. Select Replace Animation and click Import.
  • To add the animation as a new asset, click Create New then Import.
  • To replace the model of an existing skeleton:
    • Import an FBX file that contains the desired model with a similar skeleton as another asset.
    • In the FBX Import Options window, select Replace Asset and click Import.
Section/Attribute Descriptions
Texture Click to choose a texture you want to apply to the asset selected in the Shared Skeletons panel.
New Asset Displays the name of your FBX animation file.
Shared Skeletons Displays a list of all the assets that contain the same skeleton as the animation.
Existing Animations Displays a list of all the animations applied to the selected skeleton.
Create New Imports the animation as a new asset.
Modify Selected Replaces an animation or add an animation to the selected skeleton in the Shared Skeletons panel.
Replace Asset Replaces the selected asset in the Shared Skeletons panel with the imported asset.
Add Animation Adds an animation to the selected skeleton in the Shared Skeletons panel.
Replace Animation Replaces an existing animation of the selected skeleton in the Shared Skeletons panel.
Update Physics
  • Updates the size of the collision shape based on the first frame of the animation.
  • Select the checkbox if you add an animation that has a larger range of motion than the previous animations.

3D Animation Nodes

After you create an asset from an FBX file, there are two nodes inside the assets Node Map: Sub-Scene and Keyframe Animation, both with the same name as the FBX file name.

Friction Brainbox – Buildbox 3 Manual

By |

Friction Brainbox

This physics Brainbox applies friction or resistance against gravity to an asset, and can make the asset appear heavier  across a surface in a scene.

Brainbox Attributes

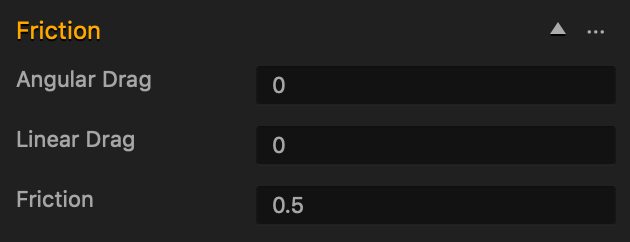
After you add this Brainbox to an asset, you need to set the asset’s physics to Dynamic, then specify the amount of resistance against the asset will have against gravity and surfaces by entering a 0-1 decimal value the attributes.

Attribute Description
Angular Drag Enter a 0-1 decimal value to specify the amount of rotation resistance when the asset is affected by gravity.
Linear Drag Enter a 0-1 decimal value to specify the amount of movement resistance when the asset is affected by gravity.
Friction Enter a 0-1 decimal value to specify the amount of movement resistance when the asset is sliding across a surface.

For example:

  • A value of 0 makes the asset slide across surfaces without any resistance.
  • A value of 1 prevents the asset from sliding across surfaces.

Nodes in Brainbox group

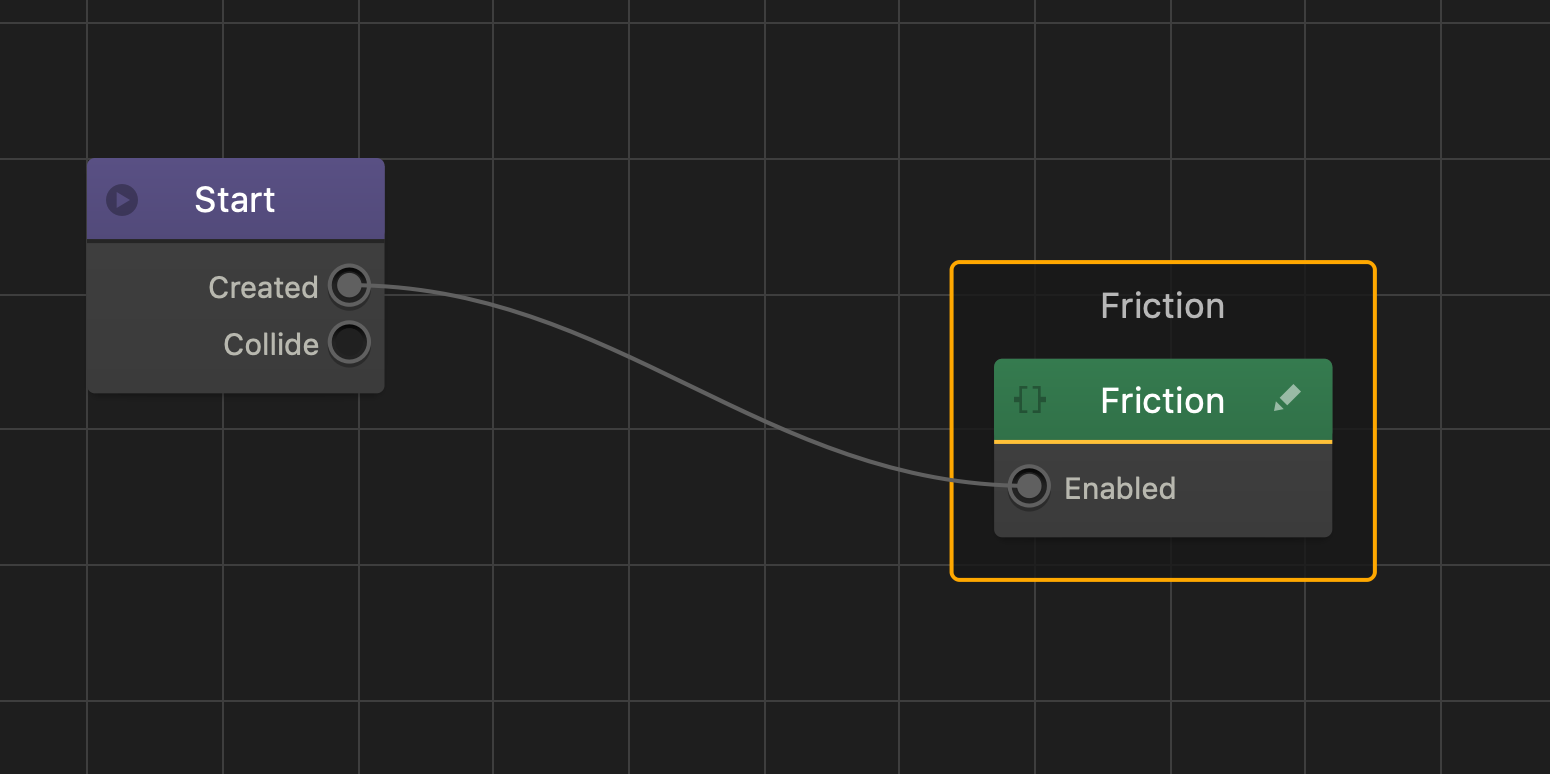
After you add this Brainbox to an asset, a custom Friction node is added to the Node Map.

Bounce Brainbox – Buildbox 3 Manual

By |

Bounce Brainbox

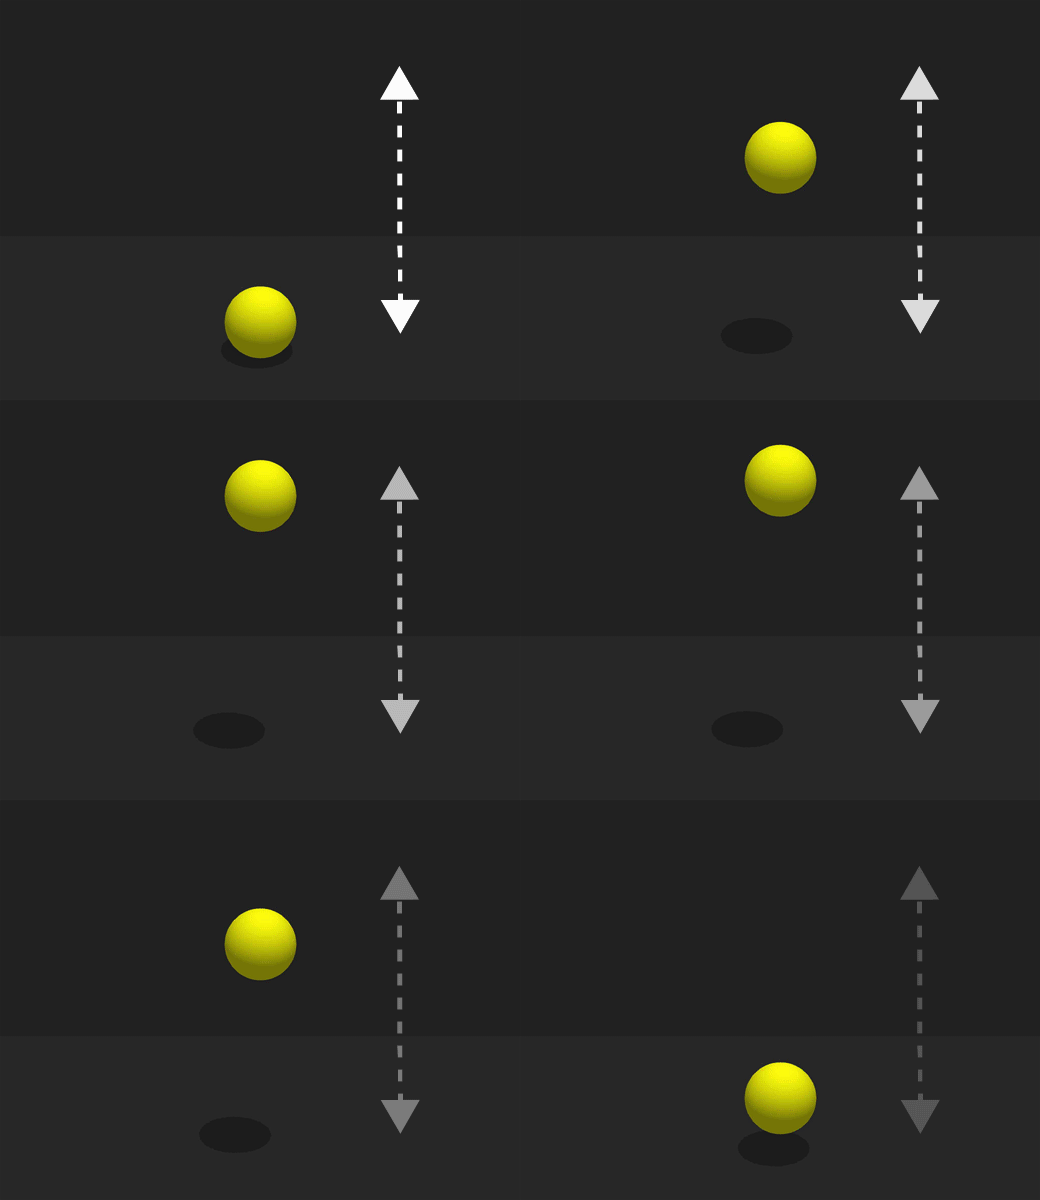
This physics Brainbox makes an asset bounce off a surface.

Brainbox Attributes

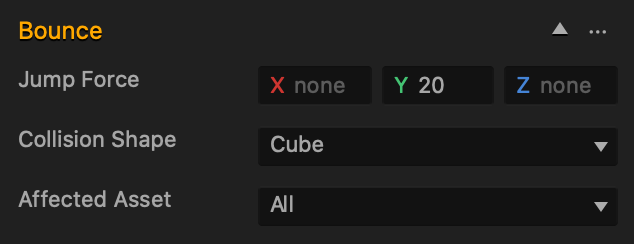
After you add this Brainbox you need to specify the Jump Force attribute.

Attribute Description
Jump Force
  • Specifies how high and in which direction the asset bounces.
  • To make an asset bounce, you must have a positive value in the axis field. Without it, the asset will not bounce at all.
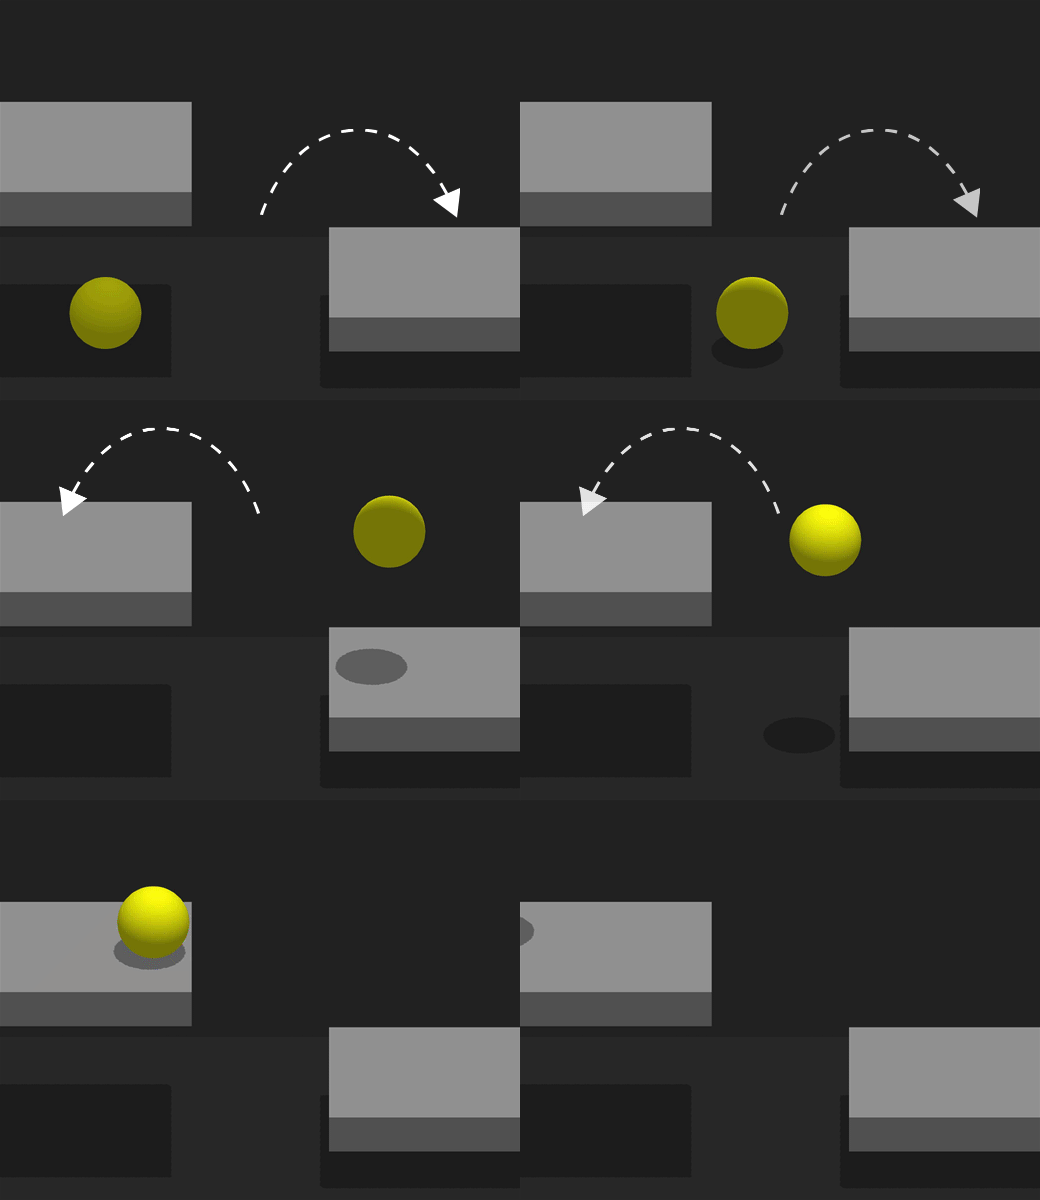
  • To make an asset bounce:
    • Straight up—enter a positive value in the Y axis field.
    • Forward—enter a positive value in the Y and Z axis fields.
    • Backward—enter a positive value in the Y and a negative value in the Z axis fields.
    • Left—enter a positive value in the Y and a negative value in the X axis fields.
    • Right—enter a positive value in the Y and X axis fields.
    • Diagonally—enter a value in all the axis fields.
If you don’t want the asset to bounce in a specific direction, delete the value in the respective axis field.
Collision Shape If you want to change the collision shape, choose the desired option. For details, see Change Collision Shapes.
Affected Asset If you want the asset to bounce off every surface, keep the All selection. If you want the asset to bounce off only a specific surface, choose the desired option.

Brainbox Node Group

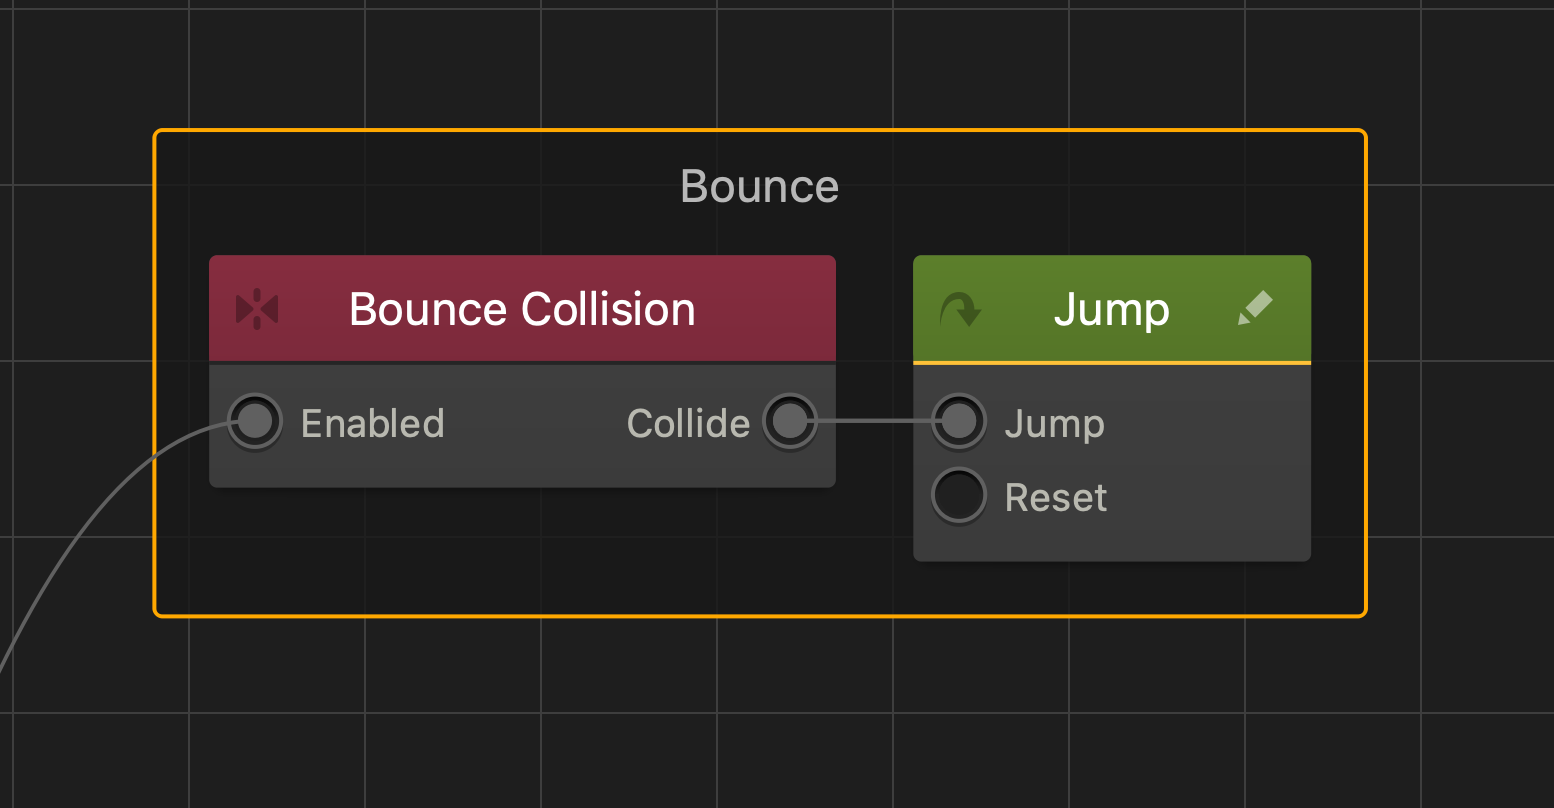
After you add this Brainbox to an asset, a group of nodes containing a Bounce Collision (If Collide) node, and Jump node is added to the Node Map of the asset.

Pin Light – API Reference

By |

Pin Light

The Pin Light is a way to add additional light sources to your game.

Function Description
color()

Returns the color of the Light in RGB (Red, Green, Blue) format.

intensity()

Returns the intensity of the Light.

isRemoved() Returns true if the Light is removed, false if not.
isVisible()

Returns true if the light is visible, false if not.

position()

Returns the Light’s position coordinates relative to its parent.

range()

Returns the range of the Light.

remove()

Remove the light from the Scene.

rotation()

Returns the rotation of the Light in degrees.

rotationQuat()

Returns the rotation of the Light in quaternion.

setColor(color)

Sets the color of the Light.

setIntensity(value)

Sets the intensity of the Light.

setPosition(x, y, z)

Sets the new position relative to the Light’s parent. If the Light has no parent, this sets the world position of the Light.

setRange(value)

Sets the range of the Light.

setRotation(x, y, z)

Sets the rotation value of the Light, in degrees.

setRotationQuat(value)

Sets rotation value in Quaternion.

setVisible(value)

Sets the visibility of the Light; true if the Light is visible, false if not.

setWorldPosition()

Sets the Light’s position coordinates in the world (absolute position).

worldPosition()

Returns the Light’s position coordinates in the world (absolute position).


color()

Returns the Light’s color in RGB (Red, Green, Blue) format. The minimum value is 0 and the maximum is 1 (think of it as the 0-255 scale divided by 255). For example, {r:0, g:0, b:0} is black and {r:1, g:1, b:1} is white.

Returns

Vec3 {x, y, z} color pigment of the Light.

let light = this.scene().findFirst("Pin Light");
log(light.color().x); // result: the red component of the light's color.

↑ Back to top


intensity()

Returns the intensity of the Light.

Returns

number The intensity of the Light. Range is 0-1000.

↑ Back to top


isRemoved()

Returns if the Light is removed.

Returns

boolean true if the Light is removed, false if the Light is not.

↑ Back to top


isVisible()

Returns if the Light is visible.

Returns

boolean true if the Light is visible, false if the Light is not.

↑ Back to top


position()

Returns the Light’s position relative to its parent. If the Light has no parent, the result of this function will be no different than worldPosition.

Returns

Vec3 {x, y, z} relative coordinates of the Light.

↑ Back to top


range()

Returns the range of the Light. The range is how far the light reaches.

Returns

Number The range of the Light.

↑ Back to top


remove()

Remove the Light from the Scene.

↑ Back to top


rotation()

Returns the rotation of the Light in degrees.

Returns

Vec3 The {x, y, z} rotation value of the Light, in degrees.

↑ Back to top


rotationQuat()

Returns the rotation of the Light in Quaternion.

Returns

Quaternion The rotation value in Quaternion.

↑ Back to top


setColor(color)

Sets the color of the Light. Expected range of {r, g, b} is 0-1.

Parameters

Vec3 color – the {r, g, b} color

↑ Back to top


setIntensity(value)

Sets the intensity of the Light.

Parameters

Number value – the intensity of the Light, ranging from 0-1000.

↑ Back to top


setPosition(x, y, z)

Sets the new position relative to the Light’s parent. If the Light has no parent, this sets the world position of the Light.

Parameters

number x – X coordinate in 3D space
number y – Y coordinate in 3D space
number z – Z coordinate in 3D space

↑ Back to top


setRange(value)

Sets the range of the Light.

Parameters

Number value – the range of the Light

↑ Back to top


setRotation(x, y, z)

Sets the rotation value of the Light, in degrees.

Parameters

number x – the X rotation of the Light
number y – the Y rotation of the Light
number z – the Z rotation of the Light

↑ Back to top


setRotationQuat(value)

Sets rotation value in Quaternion.

Parameters

Quaternion value – The Quaternion rotation value to be set

↑ Back to top


setVisible(value)

Sets the visibility of the Light; true if the Light is visible, false if not.

Parameters

boolean value – the visibility of the Light.

↑ Back to top


setWorldPosition(value)

Sets the Light’s position coordinates in the world (absolute position).

Parameters

Vec3 value – the {x, y, z} absolute position of the Light.

↑ Back to top


worldPosition()

Returns the Light’s position coordinates in the world (absolute position).

Returns

Vec3 the {x, y, z} world coordinates of the Light

let pos = this.scene().find("Pin Light")[0].worldPosition();
log('X World Position = ' + pos.x);

↑ Back to top

Did you find this page useful?

Please give it a rating:

Please provide some feedback!

This is very helpful to us.

Tell us how we can improve this post?

Platformer Brainbox – Buildbox 3 Manual

By |

Platformer Brainbox

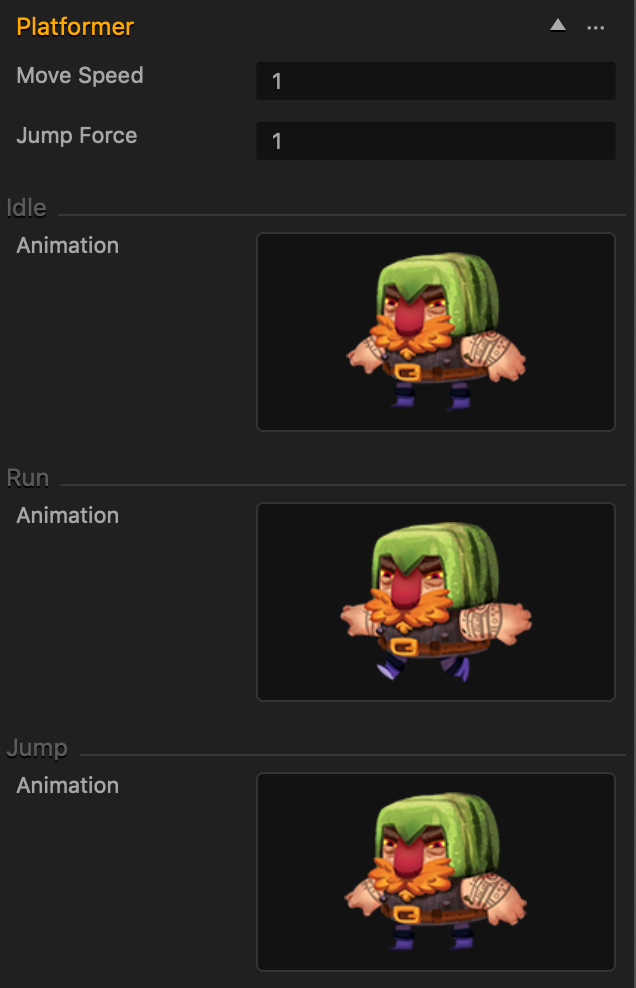
This physics Brainbox allows the player to make the asset move and jump with their keyboard. Also provides the asset with animations that play when the asset moves and jumps.

Brainbox Attributes

  • During gameplay, the player controls the asset by pressing the following keys on their keyboard:
    • Right Arrow—makes the asset move right.
    • Left Arrow—makes the asset move left.
    • Space Bar—makes the asset jump.
Attribute Description
Move Speed
  • Enter a numeric value in any of the axis fields to specify the speed the asset moves in.
  • The following provides example values and how they affect the speed of an asset.
    • 0.5—very slow.
    • 1—normal speed.
    • 5—fast.
    • 10—very fast.
    • 20—asset moves like that of a bullet.
Jump Force
  • Enter a numeric value in any of the axis fields to specify how high the asset jumps.
  • The following provides example values and how they affect the jump height of an asset.
    • 0.5—low.
    • 1—normal.
    • 5—high.
    • 10—very high.
  • Also depends on the gravity settings.
Animation
  • Plays a PNG sequence depending on player actions.
    • Jump—plays when the asset jumps.
    • Idle—plays when the player does not interact with the asset.
    • Move—plays when the player makes the asset move left or right.
  • To replace an animation with a PNG sequence of your choosing, drag all of the images associated with the sequence to the animation area.

Brainbox Node Group

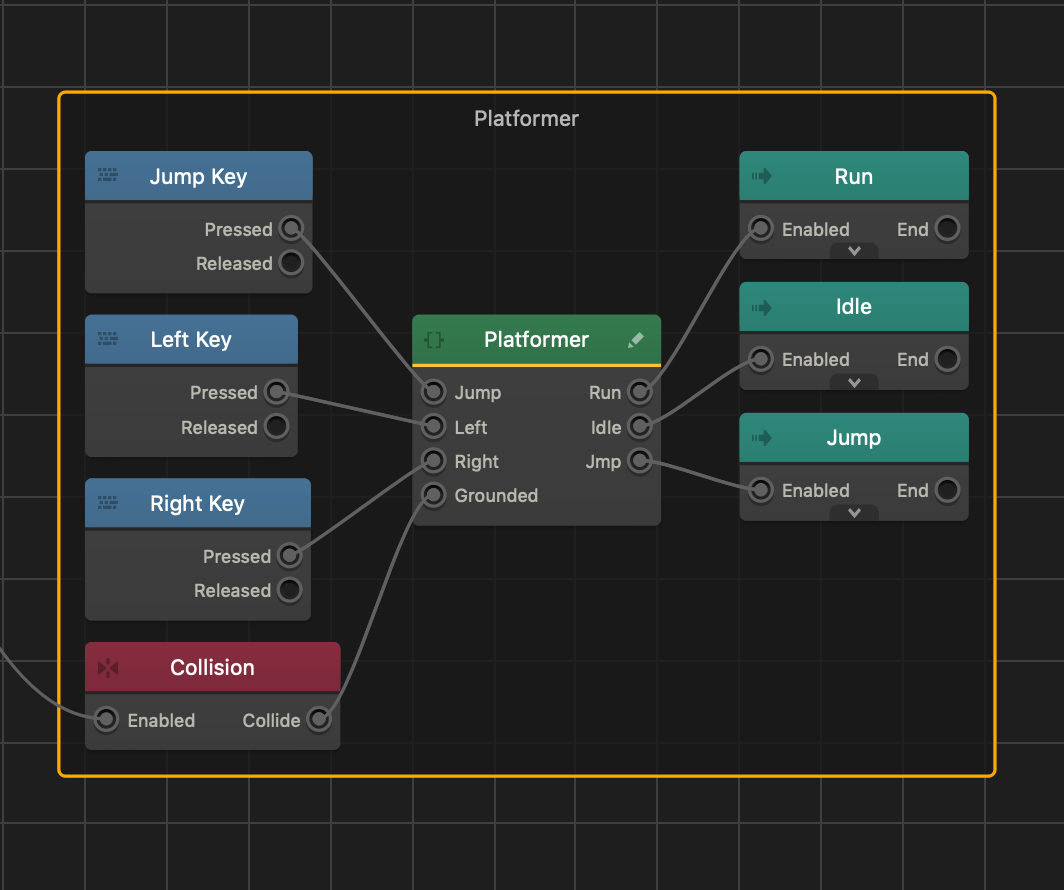
After you add this Brainbox to an asset, an If Collide node (Collision), three Keyboard Button nodes, three Animation nodes, and a custom State Machine node appear as a group in the assets node panel.

Rotate Brainbox – Buildbox 3 Manual

By |

Rotate Brainbox

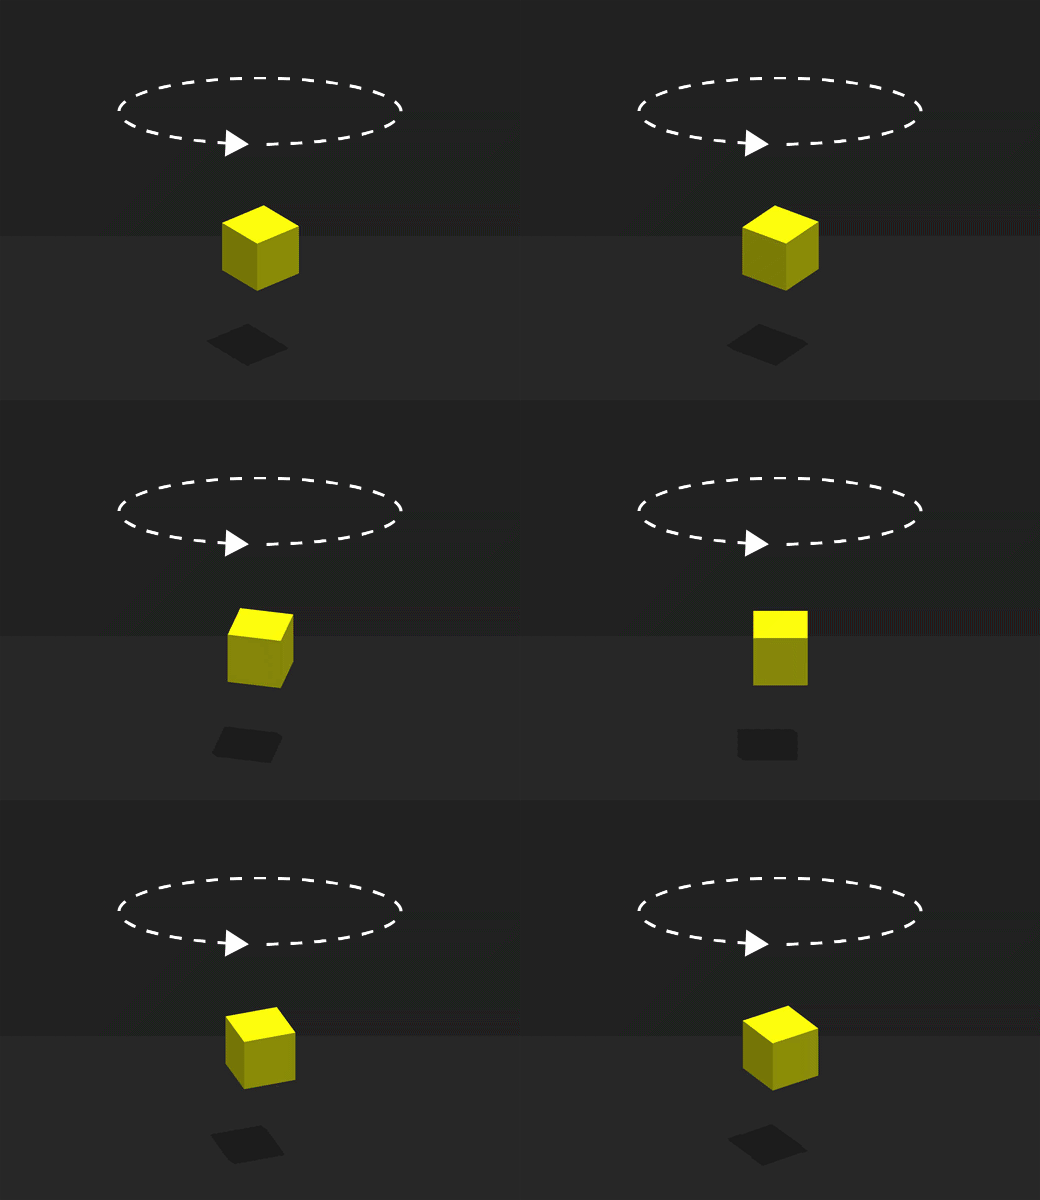
This movement Brainbox makes an asset rotate in a specified direction.

Brainbox Attributes

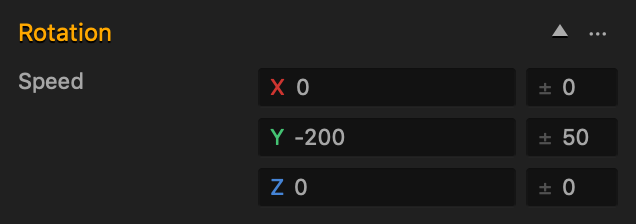
After you add this Brainbox to an asset, you need to specify the Speed and direction in which the asset should rotate.

  • Speed
    • Enter a numeric value in any of the axis fields to represent the rotation direction and speed. The greater the number, the faster the asset will rotate.
  • Direction
    • To make the asset rotate clockwise along an axis, enter a positive value in the desired Speed axis field.
    • To make the asset rotate counter clockwise along an axis, enter a negative value in the desired Speed axis field.
    • Also depends on which direction the game camera is facing.
  • The asset rotates on its center around the specified axes.
  • If you put values in more than one axis, the asset will rotate in all of the specified axis directions
    • For example, if all of the axis fields contain values, the asset will rotate like that of a mechanical bull.
  • Range
    • To make the asset pick a random axis value, enter a value in any of the range fields to the right.
    • The range value is both added and subtracted to create a minimum and maximum of possible outcomes.
    • For example, if you enter a value of 100 in the Y axis, and a value of 50 in its range field, a value between 50 and 150 will be selected during gameplay.
      |50———-100———-150|
    If you don’t want the asset to rotate in a specific direction, delete the value in any of the axis fields.

The table below shows two sample values with their speed and direction.

Positive Value Negative Value
Sample Value 100 -500
Speed Slow Fast
Direction Clockwise Counter Clockwise

Brainbox Node Group

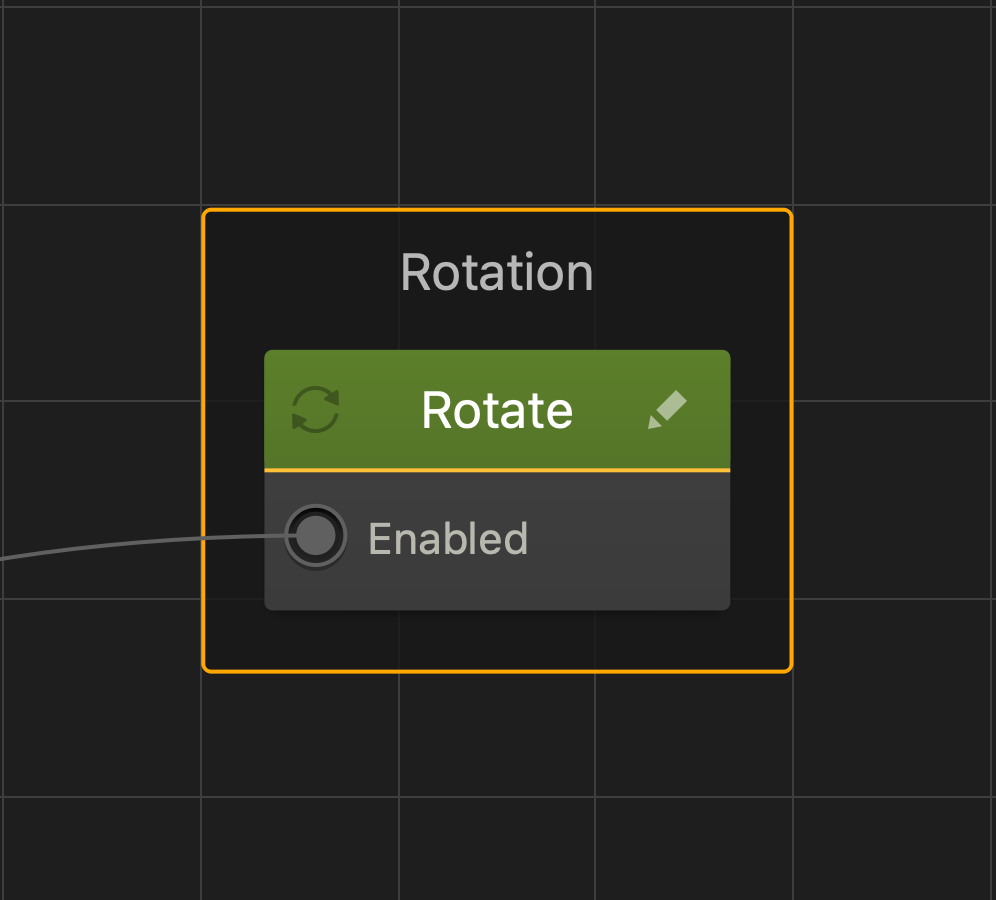
After you add this Brainbox to an asset, the Rotate node is added to the Node Map of the asset with the Speed values you’ve specified.

Side Move Brainbox – Buildbox 3 Manual

By |

Side Move Brainbox

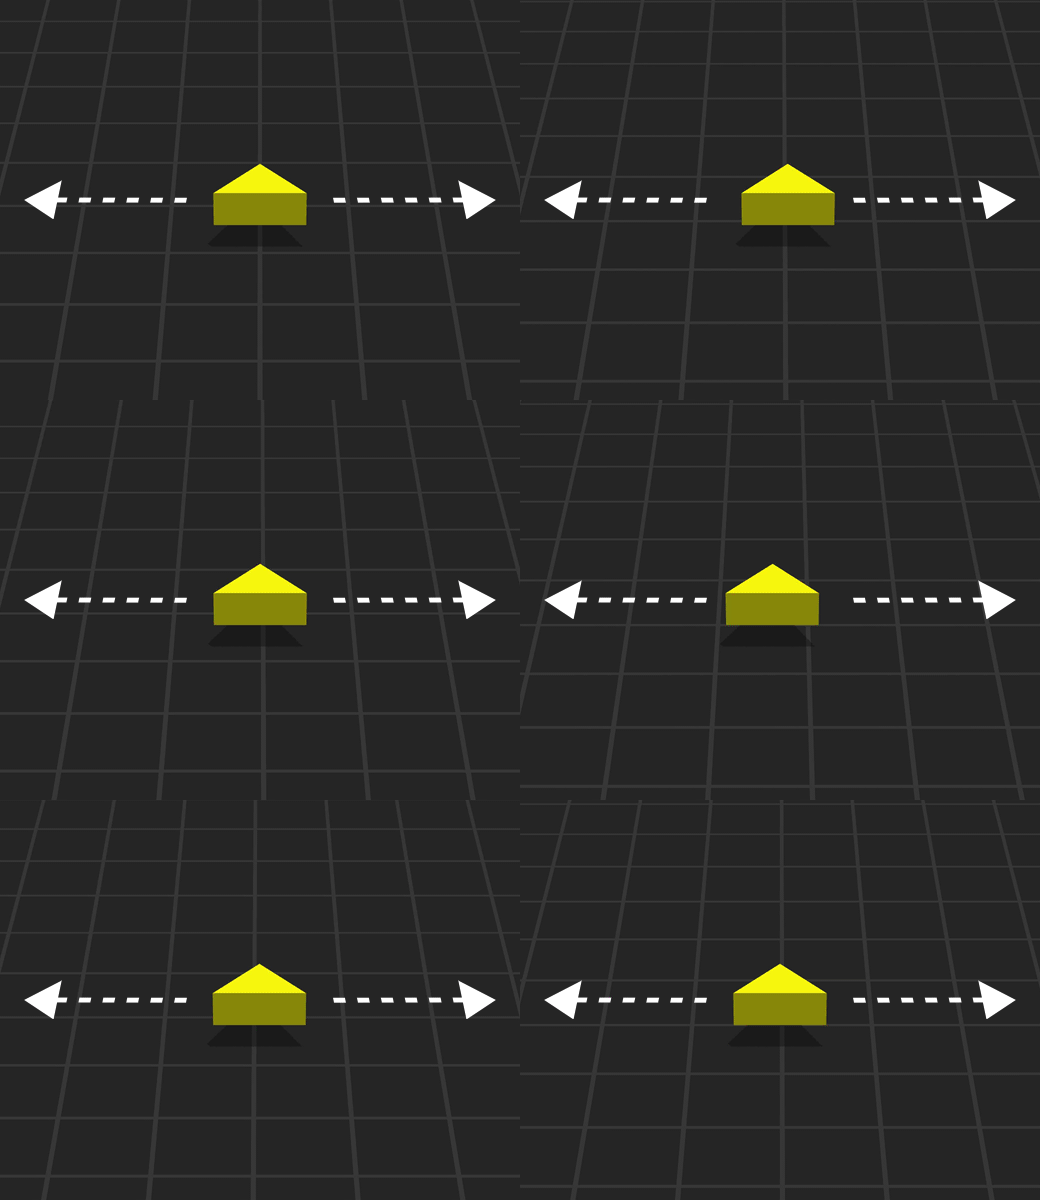
This movement Brainbox allows the player to drag a finger or mouse across the screen to move the asset.

Brainbox Attributes

After you add this Brainbox to an asset, you need to specify the Sensitivity.

  • Sensitivity
    • Determines how fast the asset moves.
    • To change the horizontal or vertical movement sensitivity, enter a numeric value in the X or Y axis respectively.
    • The higher the value, the faster the movement when the player drags a finger or mouse across the screen.
  • By default, the player can make the asset move in the following directions:
    • Forward by dragging up with finger or mouse.
    • Backward by dragging down with a finger or mouse.
    • Left by dragging left with a finger or mouse.
    • Right by dragging right with a finger or mouse.
  • To invert the asset movement, enter a (-) negative numeric value in either of the axis fields.

Brainbox Node Group

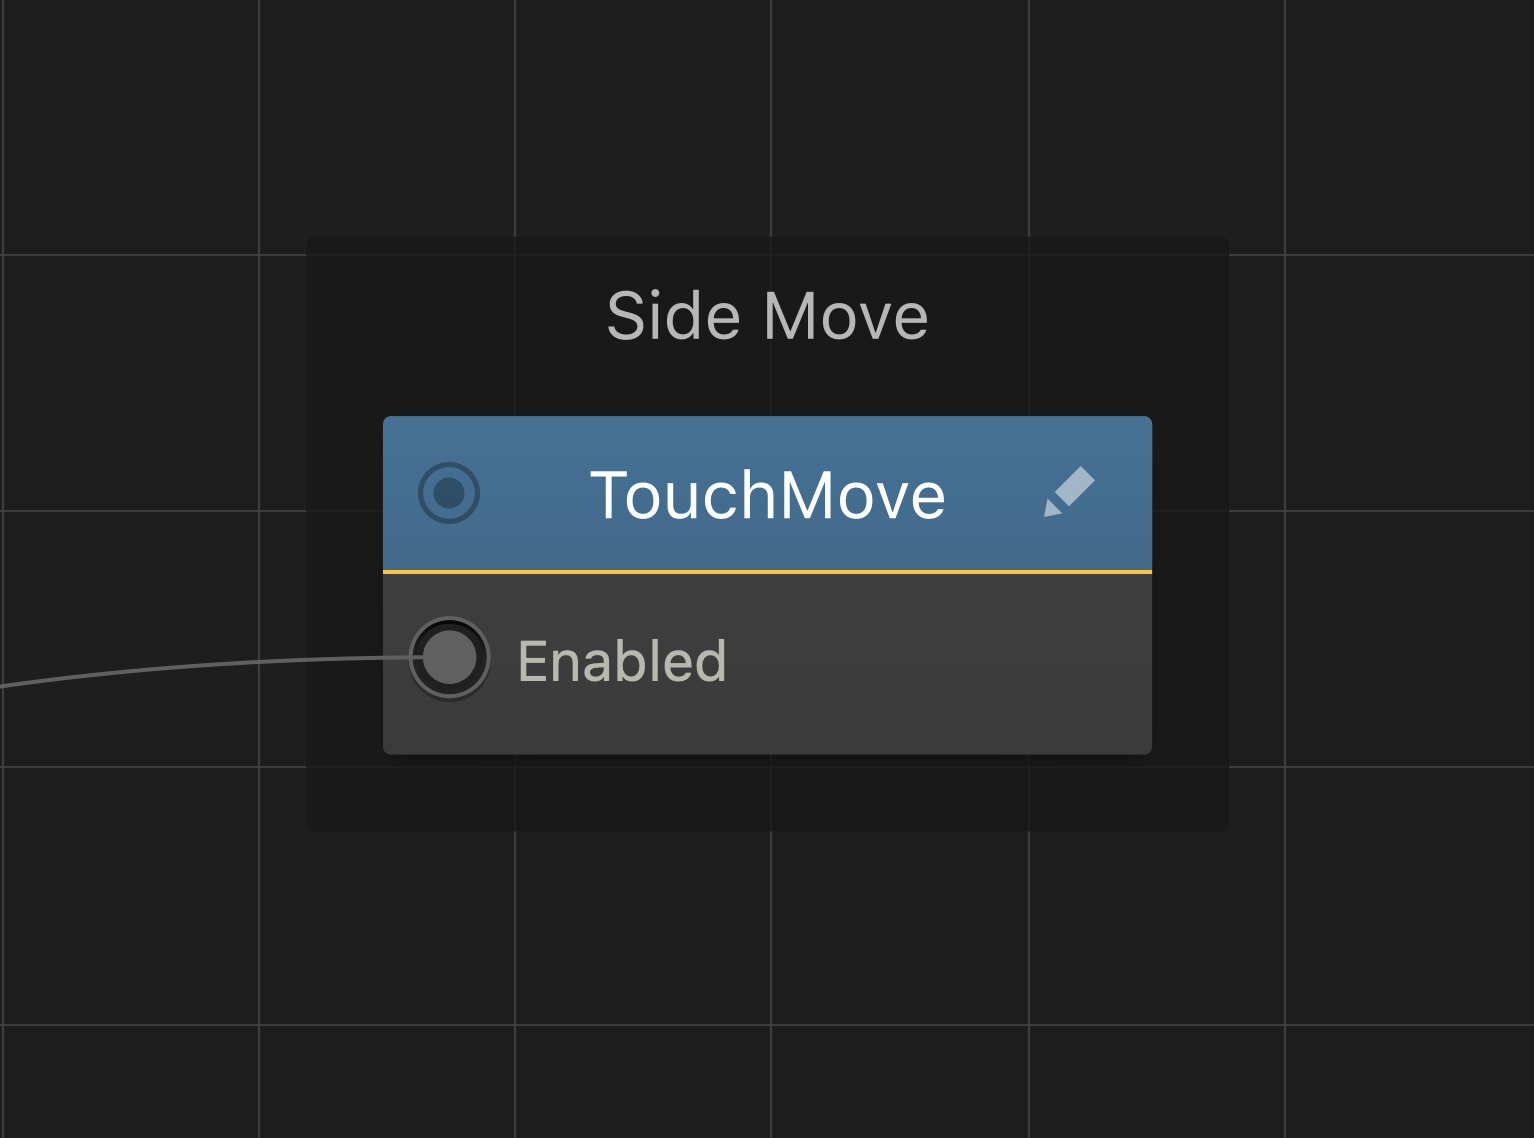
After you add this Brainbox to an asset, the Touch Move node is added to the Node Map of the asset with the Speed values you’ve specified.