Preview and Testing – Buildbox 3 Manual

By |

Preview and Test

You can preview and test the entire game either from the World workspace or UI node workspace or individual scenes (from the World workspace only).

  • To preview a simulation of your entire game as it would look after export, select Run > Preview  button on the Buildbox Menu Bar.
  • To preview an individual scene, do either of the following in the Scene Selector at the bottom of the World workspace:
    • Select the scene and select Run > Preview Selected Scene on the Buildbox menu bar.
    • Solo the (select a scene and press S on the keyboard) and click the Preview button on the Navigation bar.

The Preview window opens with your game or scene loaded where you select the desired preview settings and play the game or preview the selected scene.
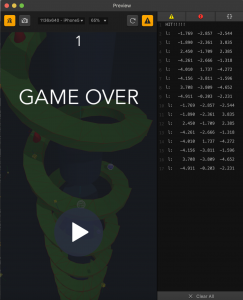
Button Icon Description
Debug Mode Highlights and shows the collision shapes of the assets in different colors during the game preview. See also Change Collision Shapes.
Take Screenshot Allows you to take a screenshot of the game and save it to your desktop as a PNG file. Just click this button while previewing the game at the frame you want an image of.
Set Screen Size N/A Choose the mobile device screen size for your preview.
Zoom N/A Select a percentage value by which to scale the selected screen size for display.
Reload Reloads the game to see the latest changes, if you’ve made any.

Leave the Preview window open, and it will update the preview as you make changes to the game.
Script Logs Opens the JavaScript logs that you can use for troubleshooting, if needed.

Navigation Bar – Buildbox 3 Manual

By |

Navigation Bar

This bar is located at the top of the Buildbox window allows you to navigate to different editors and Node Maps. For example, you’d use this bar to go back from the current workspace to the Mind Map, 3D World, an asset’s Node Map.

After you create a project or open Buildbox, the home and Mind map are the only tabs that appear on the Navigation bar.

After you open a World editor, UI editor or an asset’s Node Map, its tab appears on the Navigation bar.

After you open an asset’s node map, you see its name and a thumbnail of its current appearance.

  • The current tab is always dark with orange text.
  • To navigate to a different editor or node map, click the tab with the matching name or icon.
  • To navigate to the Mind Map, click the tab with its icon or click the current tab.
  • To delete a tab, click the x next to its name.
  • To move and change the order of a tab click and drag it along the navigation bar.

The Navigation bar also provides a set of buttons that allow you to preview your game or test an individual scene, add fonts, and change your project settings.

Button Icon Description
Preview Allows you to preview the game or the solo scene, if selected in the Scene Selector. For details, see Preview and Testing.
Preview Scene This button is present only in the World Editor. It allow you to preview your game by skipping all UI screens and preceding scenes in the World and starting from the current game scene. See also Preview and Testing.


General Workspace Overview – Buildbox 3 Manual

By |

General Workspace Overview

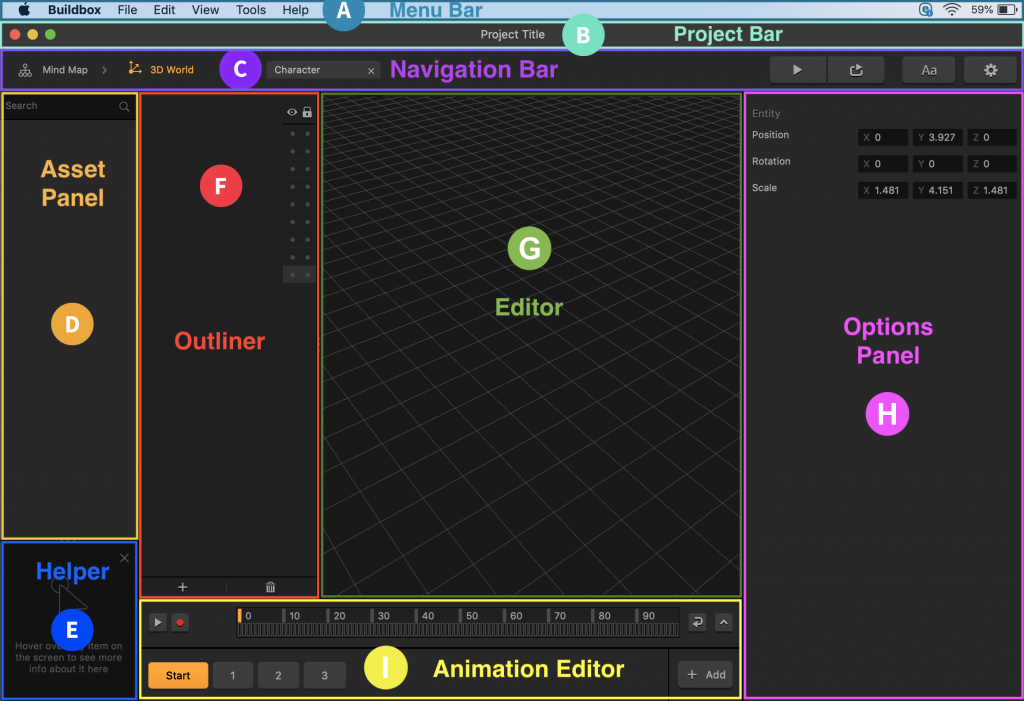
Most Buildbox workspace screens have the same predictable layout and functionality, with some parts present in all screens and others being specific to certain workspaces.

Regardless of the workspace you may have currently selected, a typical workflow starts on the left across the vertical panels.

  1. You select an asset or node in the Asset (Node) panel and drag it to the Editor or Map.
  2. All added items get listed in the Outliner, if it’s present in the selected workspace.
  3. When you select an object in the Asset (Node) panel, the Outliner, or the Editor or Map, its default attributes are displayed in the respective Options panel, where you can modify them, if needed.

Buildbox menu bar

A The Buildbox menu bar allows you to save and open projects, align and randomize scenes, change your workspace display view, access the Atlas Editor, and remove unused audio objects. For individual menu descriptions, see Buildbox Menu Bar.

Project bar

B The project bar displays the name of the selected template or your project. You can change it in the Full Game Name field in the General Project Settings.

Navigation bar

C The Navigation bar allows you to do the following:

  • Navigate between different workspaces as well as know your current located highlighted in orange.
  • Preview your game.
  • Select fonts for text labels in the Font Editor.
  • Customize your project settings.
  • Return to the Mind Map from any other screen.

For details, see Navigation bar.

Asset or Node panels

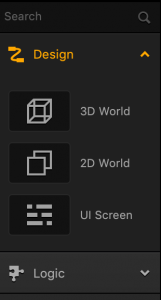
D Depending on the selected workspace, the Asset panel or Node panel displays the World or UI screen assets or nodes available for selection. This can be also the Node panel in the Node Workspace.

  • This is where you’d select the assets or nodes you want to use and drag them to the main editing space, typically a Map or Editor with a grid.
  • Depending on the currently selected workspace, assets may include shapes, characters, buttons, fonts, images, text labels, and so on. They are typically organized into groups that you can collapse/expand to facilitate your navigation in the panel.
  • If needed, you can use the Search field at the top to find the necessary item in the long list of assets or nodes.
  • In the World workspace, you can select each item in the Asset panel and view its attributes in the Options panel on the right.
  • You can also double-click assets here to view their node map.
Helper

E The Helper tool displays context-sensitive help that dynamically changes based on the current location of your cursor on the screen.

  • Hover your mouse over a panel, button, or attribute field, and the Helper displays its brief description.
  • You can minimize or close this tool as needed. Just click the x in the corner or the ? when the Helper is minimized. Alternatively,  use the View > Helper menu option on the Buildbox Menu Bar.
    You may also watch the Helper Tool video, which demonstrates how you can use it to learn about the product features and their intended use.
Outliner

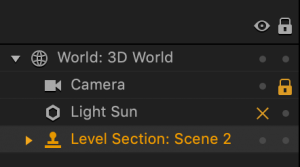
F The Outliner lists all the assets added to the selected World scene or UI screen in the respective Editor.

In the Outliner, you can do the following:

  • Lock or hide the individual items, if needed. Just click the respective option next to the item.
  • Drag the items to change their order.
  • Collapse and expand the items that are organized hierarchically.
  • Delete the added objects from the Editor, except for the camera and light source. Just click the object in the Outliner and press Delete on the keyboard.
    See also World Outliner and UI Outliner.

    You may also watch the Outliner video, which demonstrates the use and functionality of the Outliner in the World workspace.
Editor or Map grid

G This is the main editing area, such as Mind Map, Scene Editor, Font Editor, UI Editor, Node Map, and so on. Depending on the selected workspace, you can do the following on the grid:

  • Select objects and modify their attributes in their respective Options panel.
  • Position, resize, and rotate the assets or connect nodes to each other.
  • Use your trackpad or keyboard to change your view as needed, for example:
    • To zoom in or out, use the Command–Plus sign (+) or Command–Minus sign (-) shortcut keys respectively.
    • To drag the grid with all the items on it, hold Spacebar–Click and drag the grid.
    • To change the angle of the 3D view in the Scene Editor, hold Spacebar–Right-Click and drag the grid to rotate or otherwise change the view of the scene.

To set the desired display in an Editor or Map, you may also use the View options on the Buildbox Menu Bar. Most standard keyboard shortcuts, such as delete, undo, and redo operations, also work in Buildbox. For a list of all the keyboard commands, see Buildbox 3 Keyboard Commands.

Options panel

H The Options panel displays the attributes of the selected object in the Editor or Map, which you can modify to achieve the desired effects and functionality. For details, see Options panel.

Animation Editor

I The Animation Editor is present in the World and UI workspaces where you can animate the selected objects.  For details, see Animation Editor. The World workspace also includes the Scene Selector underneath.

UI Options – Buildbox 3 Manual

By |

UI Node Attributes

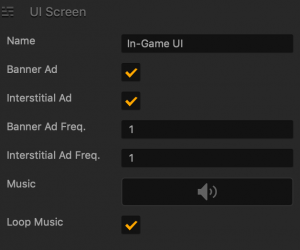
To view the UI node attributes in the Options panel, click a green UI node on the Mind Map.

Option Description
Name Change the name of the selected node that represents a UI screen, for example, Game Over. The name will be updated in the Outliner, on the Mind Map, and on the Navigation bar.

Don’t leave this field blank, as you may find it hard to identify this node or distinguish it from other items in your project.
Ad Banner Select to allow banner ads to appear at the bottom of the selected screen. For details, see Ad Monetization.
Ad Interstitial Select to allow full-screen interstitial ads to appear on the selected screen. For details, see Ad Monetization.
Ad Banner Frequency Define the frequency for the banner, if you have selected one. Enter the number of times you want the ad to appear on the screen whenever it is displayed. If you enter a 0, no ads will be displayed.
Ad Interstitial Frequency Define the frequency for the interstitial ad, if you have selected one. Enter the number of times you want the ad to appear on the screen whenever it is displayed. If you enter a 0, no ads will be displayed.
Music Drag an MP3 file that you want to play when your game starts or when this UI screen is displayed.  See also Add Music and Sound Effects.
Loop Music Select to set the music to play continuously. If you clear the checkbox, the music will play once and stop.

UI Screen Nodes – Buildbox 3 Manual

By |

UI Screen Nodes

Although not required, UI nodes allows you to create user interfaces for menus or in-game overlays. Here you can add buttons, text labels, and images to your game. You can also display ads on the UI screens. For details, see Ad Monetization and FAQs.


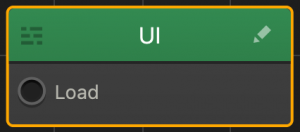
By default, a new UI node has only a Load input, which you can connect to the output of any other node on the Mind Map, a Start node, another UI node, or a 3D World node. See also Node Anatomy.

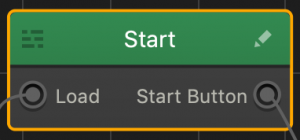
Depending on your UI design, you may add Navigation buttons, such as the Start button, which will result in additional outputs on the UI node itself.

You can connect these additional outputs to the input of either another UI node or a 3D World node. 

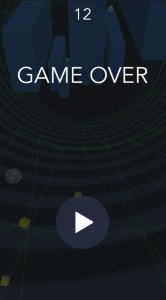
Typically, a game would have a Start UI node, a Game Over node, and a Game UI node that is an overlay that displays the player’s score during a game session. 

Here’s what a UI screen may look like for a Game Over node during a game session:

Adding, Deleting, and Editing Game UI Screens

To add a UI node, do one of the following on the Mind Map:

  • Drag the UI node from the Node panel to the Mind Map.
  • Right-click anywhere on the Mind Map grid and select Add New UI.
  • Duplicate and existing UI—select the node and press D on your keyboard.

To delete a UI, select the corresponding node and press Delete on the keyboard.

To change the UI node attributes in the Mind Map, select the node and make the appropriate changes in the Options panel on the right, where you can add music and ads to each UI screen.

To add buttons, text, player’s score counter, facebook likes, animations, event observer and unlocking logic, you need to go inside the UI node. To open the UI node workspace, do either of the following:

  • Double-click the UI node.
  • Click the Edit icon in the top right corner of the node.

See also Add Control Button.

World Options – Buildbox 3 Manual

By |

World Node Attributes

To view World node attributes, click a World node on the Mind Map.

Option Description
Name Change the name of the selected World, for example, Level 1.

The name will be updated in the Outliner, on the Mind Map, and on the Navigation bar.

Don’t leave this field blank, as you may find it hard to identify this node or distinguish it from other items in your project.
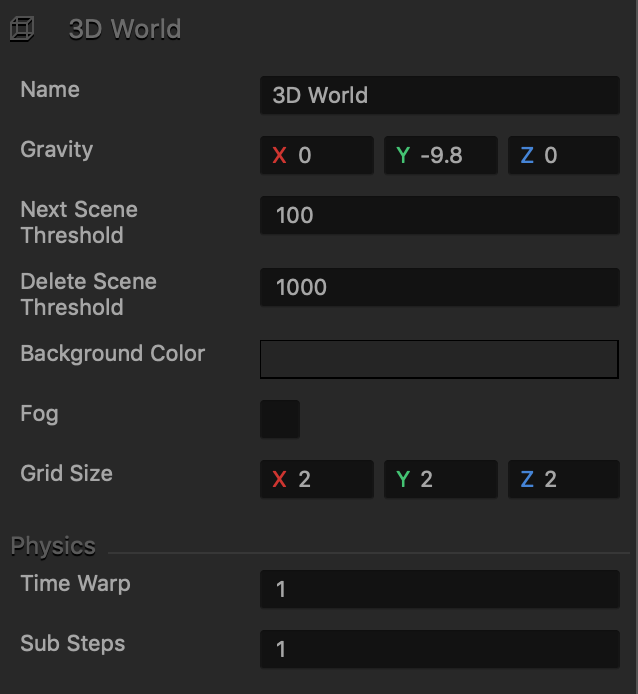
Gravity To create a continuous force that will act on everything as gravity does in the real world, enter a decimal for each axis to specify the direction of the force along that axis. For example, a negative value on the Y axis will make an object fall, whereas a positive value will pull it up.
Next Scene Threshold Enter a numeric value to specify a threshold after which the next scene should be created during a game session.
Deletion Threshold Enter a numeric value to specify a threshold at which the previous scene, which the player has passed, should be deleted during a game session.
Background Color To change the background color of the scenes in the selected game level, click this field, select the desired color from the several options provided in the Colors window, and click OK. See also Change Background Colors and Images in Scenes.

To preview the color, click the Preview button on the Navigation bar.

Fog Select to make fog appear in the distance in the game, so that objects emerge from a mist.
Fog Start Distance

Fog End Distance

These fields appear only the Fog checkbox is selected.

Enter numeric values to set the start and end distance for the fog in the selected world.

Grid Size Enter numeric values to change the size of the cells in the grid in the Scene Editor.
Time Warp Change the game speed, or how fast the object is moving in your game. Increase both default values to speed up the movement and use the Preview window to see the results.

Enter a numeric value to determine the game speed. A value of 1 is normal speed, 0.5 is half speed, 2 is double speed, and so on.

You may have to experiment a bit to find the optimal values for each game.
Sub Steps Enter the additional amount of times physics will be calculated during gameplay.

For example, the default value of 0 allows the game to calculate physics once. A value of 1 allows physics to be calculated

Edit Components Add components from the node section and add custom script nodes for master/controller logic. This is an advanced feature reserved for experienced users.

World Nodes – Buildbox 3 Manual

By |

World Nodes

Each game typically has at least one 3D World node or 2D World Node on its Mind Map.

A World node is a 2D or 3D environment that consists of a series of scenes, which collectively represent a level in your game.

A World node has a Load input, which you can connect to the output of either a UI node or Start node on the Mind Map, and a UI output, which you must connect to the input of a UI node. The connectors between nodes indicate the overall game flow, with each preceding node activating the next node to which it is connected. See also Node Anatomy.

Depending on your game design, you may define multiple transitions and dynamic changes in the game flow based on the user actions by defining your game logic.

Adding, Deleting, and Editing Game Levels

To add more game levels, you need to add more World nodes by doing any of the following:

  • Drag the 2D or 3D World node from the Node panel on the left to the Mind Map.
  • Right-click anywhere on the Mind Map grid and select Add New 2D World or Add New 3D World.
  • Duplicate and existing World—select the node and press D on your keyboard.

To delete a game level, select the corresponding World node and press Delete on the keyboard.

To change the World node attributes in the Mind Map, select the node and make the appropriate changes in the Options panel on the right, which allow you to define a number of critical attributes, such as:

  • The gravity force, which helps you create natural movement of the objects in the game. By default, it is pre-set to -9.8 on the Y axis.
  • The scene background color.
  • The “game speed,” or how fast or slow the object is moving in the game, by increasing or decreasing both Time Warp and Sub Steps values respectively.

To edit scenes, add characters, enemies, obstacles, and other assets inside a game level, you need to go inside the World node and use the Scene Editor. To open the World workspace, do either of the following:

  • Double-click the World node.
  • Click the Edit icon  in the top right corner of the node.

See also How to/FAQs.

Game Start Node – Buildbox 3 Manual

By |

Game Start Node

The Start node on the Mind Map is the root node of your game.

It is a special UI node that loads the game and displays a loading bar on a splash screen to your players, for example, with your logo. You may also use this node to add background music to your entire game.

  • Anything you connect to this node will load immediately after the player begins your game.
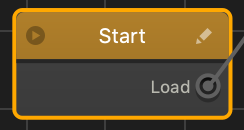
  • The Start node has only one output, Load, which you can link either to a UI node or World node. See also Node Anatomy.
  • You may not duplicate or delete the Start node.

Editing Start Node—Customizing Your Splash Screen

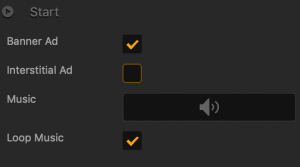
  • To add music, select the Start node on the Mind Map and in the Options panel on the far right, do the following:

    Since ads need to be preloaded when the game starts, banner and interstitial ads added to the Start node on the Mind Map will not appear on the Start UI screen when it is first loaded. They will be displayed only if the player chooses to replay the game. For details, see Ad Monetization.
    Option Description
    Ad Banner Select to allow banner ads to appear at the bottom of the screen.
    Ad Interstitial Select to allow full-screen interstitial ads to appear on the screen.
    Music Drag an MP3 file that you want to play when your game starts. See also Add Music and Sound Effects.
    Loop Music Select the checkbox to set the music to play continuously. If you clear the checkbox, the music will play once and stop.
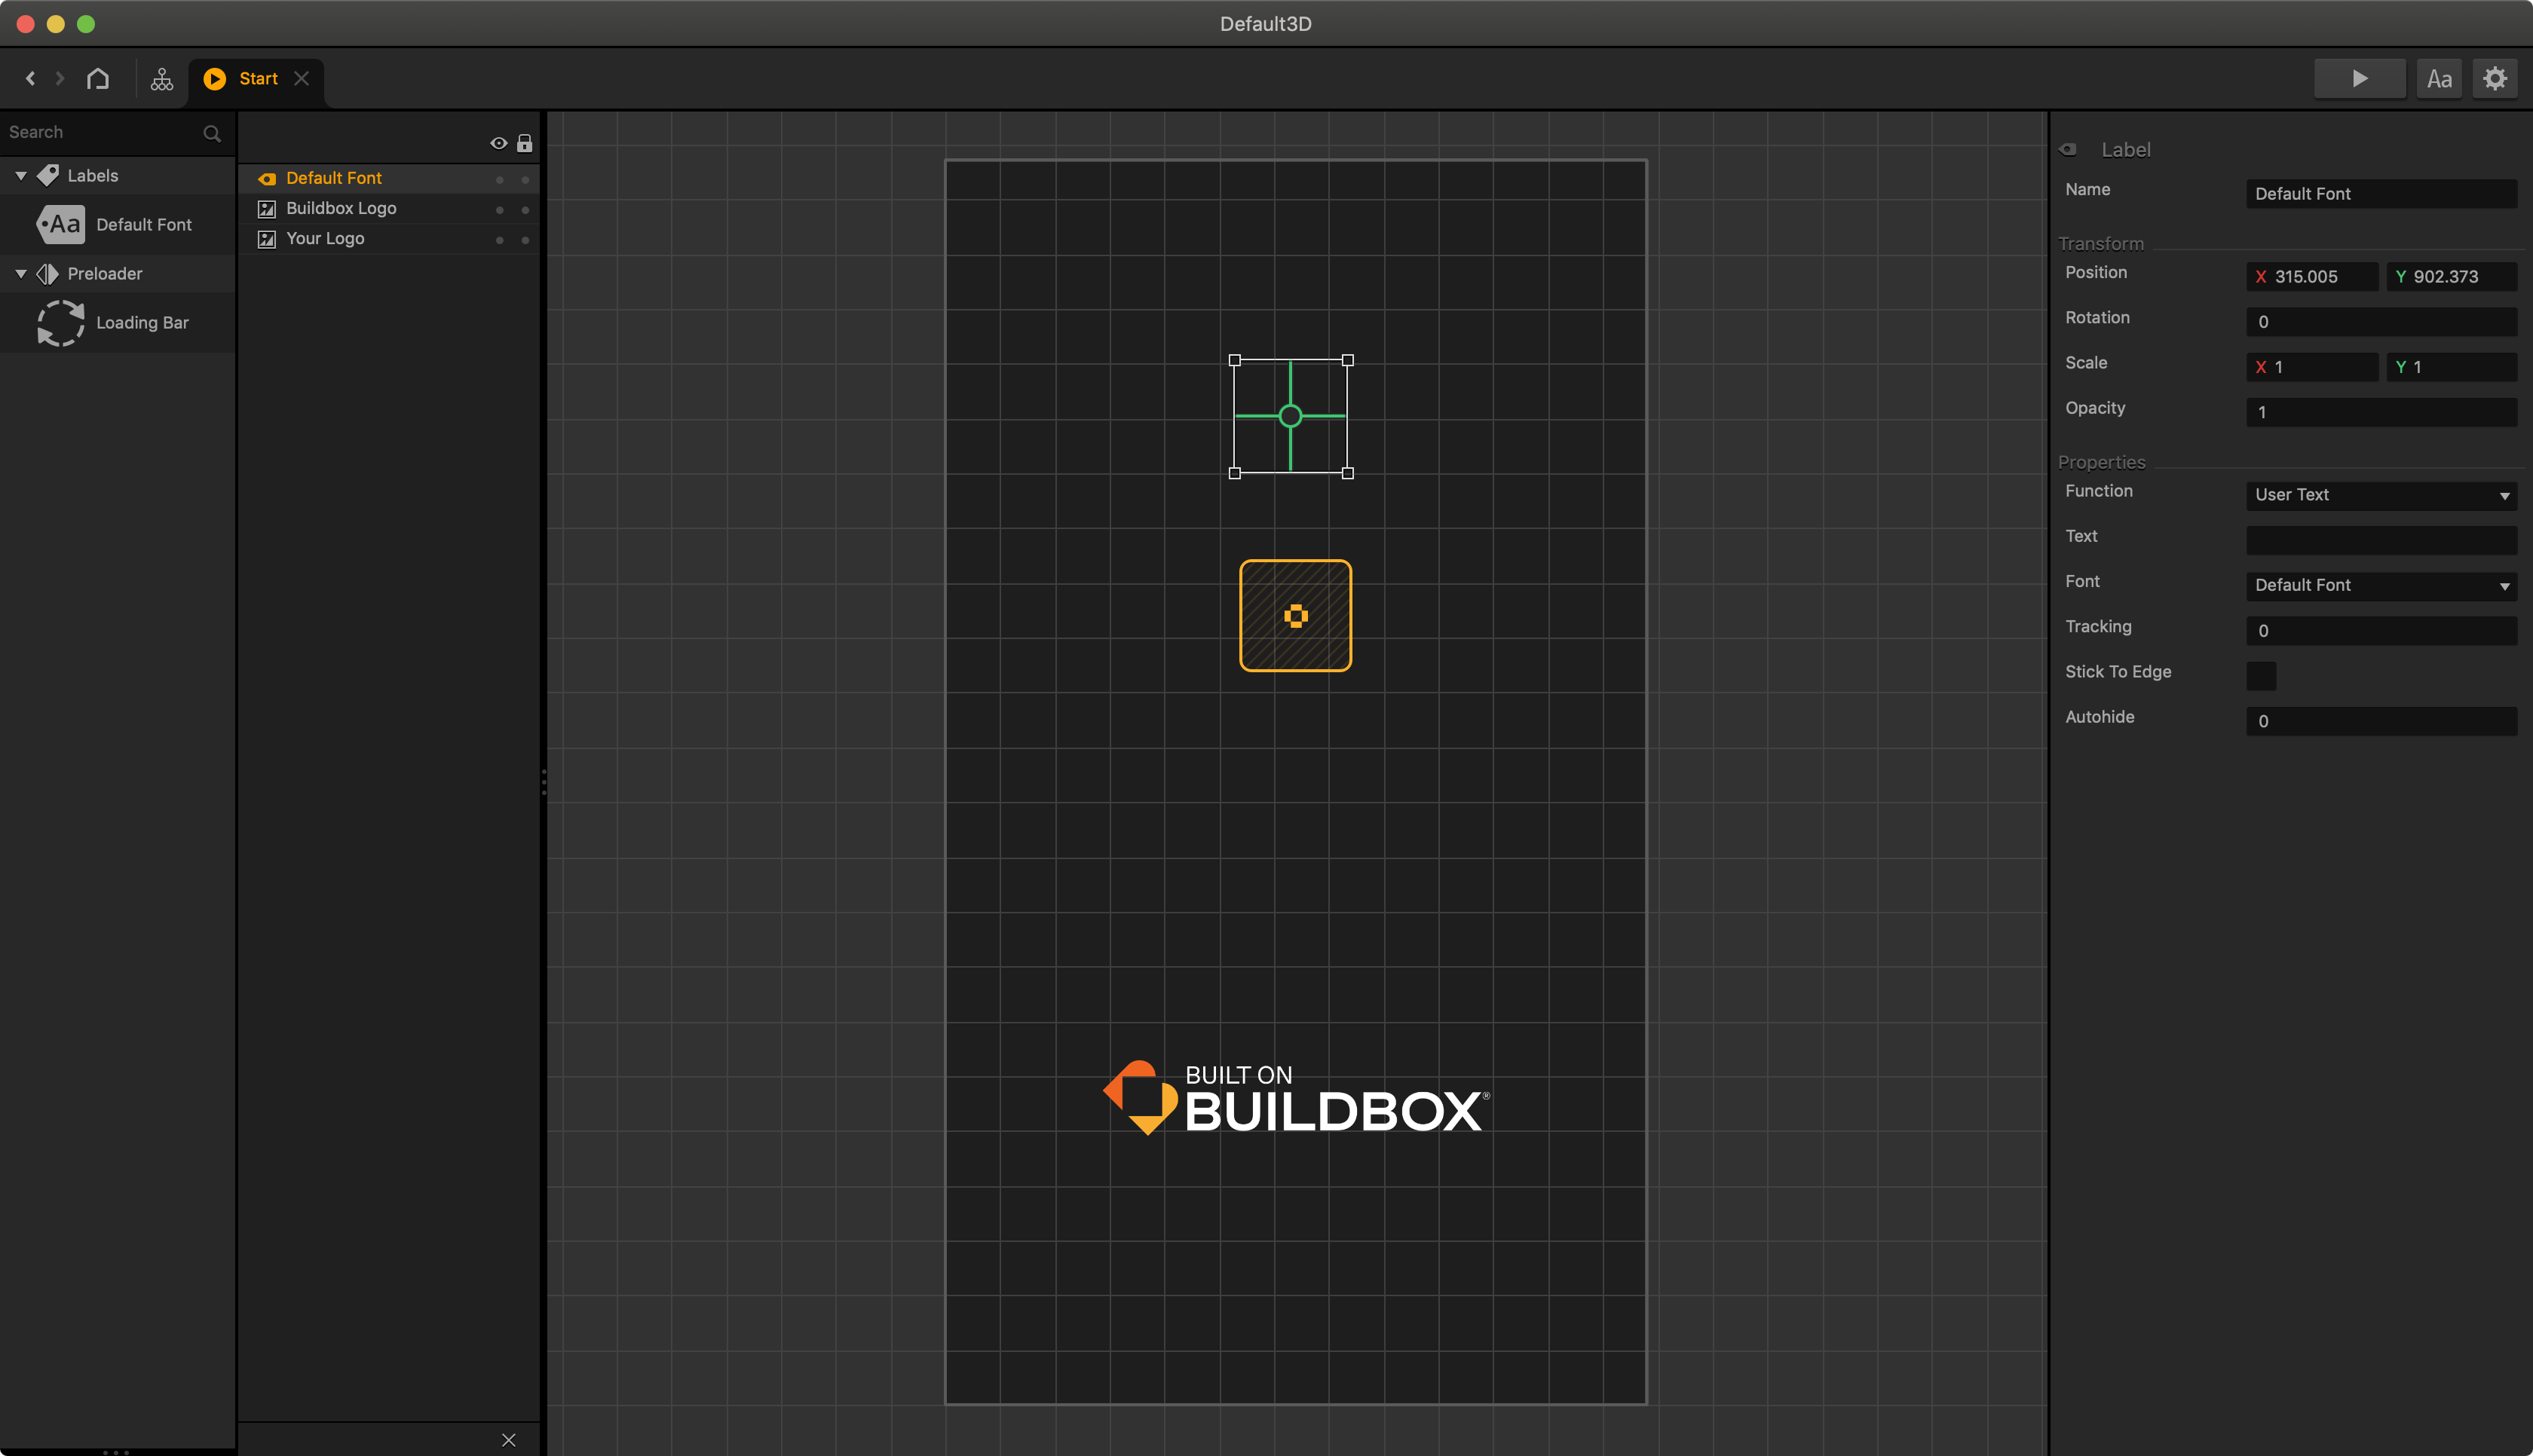
  • To add your logo, remove the Buildbox logo, add text, a loading bar, or make any other changes to the splash screen, do either of  the following to open its UI Editor:
    • Double-click the Start node.
    • Click the Edit icon in the top right corner of the node.
      The Start node UI Editor appears.

    In the Start node UI Editor, drag the appropriate assets from the Asset panel on the left or images from your computer and define their attributes in the respective Options panels, for example, Image Options for the logo.
    See also UI outliner and Sprite Editor.

Only Buildbox Plus and Buildbox Pro users can customize the Start node.

Mind Map – Buildbox 3 Manual

By |

Mind Map

The Mind Map is the very first screen you see when you open a game project or a template.

As its name suggests, the Mind Map allows you to map and organize the flow of your game. It is a graphical representation of the game with visual connections between its nodes, such as UI screens and 3D Worlds, indicating their relationships.

You may also watch the Mind Map video.

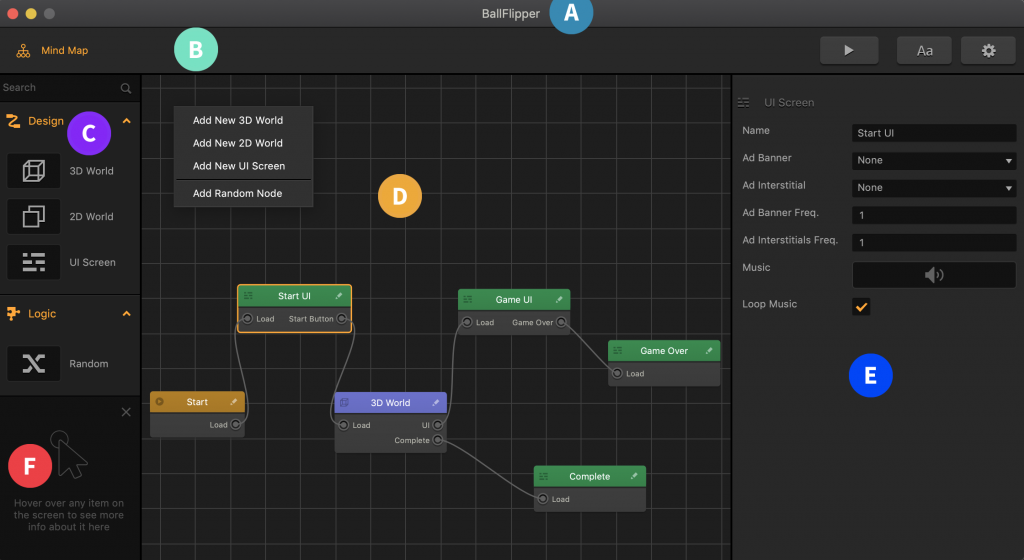
The Mind Map screen consists of the following parts:

  • A The name of the selected template or your project.
  • B The Navigation bar.
  • C The Node panel from which you can drag new nodes to add to the Mind Map.
  • D The Mind Map grid with the game nodes.
  • E The Options panel on the right that displays the properties of the selected node.
  • F The Helper with context-sensitive help.

For details on individual parts and how to work with the Mind Map UI, such as zooming or dragging the grid, see General Workspace Overview.

Mind Map Nodes

At the very least, any game in Buildbox must have two nodes:

  • A Start node, which is basically the root node that will load your game.
    • You can define some of its attributes, such as background music, in its Options panel on the Mind Map. See also Add Music and Sound Effects.
    • To modify the splash screen, for example, to add your own logo or a loading bar, double-click the node make the desired changes in its UI Editor.
  • A 3D World node that consists of a series of scenes and represents a game level.
    Similarly, you can define some of the key attributes for you game level, such as gravity and game speed, in the Options panel on the Mind Map. To create scenes, however, you need to go inside the World node. For details, see World Workspace.

Optionally, you can also add and use the following types of nodes:

  • UI nodes, which allow you to add a user interface or score-keeping game screen overlays.
  • Random node, which you can use to randomize your game flow.

Adding, Deleting, and Editing Nodes

To add more nodes to your game on the Mind Map, do one of the following:

  • Drag the type of node you need from the Node panel to the Mind Map.
  • Right-click anywhere on the Mind Map grid and select Add New World or Add New UI respectively.
  • Duplicate and existing node—select the node and press D on your keyboard.

See also Add a Game Level.

To edit the node attributes on the Mind Map, select the node and update the values in the Options panel on the right.

To go inside a node to edit it:

  • Double-click the node.
  • Click the Edit icon in the top right corner of the node.

The corresponding node Editor is displayed, where you can make the necessary modifications.

To delete a node, select the node and press Delete on the keyboard.

After adding or deleting nodes, make sure the game flow is properly connected.

Making a Simple Video Game with Tutorials

By |

Making a Simple Video Game with Tutorials

Practice makes perfect! The most effective way of exploring Buildbox 3 is the hands-on approach! You can preview and explore the mini-game templates on your own or actually build a simple game by doing the following:

  1. Click the New Game tab on the main screen.
  2. At the top of the Templates panel on the left, click Create New.
  3. Follow instructions in these video tutorials:
    1. Making a simple video, part 1
    2. Making a simple video, part 2
To explore all available tutorials, click the Tutorials tab on the main screen.