Creating Characters – Buildbox 3 Manual

By |

Create Characters

A character is an asset that the camera typically follows in the game, and which the player can control.

To create a character in a game:

  1. On the Mind Map, double-click the World node where you want to add a character.
  2. Inside the World, click Asset Library.
  3. On the Shapes tab, double-click the shape you want to make a character in your game.
  4. Click Asset Library to close it.
  5. In the Asset panel, under Objects, select the shape you’ve just added and drag it over the Characters section above (which may be grayed out, if you don’t have any other characters yet).
    The asset is now added to the Characters list.
  6. Select the shape under Characters.
  7. In the Options panel on the far right, do the following:
    1. In the Name field, type Character or any other name that would help you identify this asset as a character.
    2. In the Collision Group, select Character.
  8. If needed, change the collision shape of the character.

You’ve added a character to your game.

Adding Music and Sound Effects – Buildbox 3 Manual

By |

Add Music and Sound Effects

You can add an MP3 file from your computer to a game in one of the following ways:

  • To the Start node on the Mind Map. The selected music will be added to the entire game.
  • To individual UI nodes on the Mind Map. The music or sound will be played only when the selected UI screen is displayed.
  • To an asset by using the Sound content node in the Node Map.
  • To individual buttons when the player taps and or releases them. For details see UI Buttons.

Drag New Files

  1. Select the appropriate node.
  2. In the respective Options panel, drag an MP3 file from the Finder to the Sound or Music field.
    The file will be added to the selected node or asset.
  3. If you want the music to be played continuously, select the Looped checkbox.

The file you drag will be also added to the audio assets of this project, which means you can select it anywhere else in the project as explained below.

Select Previously Added Files

  1. Select the appropriate node.
  2. In the respective Options panel, mouse over the Music or Sound field, and click the Edit icon.
  3. Select the MP3 audio file you need from the drop-down list.
  4. If you want the music to be played continuously, select the Looped checkbox.

Spotlight Options – Buildbox 3 Manual

By |

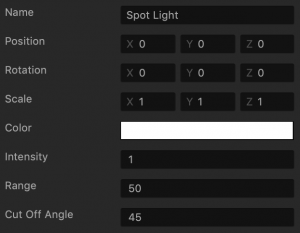
Spot Light Attributes

A spot light is an additional source of light in a game that projects a focused beam of light of a smaller diameter.

A scene can only have a maximum of 7 lights.

To view the spot light attributes in the Options panel:

  1. Inside a World, drag the spot light from the Lights section in the Asset panel to the Scene Editor.
  2. Click the spot light in the Scene Editor or select it in the Outliner.

Option Description
Name Change the name of the light object, only if needed.
Position Enter the appropriate numeric values for each axis to define the location of the light. Alternatively, drag the arrow axis handles to the desired location in the Scene Editor. If needed, for details, see Tools.
Rotation Enter the appropriate numeric values for each axis to define the angle of the light. Alternatively, click the Rotation Tool button and drag the circle axis handles to set the desired angle for the light in the Scene Editor. If needed, for details, see Tools.
Scale Enter the appropriate numeric values for each axis to define the size of the light. Alternatively, click the Scale Tool button and drag the cube axis handles to set the desired size for the light in the Scene Editor. If needed, for details, see Tools.
Color Click this field, select the desired light color from the several options provided in the Colors window, and click OK.
Intensity Enter a numeric to specify the strength or amount of light produced by the light source. The higher the number, the more light will be shed.
Range Enter a numeric value to specify how far the light should be projected.
Cut Off Angle Enter a numeric degree value from 0 to 180 to specify the angle of the light beam.

Asset Options – Buildbox 3 Manual

By |

Asset Attributes

There are two sets of attributes that you can edit for an asset:

Object Attributes

To view these attributes in the Options panel, select a character or an object in the World Asset panel.

The attributes below are always present.

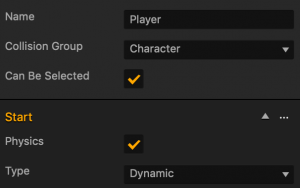
Option Description
Name Change the name of the asset, if needed, for example, Enemy Cone, to indicate the collision group.

Don’t leave this field blank, as you won’t be able to tell what object it is if you hide it in the Outliner.
Collision Group Specify how this asset should be treated when this asset collides into another one during the game (see also If Collide node):

  • None
  • Character—The asset will be treated as a character, which is typically controlled by the player and is followed by the camera.
  • Enemy—The asset will be treated as an adversary of the character.
  • Platform—The asset is treated as a level surface on which the other assets stand, bounce, and so on.
  • Coin—The asset is treated as a collectible item that counts toward the player’s score.
Can Be Selected This checkbox appears only for character assets. For details, see Creating Characters.

Select this checkbox if you want to allow the player to select the character during a game session.

Physics Select this checkbox to add a collision shape to the selected asset and define its movement and other aspects of its physics.
Type Select the type of physics to define the motion of the selected asset and its collision shape in particular:

  • Static—Select to make the object or character static. It won’t move at all.
  • Dynamic—Select to make the object or character move naturally, adhering to the laws of gravity.
  • Kinematic—Select to make the object or character move around and interact with other objects but without considering the laws of gravity or any other physical forces that cause objects to move.

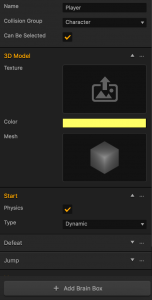
Additional sets of attributes may appear depending on the type of the asset and behavior added to it, for example, as shown below.

You can expand/collapse each section. The attributes inside correspond to the respective Asset nodes.

If you delete a set, the corresponding asset nodes will be removed from the asset’s Node Map.

To add the attributes, you can do either of the following:

  • Add the nodes directly on the Node Map of the asset.
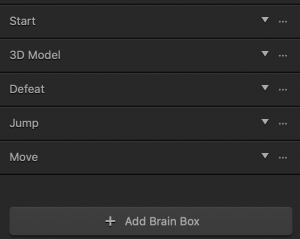
  • Use the Add Brain Box button at the bottom of the panel and select the desired movement or behavior from the list.
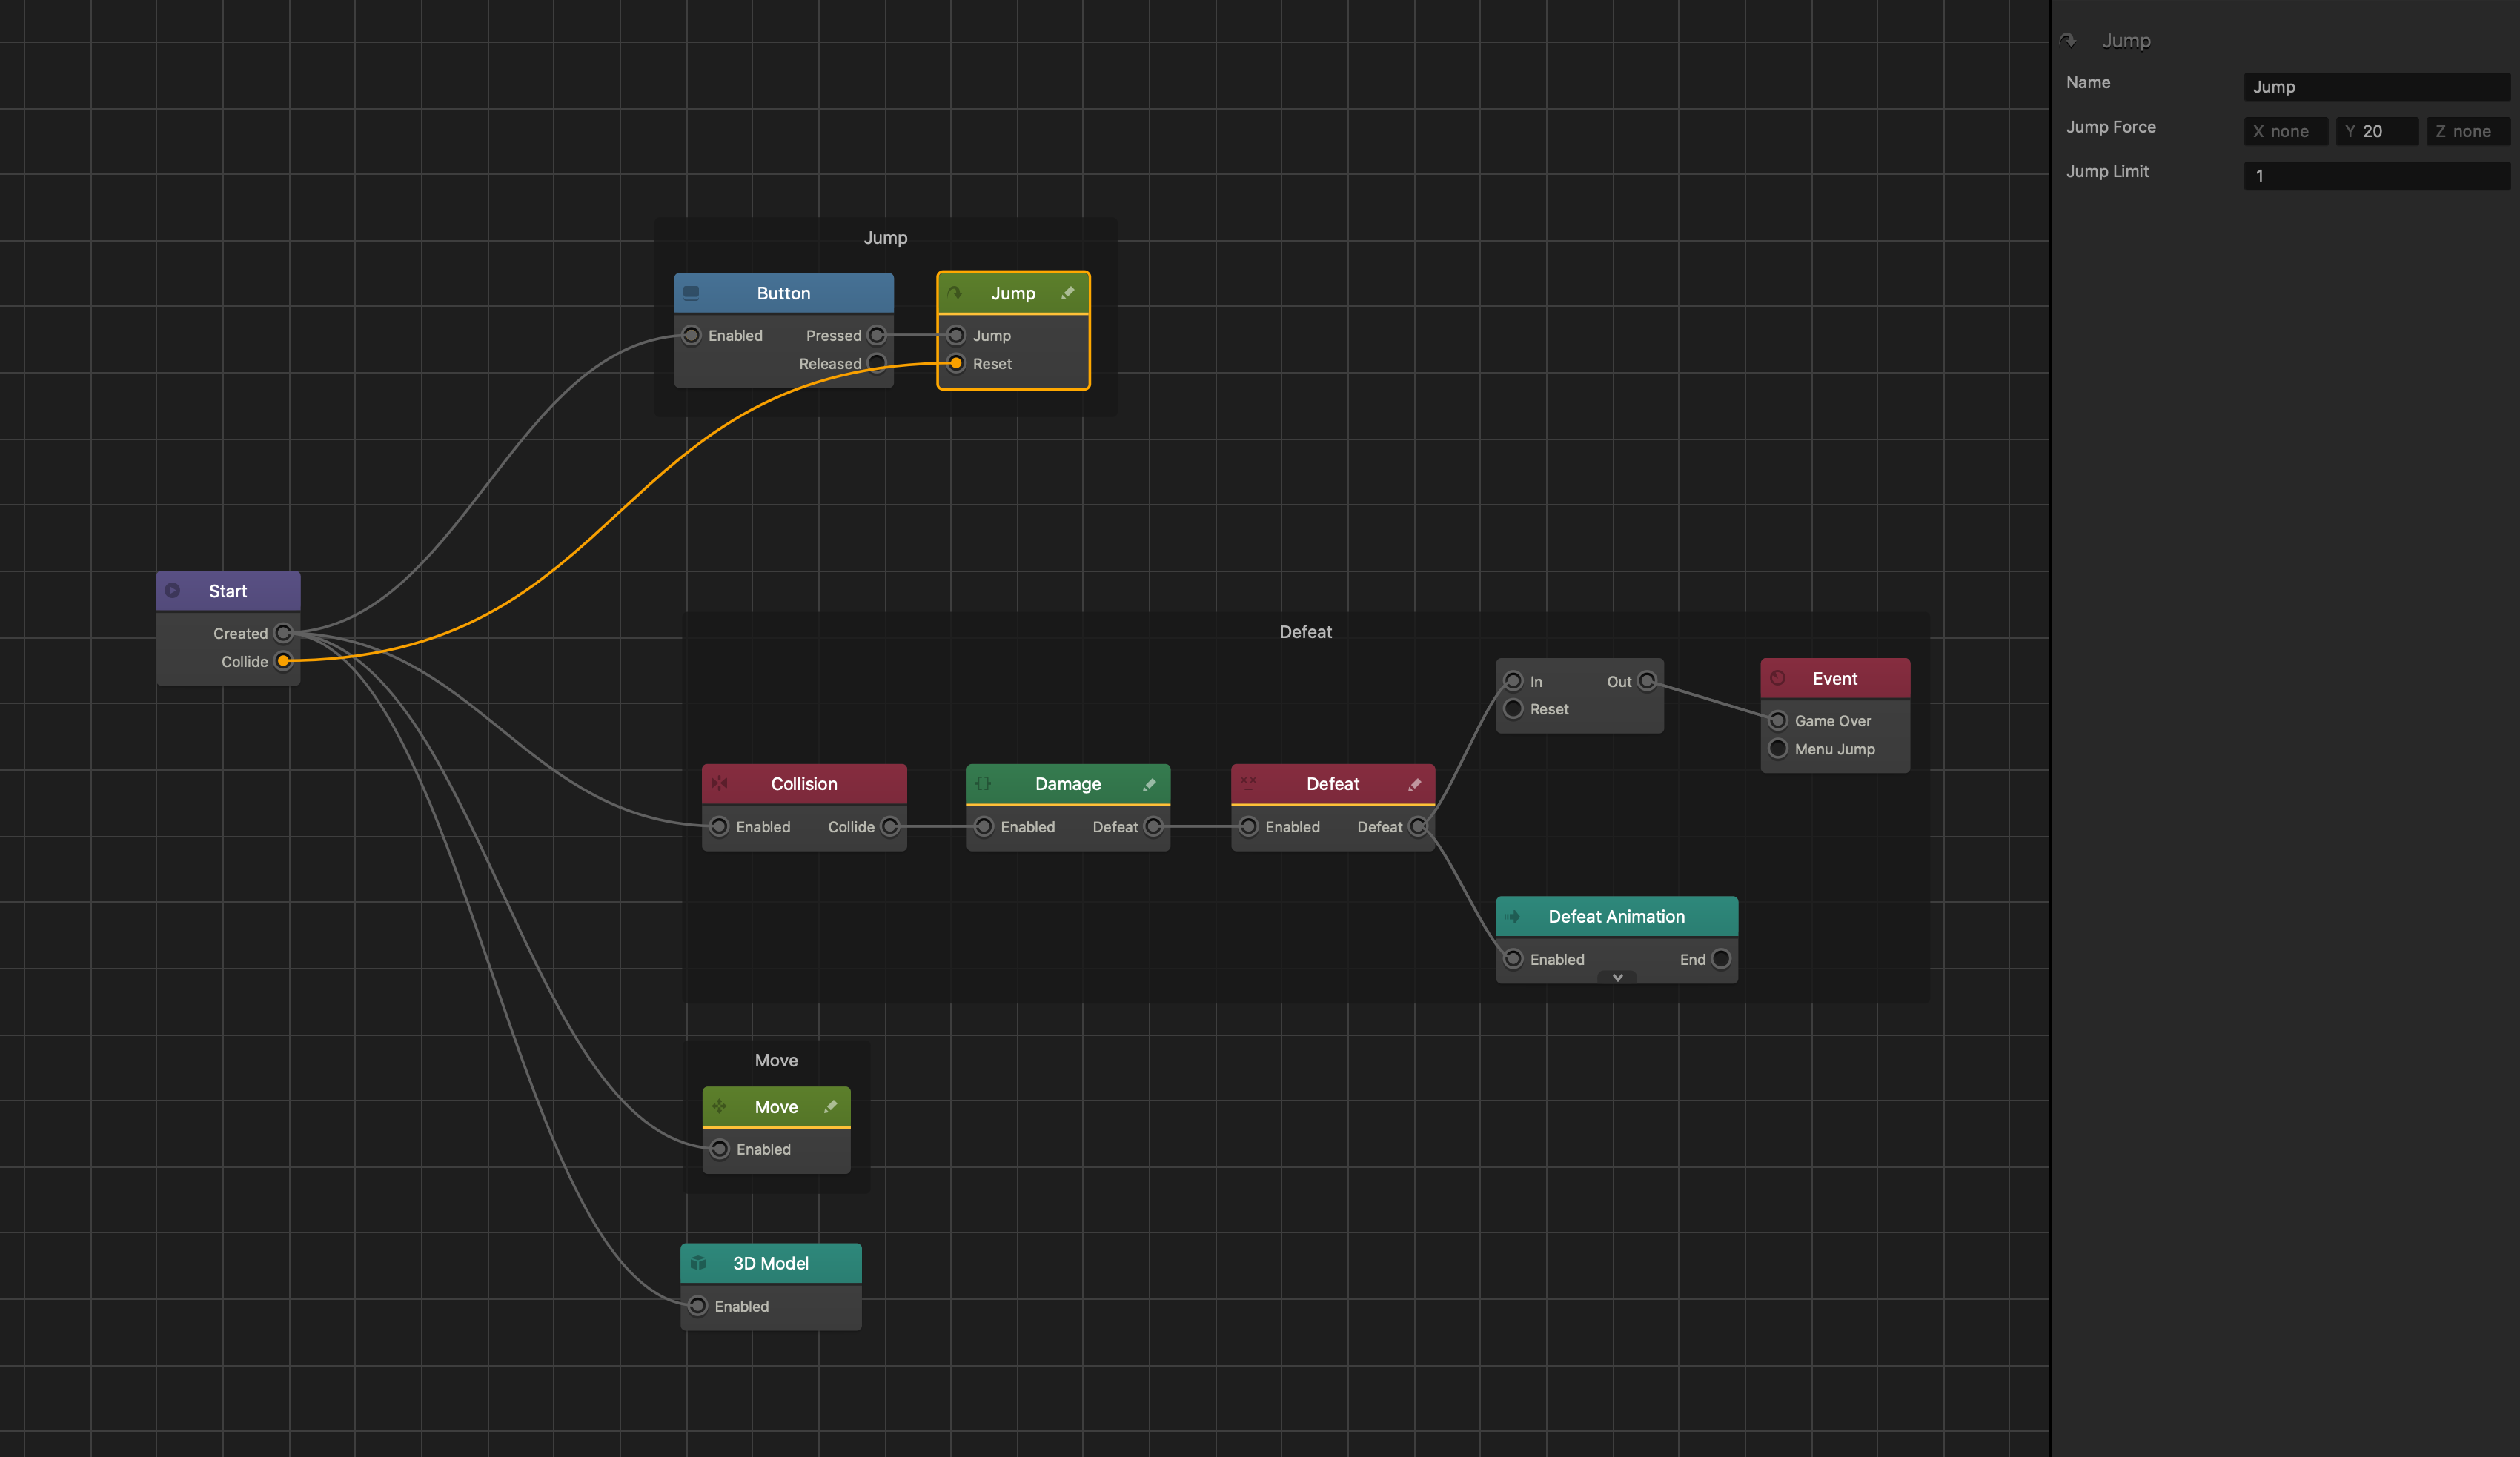
    When you add a Brain Box, a group of corresponding nodes with predefined functionality appears on the asset’s Node Map, for example:

For more information about Brainboxes, see Brainboxes.

Below are the 3D model node attributes. For the rest of the node attributes, see the respective Asset nodes.

Option Description
Texture Drag an image file you want to use to add texture to the asset.

To edit the image, mouse over the field, click the Edit icon that appears, and make the necessary updates in the Sprite Editor. Click Save when done.

Color Click this field, select the desired color from the several options provided in the Colors window, and click OK.

If you have added texture to the asset, this color will be applied under the texture.

Mesh Mouse over the field, click the Edit icon that appears, and select the appropriate shape for the asset in the Mesh Manager. Click Save when done.

You may also add a new basic shape from the Asset Library to begin with.

Entity Attributes

To view these attributes in the Options panel, select a character or any object in the Scene Editor.

Option Description
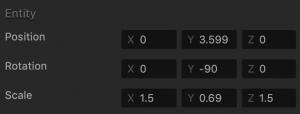
Position Enter the appropriate numeric values for each axis to define the location of the asset. Alternatively, drag the arrow axis handles to the desired location in the Scene Editor. If needed, for details, see Tools.
Rotation Enter the appropriate numeric values for each axis to define the angle of the asset. Alternatively, click the Rotation Tool button and drag the circle axis handles to set the desired angle for the asset in the Scene Editor. If needed, for details, see Tools.
Scale Enter the appropriate numeric values for each axis to define the size of the asset. Alternatively, click the Scale Tool button and drag the cube axis handles to set the desired size for the asset in the Scene Editor. If needed, for details, see Tools.

Camera Options – Buildbox 3 Manual

By |

Camera Attributes

The camera is one of the most important elements in a 3D game. It acts as the player’s eyes, letting them see the game world from different viewpoints. In Buildbox, the camera is typically located behind and above the player and rotates around the character as it turns.

There are several important Follow camera attributes, such as Follow Position, Rotation, Offset, and others, that you need to define to make the camera move around as desired in your game.

To view the camera attributes in the Options panel, inside a World, click the camera in the Scene Editor or select it in the Outliner.

Option Description
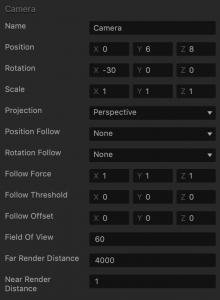
Name Change the name of the camera object, only if needed.
Position Enter the appropriate numeric values for each axis to define the location of the camera. Alternatively, drag the arrow axis handles to the desired location in the Scene Editor. If needed, for details, see Tools.
Rotation Enter the appropriate numeric values for each axis to define the angle of the camera. Alternatively, click the Rotation Tool button and drag the circle axis handles to set the desired angle for the camera in the Scene Editor. If needed, for details, see Tools.
Scale Enter the appropriate numeric values for each axis to define the size of the camera. Alternatively, click the Scale Tool button and drag the cube axis handles to set the desired size for the camera in the Scene Editor. If needed, for details, see Tools.
Projection Select the type of view you want players to see in the game.

  • Perspective (default for 3D games) projection—the camera will render objects the way they appear in the real world, that is, with far-away objects appearing smaller than those nearby.
  • Orthogonal projection—the camera will render all objects at the same scale, with no sense of depth.
Position Follow Select which object you want the camera to follow in the game:

  • None (the camera will remain stationary)
  • Game Path—the camera will follow the path specified by the Start and End Points.
  • Character—the camera will follow a character asset.
Rotation Follow Select which object’s rotation you want the camera to match in the game:

  • None
  • Game Path—the camera will match the rotation of the game path along all three axes.
  • Game Path Horizontal—the camera will match the rotation of the game path only on the X axis. In other words, the camera will not roll up and down. It will rotate sideways only (or twist).
  • Character—the camera will rotate so that it is always facing the character.
Follow Force Enter a numeric value from 0 to 1 to specify how fast you want the camera to follow its target object (selected in the Position Follow field) along each axis, with 1 indicating 100%.
Follow Threshold Follow threshold is an invisible boundary that defines a distance within which the character can move around without being followed by the camera. As soon as the character crosses the threshold, the camera will start following it again.

Enter a numeric value to specify the follow threshold for the camera.

Follow Offset Enter a numeric value for each axis to specify the distance between the camera and its target object, which should be kept during the game.
Field of View Specify the extent of the observable game world that the player can see on the screen during the game. The higher the number, the farther away is the camera, and the larger is its field of view.

This is not the same as the camera view. To see the camera view, click the Camera button on the Scene Editor toolbar and see how it changes as you enter different values in this field. See also Change the Game Camera View.
Far Render Distance

Near Render Distance

Specify the maximum and minimum distance of objects in a 3D scene that are drawn by the rendering engine to balance performance and visuals. See also the Editor settings for the project.

Light Sun Options – Buildbox 3 Manual

By |

Light Sun Attributes

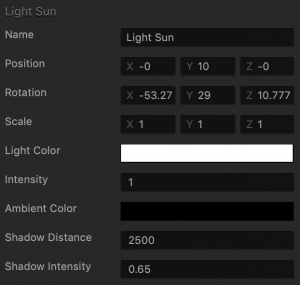
The Light Sun is the main source of light in every scene. To view the light sun attributes in the Options panel, inside a World, click the light sun in the Scene Editor or select it in the Outliner.

You may also watch the Light Sun video.
Option Description
Name Change the name of the light object, only if needed.
Position Enter the appropriate numeric values for each axis to define the location of the light. Alternatively, drag the arrow axis handles to the desired location in the Scene Editor. If needed, for details, see Tools.
Rotation Enter the appropriate numeric values for each axis to define the angle of the light. Alternatively, click the Rotation Tool button and drag the circle axis handles to set the desired angle for the light in the Scene Editor. If needed, for details, see Tools.
Scale Enter the appropriate numeric values for each axis to define the size of the light. Alternatively, click the Scale Tool button and drag the cube axis handles to set the desired size for the light in the Scene Editor. If needed, for details, see Tools.
Light Color Click this field, select the desired color from the several options provided in the Colors window, and click OK.
Intensity Enter a numeric to specify the strength or amount of light produced by the light source. The higher the number, the more light will be shed.
Ambient Color Click this field, select the desired color from the several options provided in the Colors window, and click OK.
Shadow Distance Enter a numeric value to specify the distance from the Path Anchor to the end of where shadows are being drawn. Beyond this distance, shadows will not show up.
Shadow Intensity Enter a decimal from 0 to 3 to specify how dark you want the shadow to be.

Buildbox 3 Glossary

By |

Glossary

A | B | C | D | E | F | G | H | I | J | K | L | M | N | O | P | Q | R | S | T | U | V | W | X | Y | Z

A

Asset
Any image, 3D model, or object used in game Worlds. Organized into Objects and Characters in the Asset panel.
Atlas
A collection of PNG images added to the project. Any time you add an image file to an asset or node, it is stored and referenced in an atlas. See Atlas Editor.
Attributes
The properties of an asset that you can edit in the Options panel.

B

Banner Ad
An image or video advertisement that occupies the bottom portion of a UI in a game.
Brainbox
Applies a gameplay feature or specific functionality with customizable attributes to an asset.

C

Character
An asset in a game that is followed by the camera.  See Creating Characters.
Coin
A type of collision group assigned to an asset that awards points to players when a Character collides with an object.
Collision Group
A group of assets that allows If Collide nodes to be affected by all assets sharing the same group name. Selected in the Options panel of the asset. See also FAQs.
Collision Shape
The surface area around an object that gets affected when two objects from different collision groups collide. See Changing Collision Shapes.
Components
The attributes of a World or UI node that can be edited in the Options panel.

D

Damage
A numeric value used to subtract from the Health of objects. For details, see Manage Health, Damage, and Defeat.

E

Enemy
A type of collision group assigned to an asset that can harm a Character. See Adding Enemies.
Event
Something that happens during the game or session that is used to determine when the game should advance to another level or UI.

F

Field of View (FOV)
The extent of the observable game world that the player can see on the screen during the game.

G

Gravity
The amount of constant force applied to an axis within a 3D World, which allows creating natural movement of an object. Defined in the Options panel of a World node.

H

Health
A set number of hit points that determines how often an Object or Character can receive damage before they been defeated. For details, see Manage Health, Damage, and Defeat.
Hull
A “solid” shape that reflects only the outer frame of the selected shape, without details such as a hole in a torus, for example. No objects can go through a Hull collision shape.

I

Interstitial Ad
A short video advertisement that plays after a user enters a User Interface a set number of times. Defined in the Options panel of a UI node.

L

Label
An asset that displays text on the screen. Labels listed in the Asset panels are basically fonts added to the game using the Font Editor.
Level
A World, or a series of Scenes. See also World Nodes.

M

Mesh
The surface of a 3D model that defines its shape. Selected in the Options panel of the asset.
Mind Map
A graphical representation of the game with visual connections between its nodes, such as UI screens and 3D Worlds, indicating their relationships. The Mind Map allows you to map and organize the flow of your game and includes the root Start Node that loads your game.
Mute
A muted scene is an inactive scene marked with a red line underneath the scene name in the Scene Selector. A muted scene will not show up in the preview or in the final export.

N

Node
A visual representation of a coded functionality within an asset. Each node can connect with another node through their input and output connections. See Node Anatomy.
Node Map
A graphical representation of the asset’s behavior with visual connections between its nodes. It may include individual nodes from the Node Panel or Brainboxes.
Node Connector
The line that connects the input of one node to the output of another.

O

Object
Any type of asset used in game Worlds that is not a Character. The player can control objects, but the game camera cannot follow them.
Outliner
A panel in the World and UI Node workspaces that lists the added assets in hierarchical order. See General Workspace Overview.

P

Path Anchor
The path between the end point and the starting point that an object will follow in a scene.
Physics
The checkbox in the Start Node of an asset that is used to determine if an object’s position and rotation is affected by gravity or other objects.
Platform
A type of collision group that defines an object as a platform or surface that an Object or Character can move on or land on while Gravity is active.
Point
A value that is awarded to players based on progression within the game.
Point Light
An additional source of light that you can add to a scene from the Asset panel, which emits light within a given diameter range. See also Point Light Options.
Point of Origin
The X, Y, and Z axes of an object that is placed within the scene.

R

Randomizer
A type of node that allows the user to move to a random UI or World.

S

Score
The total amount of Points the player has earned throughout the game. See Adding Score.
Skeleton
A collection of bones or joints bound to an asset and organized in a hierarchy that allows the asset to bend, twist, and change form while animating. See also Importing 3D Animations or Sub-Scene Node.
Spot Light
An additional source of light that you can add to a scene from the Asset panel, which projects light onto a surface. See also Spotlight Options.
Sprite
A two-dimensional image that is made up of small images combined into one larger image at defined X and Y coordinates.
Solo
A solo scene is the only active scene in a World marked with a blue line underneath the scene name in the Scene Selector. A solo scene will be the only scene that is shown in the preview and the final export. To solo a scene, right-click the scene name and select Solo.
Sub Steps
A numeric value that sets the amount of motion being displayed on a screen. Defined in the Options panel of a World node.

T

Template

This term may refer to either of the following:

  • Game Template: A pre-built game of a specific genre that you can use to quickly make games of the same type. See Exploring Buildbox.
  • Font Template: Creates a 2D text area with font and color properties that can be edited in the Font Editor.
Texture
An image that is applied to the entire surface of a 3D model. Selected in the Options panel of the asset.
Threshold
A numerical value that defines a limit before a specific attribute becomes active. For example, see the threshold settings for adding and deleting scene during a game session in the Options panel of a World node and the Follow Threshold in the Camera Options.
Time Step
How often physics is being calculated per second. Defined in the Options panel of a World node.
Time Warp
A numeric value that defines the speed of time in a World. Defined in the Options panel of a World node.

U

UI (User Interface)
A type of node on the Mind Map that allows you to create menus and overlays with in-game information, for example, points, health, and so on. See UI Nodes.

W

World
A special type of 3D environment node that represents a game level on the Mind Map. A world contains all Assets within a game, and is organized into sections called Scenes. See World Nodes.

Node Panel – Buildbox 3 Manual

By |

Mind Map Node Panel

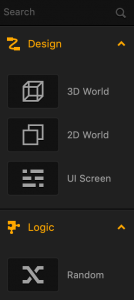
The Node panel on the Mind Map allows you to add new World and UI nodes to your project.

Just drag the type of node you need to the Mind Map, define its attributes in the Options panel on the far right, and link to the general game flow. See also Mind Map Nodes.

If you are still new to Buildbox, consider exploring the product functionality and features before adding new nodes. Specifically, make sure you are familiar with the following types of nodes:

To learn more about the node anatomy, see Node Anatomy.

As your expertise grows, you may use this panel to add logic to your game flow, for example, to randomize the transitions to next levels of UI screens with the help of the Random node. For details, see Logic.

Options Panel – Buildbox 3 Manual

By |

Options Panels

Whenever you select a node in the Mind Map, an object in the Asset panel in a World, the camera in the Scene Editor, a button in a UI node workspace, a node on the Node Map, or any other item in a Buildbox workspace, its attributes appear in the panel on the far right. You can edit these attributes to define the desired game settings like physics or object appearance and behavior as needed.

Here’s what you need to know about the Options panel attributes:

  • Most fields have default values that in most cases will create optimal game experience, especially if you are using a template to get started.
  • You can use the default values as guidelines for making minor adjustments as needed.
  • Any changes you make are automatically saved and applied throughout the entire project.

Here’s a list of the Options panels that you may need to work with:

For asset node attributes, which appear in the Options panel in the Node Map, see Node Reference.

Project Settings – Buildbox 3 Manual

By |

Project Settings

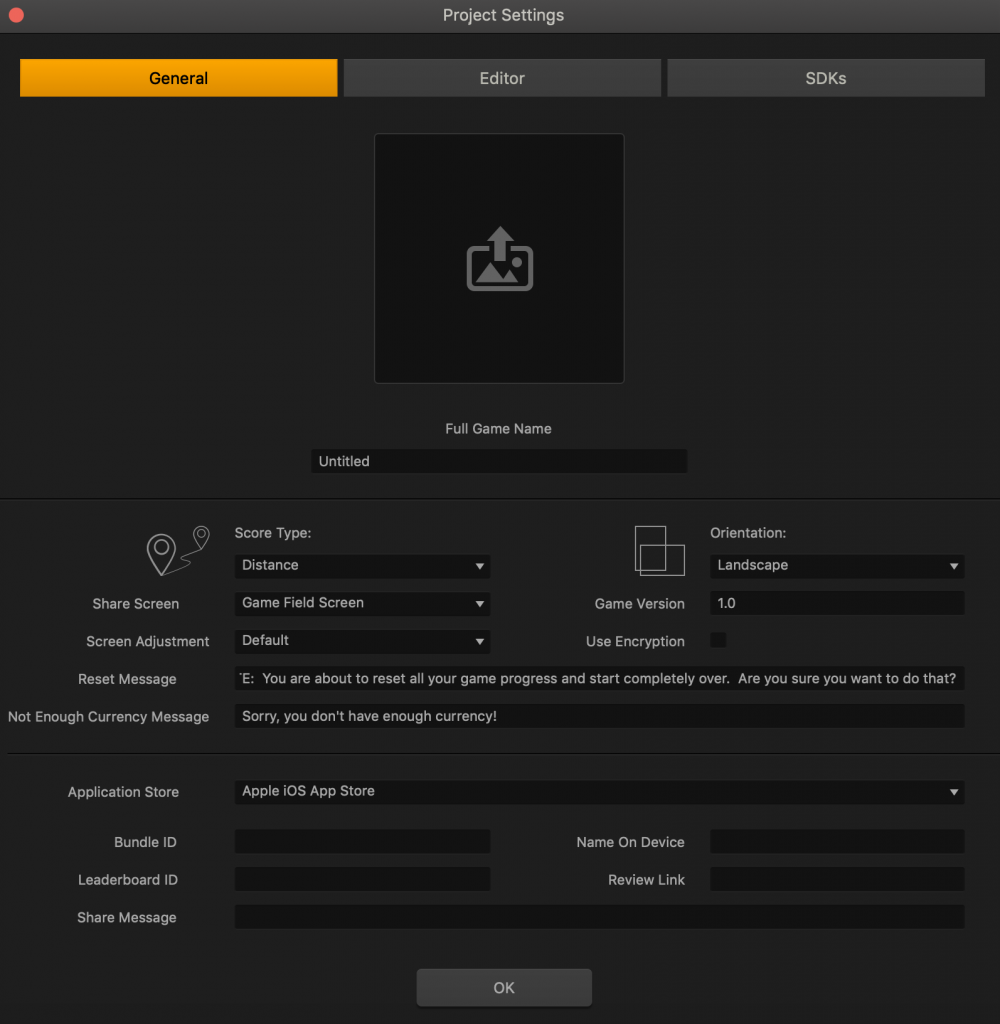
To configure your project information, metadata, scoring options, and other settings for your game to prepare it for export, select File > Project Settings on the Buildbox menu bar.

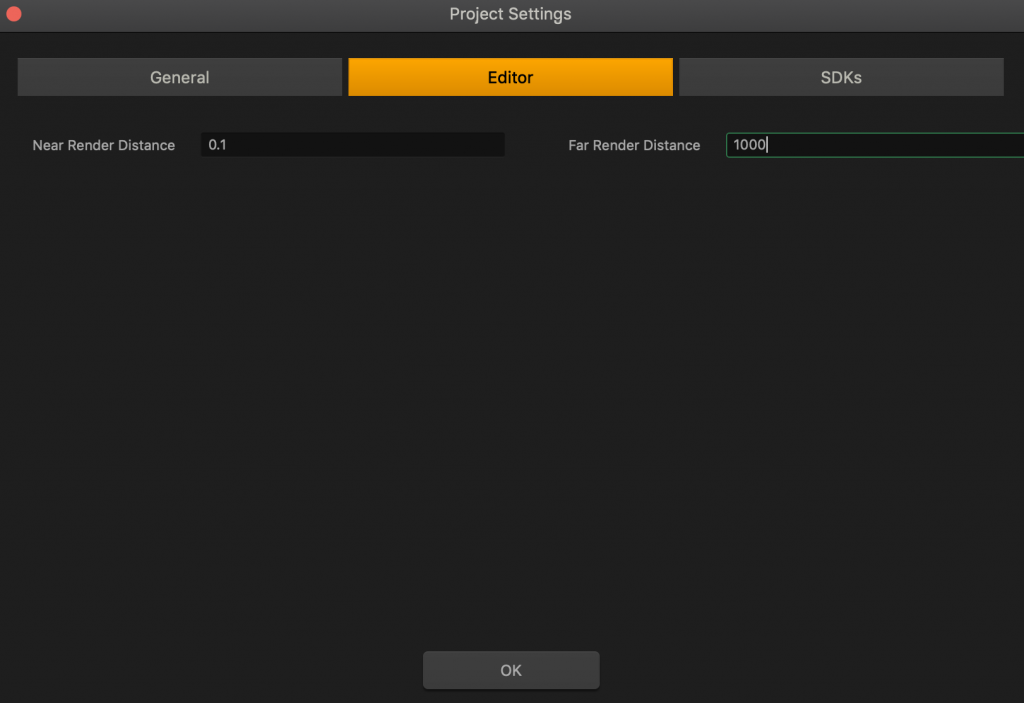
A window opens with three sets of settings:

General

Use this tab when creating and exporting project.

You may also watch the Project Settings video that provides a high-level overview of the options on this screen.
Setting Description
Game Icon Drag a square PNG file with your game icon image, which will appear on the player’s mobile device. The image corners will be automatically rounded, so no additional editing is required.
Full Game Name Enter the name of your game.
Score Type Select what you want scoring to be based on in your game:

  • Distance—(Default) How far the player traveled in a World.
  • Coins Collected—The number of coins collected in a World.
  • Points Collected—The number of points collected in a World.
Orientation Select screen orientation for your game:

  • Landscape (horizontal)
  • Portrait (vertical)
Game Version Enter your game version for version control when submitting updates to App Stores.
Use Encryption Select to encrypt your game file to prevent other developers from stealing or remaking your game.
Share Screen Select which game image to use for sharing on social media:

  • Game Field Screen—A game play screenshot, which is typically one of the last scenes played before entering the UI where the share button is present.
  • Game Over Screen—The UI screen that is connected to the Game Over Event Observer.
Screen Adjustment Select how to scale the screen image for sharing on social media:

  • Default—Classic Buildbox scaling.
    This automatically sets the screen resolution game size for iPhone, iPad, or iPhoneX.
  • Fit to Height—Scale image to fit the screen height. The sides will be cropped and will adjust as needed to reflect aspect ratio changes.
    For example:
  • Fit to Width—Scale image to fit the screen width. The top and bottom will be cropped and will adjust as needed to reflect aspect ratio changes.
    For example:
  • Auto
    If you can create an image that fits the iPhone 5, iPhoneX, iPad resolutions, use it. Otherwise, create a separate image for each resolution.
Reset Message Enter a warning and confirmation request message to be displayed when the player presses the Reset Game button in the game.

For example, “IMPORTANT: You are about to erase all your game progress and start over. Are you sure you want to do that?”

Not Enough Currency Message Enter a warning message to be displayed when the player does not have enough currency to make a purchase in the game.

For example, “It looks like you don’t have enough currency to complete this purchase.”

App Store There are several App Stores for different devices to which you can export your game. You can select one App Store at a time, enter the required information, and save your settings for all of them at once. When you export a game to an App Store the corresponding settings will be used.

Editor

Setting Description
Near Render Distance These settings apply to the Scene Editor where you edit your game Worlds. This is helpful when you have very large scenes and need to see most of the scene in the Editor. See also World Workspace.
Far Render Distance
SDKs

Use this tab to add custom ad networks for monetizing your game. If you use Buildbox’s easy ad monetization solution (AppLovin), there is no need to add anything in this tab; it will be added for you automatically on export. For details and instructions, see Ad Monetization.

  • Here is a guide on adding a custom ad network.
  • If you have multiple networks added, ads will be first displayed from the network that is listed first.
  • You can change the order of the networks by dragging their entry using the handle in the top-left corner.
    • If you do not add AppLovin to the SDK list, it will be automatically added at the bottom of the list on export. You can add AppLovin and reorder it to change this.
  • To delete the custom ad network, click x in the top-right corner of the entry.