Object Start Node – Buildbox 3 Manual

By |

Object or Character Start Node

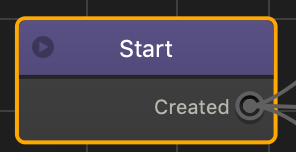
Just like the Start node on the Mind Map is the root of the game, the Start node on the Node Map is the root node of the selected object or character. This is where you can enable physics for the asset, select its collision shape, define its movement, and so on.

The Start node has only one output, Created, which is always linked to at least one node, a 3D Model node that defines the mesh of the asset.

You may not duplicate or delete the Start node.

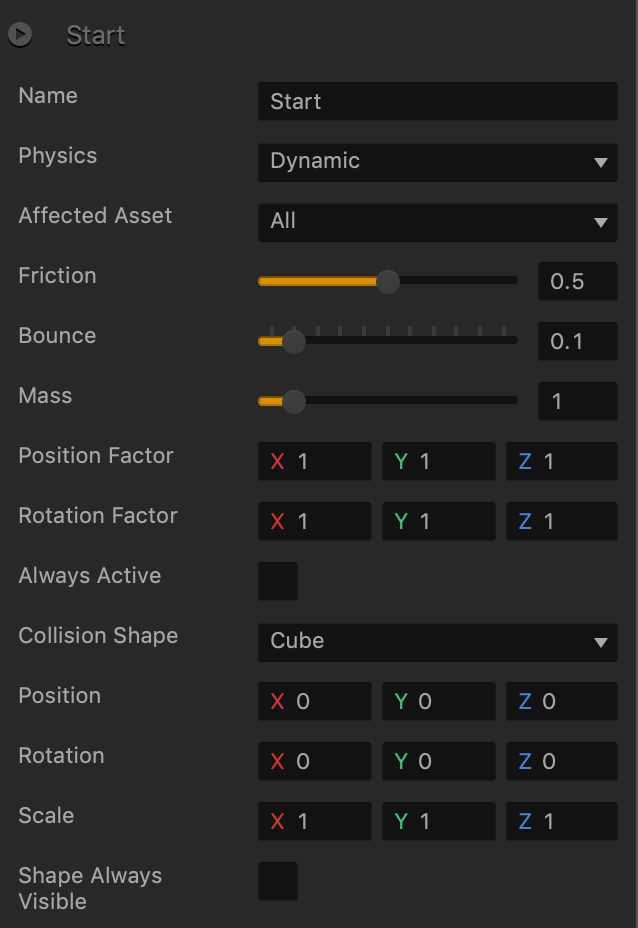
Start Node Attributes

Option Description
Name Change the name of the Start node on the Node Map for the selected asset, if needed.
Physics To apply physics to an asset, select one of the following types of physics:

  • None—the asset will not have physics.
  • Static—allows other objects to collide with this asset like that of a wall. It will not move nor does it adhere to gravity.
  • Dynamic—makes the object or character move naturally, adhering to the laws of gravity.
  • Kinematic—makes the object or character move around and interact with other objects but without considering the laws of gravity or any other physical forces that cause objects to move.
Collision Shape Select the desired collision shape for the asset:

  • Cube
  • Sphere
  • Cylinder
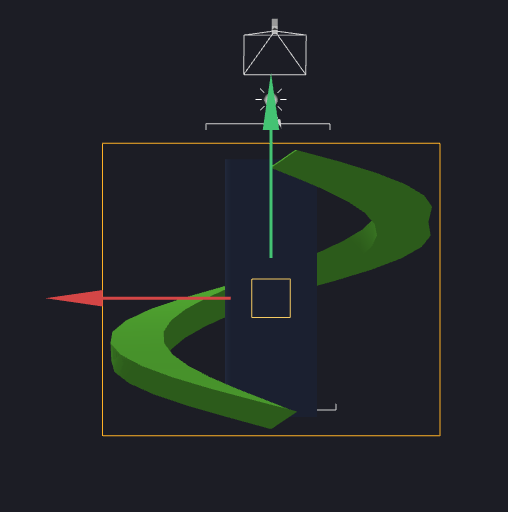
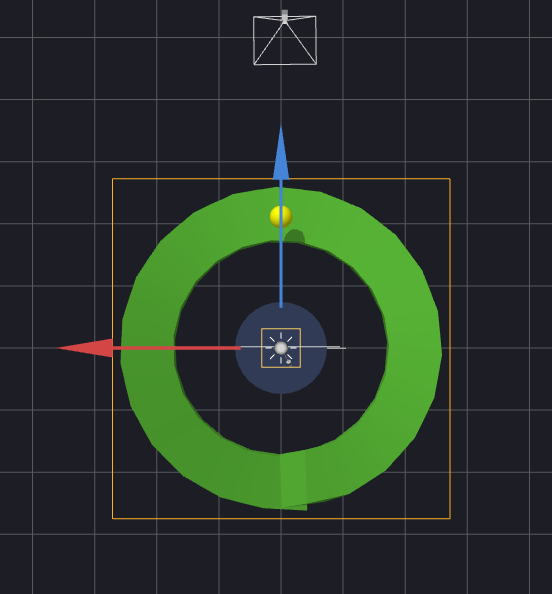
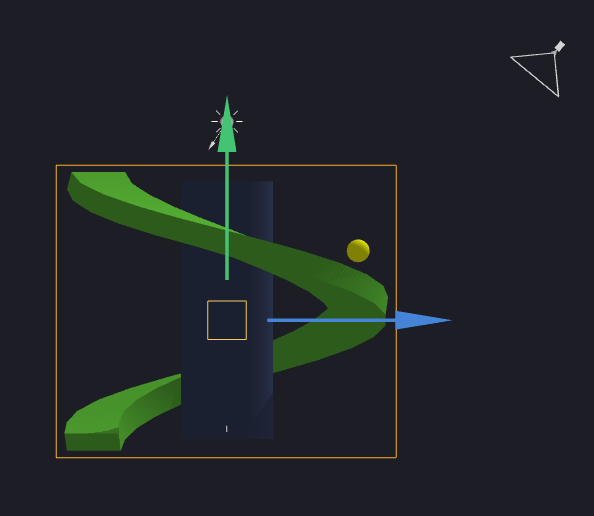
  • Mesh—A sophisticated shape, with outer and inner vertices created to reflect the shape details, such as a hole in a torus, for example, which would let objects go through it during a collision.
  • Hull—A “solid” shape that reflects only the outer frame of the selected shape, without details such as a hole in a torus, for example. No objects can go through a Hull collision shape.

If you select Mesh or Hull, make sure to select a custom shape in the Collision Mesh field below.

Collision Mesh This field appears only if Mesh or Hull is selected as the Collision Shape.

Mouse over the field, click the Edit icon that appears, and select the appropriate shape for the asset in the Mesh Editor. Click Save when done.

Position Enter the appropriate numeric values for each axis to define the location of the collision shape.

Alternatively, you can later click the button in the Scene Editor and drag the arrow axis handles to the desired location. If needed, for details, see Tools.

Rotation Enter the appropriate numeric values for each axis to define the angle of the collision shape.

Alternatively, you can later click the button in the Scene Editor, then click the Rotation Tool button, and drag the circle axis handles to set the desired angle for the collision shape. If needed, for details, see Tools.

Scale Enter the appropriate numeric values for each axis to define the size of the collision shape.

Alternatively, you can later click the button in the Scene Editor, then click the Scale Tool button, and drag the cube axis handles to set the desired size for the collision shape. If needed, for details, see Tools.
Friction Drag the slider or enter a 0-1 decimal value or to specify the amount of movement resistance when the asset is sliding across a surface.
Bounce Drag the slider or enter a 0-1 decimal value to specify the ratio of the relative speed of the asset after and before a collision.
Mass Drag the slider or enter a numeric value to specify the mass of the object.
Position Factor Enter a numeric value of 0 or 1 to limit the movement of the object or character along the axis:

  • 1—The object can move freely.
  • 0—The object will be locked in the selected position.
Rotation Factor Enter a numeric value of 0 or 1 to limit the rotation of the object or character along the axis:

  • 1—The object can rotate freely.
  • 0—The object will be locked in the selected rotation angle.
Always Active As part of Physics calculation optimization, the engine disables game characters if it perceives them as not moving anymore. When the player touches an inactive character disabled by the engine, the character usually “wakes up” and becomes active again. In some cases, however, it will remain inactive.

To prevent this from happening, and to set a character always active, even if it doesn’t move, select this checkbox.

Shape Always Visible Select this checkbox to always show the collision shape in the scene.

Customizing Nodes – Buildbox 3 Manual

By |

Customizing Nodes

There are some types of nodes that you can customize directly on the Node Map. These nodes have an Edit icon in the top-right corner of their title.

There are several ways you can customize a node when you click the Edit icon:

Adding Inputs and Outputs

To add or remove inputs and outputs in a customizable node:

  1. On the Node Map, double-click the node you want to modify.
  2. Click the Edit icon in the top-right corner of the node.
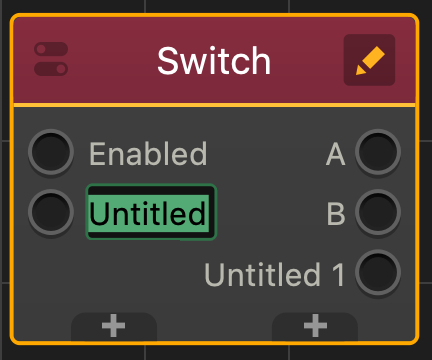
  3. Click a plus (+) sign that appears at the bottom of the node to add an input or output respectively.
  4. To rename an input or output, click Untitled and type the appropriate name.
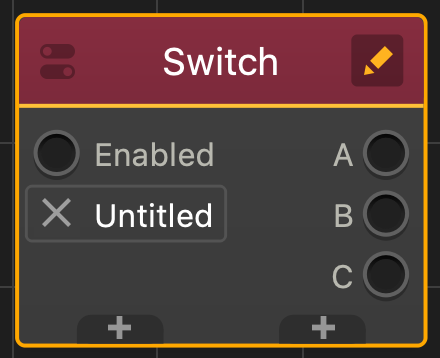
  5. To remove an input or output, mouse over its name and click the X next to it.
  6. When done, click anywhere on the Node Map to exit the edit mode.
  7. Connect the new input or output to the other nodes as needed.

Adding Images

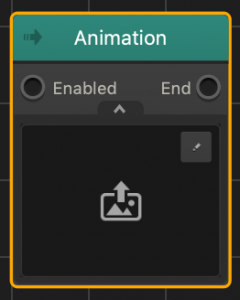
For some nodes, you can also add an image file directly to the node, for example, to the Animation node. Just click the drop-down arrow at the bottom and drag the desire file to the image area.

Adding Attributes

To add an attribute to a customizable node:

  1. On the Node Map, double-click the node you want to modify.
  2. Click the Edit icon in the top-right corner of the node.
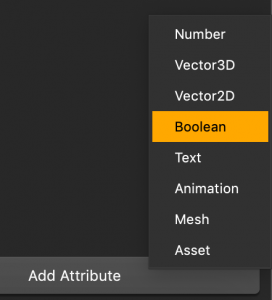
  3. In the Options panel on the right, at the bottom, click the Add Attribute button and select the desired attribute.

    A new Untitled attribute field of the selected type appears in the panel. For attribute field examples, see Attribute types below.
  4. Click the Untitled label, delete the text, and type the name for the attribute and enter the desired value for it.
  5. Click anywhere on the Node Map to close the edit mode.

Attribute Types

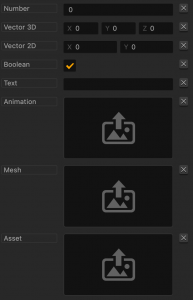
Here’s an example of all attribute fields that you can add to a customizable node.

Attribute Name Allows you to
Number Enter any numeric values.
Vector3D Enter numeric values for each of the 3D axes.
Vector2D Enter numeric values for each of the 2D axes.
Boolean Add a checkbox for boolean values.
Text Enter any alphanumeric values.
Animation Add an image file and create an animation.
Mesh Open the Mesh Manager and add a mesh to the node.
Asset Open the Asset Manager and add an asset to the node.

Removing Attributes

You can remove any attribute from a customizable node, except the Name field.

To remove an attribute from a node:

  1. On the Node Map, double-click the node you want to modify.
  2. Click the Edit icon in the top-right corner of the node.
  3. In the Options panel on the right, click the X next to the attribute that you want to delete.
  4. Click anywhere on the Node Map to close the edit mode.

Node Anatomy – Buildbox 3 Manual

By |

Node Anatomy

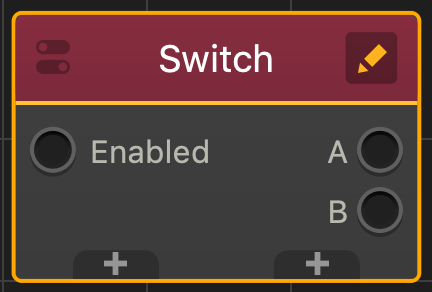
Whether they are used on the Mind Map or Node Map, all nodes in Buildbox have the same overall layout.

Appearance

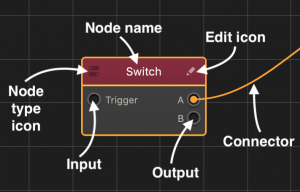
  • All nodes have a colored title that indicates the category and at least an input or an output below.
  • Aside from the colored background, each node title consists of two parts:
    • A node icon in the top-left corner that indicates the type of the node in the same node category.
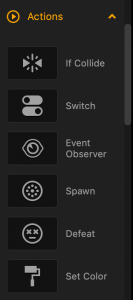
      NOTE: This is the same icon that is displayed in the Node panel from which you can add nodes to the map, for example, for a Switch node shown above. This icon also appears under your mouse cursor when you drag a node from the Node panel to the Map.
    • The name of the node, which you can change in the respective Options panel, if necessary.

Customizability

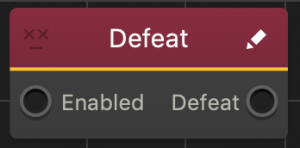
Some nodes are customizable, which is indicated by the Edit icon in the top-right corner.

  • In object or character nodes, clicking the icon allows you to customize their code by using JavaScript, add attributes, and/or modify inputs and outputs. For details, see Customizing Nodes.
  • In World and UI nodes, it opens the respective World and UI workspaces where you can edit the nodes.

Functionality

Nodes must be connected, with each preceding node activating the next node to which it is connected. On the Mind Map, the connectors between World and UI nodes indicate the overall game flow. On the asset Node Map, the connectors between different nodes define the looks and behavior of the asset under specific conditions.

Node connections are made between node outputs and outputs. Here’s what you need to know about them:

  • All nodes, except the Start nodes, have at least one input on the left.
  • Some nodes may also have one or more outputs on the right.
  • A node must have at least one connector linking its output to the input of another node.
  • You may not link an output to another output and vice versa, only output to input.
  • You can add multiple connectors from one output.

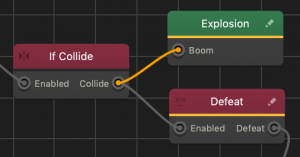
For example, to see how the If Collide and Defeat nodes are used, see Health, Damage, and Defeat.

Node Map Workspace – Buildbox 3 Manual

By |

Node Map Workspace

To define the behavior of an asset in the game in response to the player’s actions, enable physics, as well as modify the associated game flow logic, you may need to add a few nodes on its Node Map.

To access the Node Map of a character or object:

  1. On the Mind Map, double-click the 3D World node where you want to modify an asset.
  2. Inside the 3D World, on the Asset panel, double-click the asset, for example, the character asset in your game.

The corresponding Node Map appears with the selected asset’s name added to the Navigation bar as a highlighted tab.

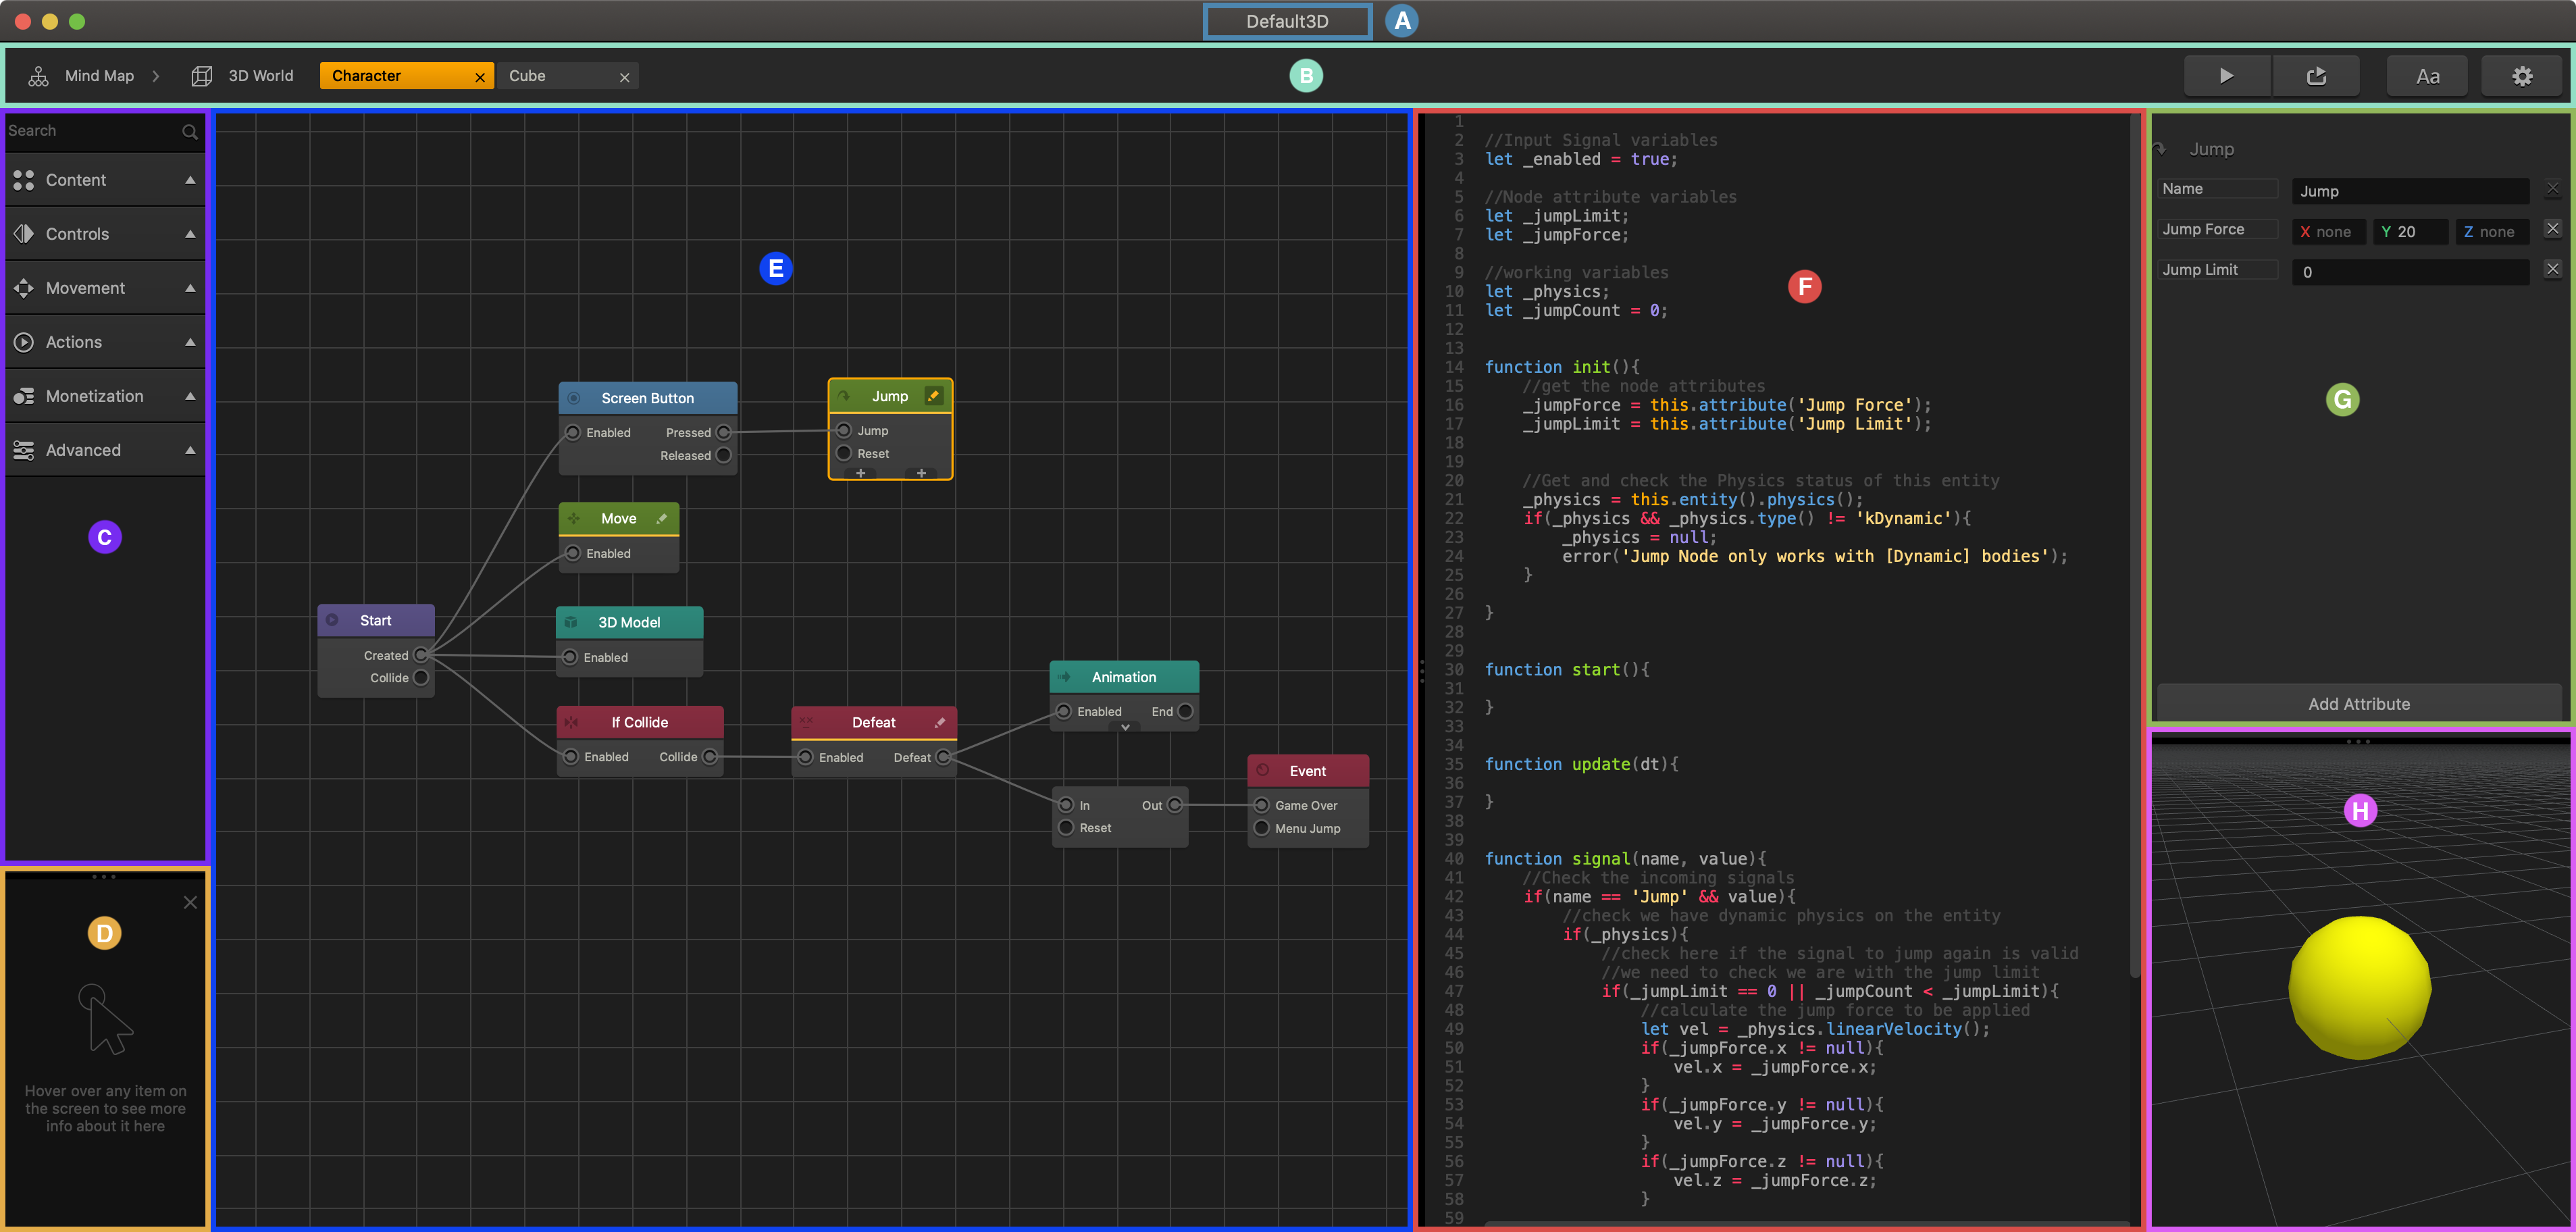
The Node Map workspace consists of the following parts:

For details on how to work with the Node Map, such as zooming or dragging the grid, see Workspace Overview.

At the very least, any object or character in Buildbox must have two nodes on the Node Map:

  • A Start node, which creates the character or object and enables its physics.
  • A 3D Model node, which defines the shape of the asset.

Adding, Editing, and Deleting Nodes for an Asset

To add a node to the Node Map:

  1. On the Mind Map, double-click the 3D World node where you want to modify an asset.
  2. Inside the 3D World, on the Asset panel, double-click the asset, for example, the character asset in your game.
    The Node Map is displayed, with the name of the selected asset highlighted on the navigation bar.
  3. In the Node panel on the left, expand the node category from which you want to add a node.
    If you don’t know the category, type the name of the node in the Search field.
  4. Drag the node you need from the Node panel to the Node Map.
  5. Define the node attributes in its Options panel.
  6. Customize the node, if needed, and connect it to the other nodes.
If applies, you can also duplicate an existing node with its connectors, if there are any—just select the node and press D on your keyboard.

To remove or create a duplicate of a node, right-click the grid and select an option:

Option Keyboard Shortcut
Duplicate W, A, S, or D
Copy Ctrl/CMD + C
Paste Ctrl/CMD + V
Delete Delete, Backspace

To edit the attributes of a node:

  • Click the node and make the necessary updates in the respective Options panel.
  • If the node has an Edit icon in the top right corner, you can customize the node by editing its JavaScript code and modifying its inputs and outputs. In this case, either click the Edit icon or simply double-click the node. For details, see Customizing Nodes.

    To see the Buildbox JavaScript API documentation, on the Buildbox menu bar, go to Help > JS API Reference.

To delete a node with its connectors, select the node and press Delete on the keyboard.

Pinned Node Attributes

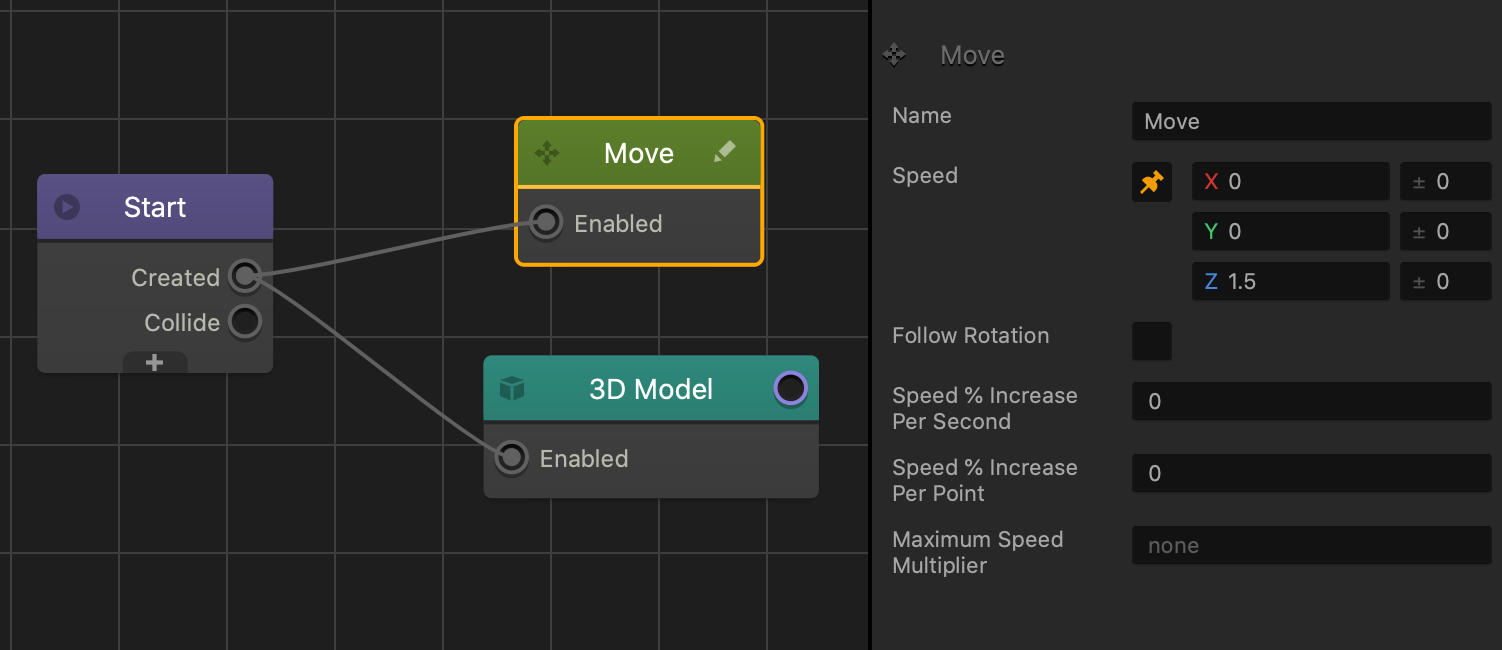
Some attributes contain the button that allows you to make the attribute value unique per instance in the Scene Editor. This allows you to set a different value for each instance of the asset in a scene. The following walks you through how to pin the Speed attribute of the Move node:

  1. On the Asset’s node map, select the Move node then hover your mouse over the Speed attribute and click the pin icon that appears.
  2. Click the World tab to go back to the World Editor.
  3. Drag the asset from the asset panel to the Scene Editor multiple times to create multiple instances of the asset in the Scene.
  4. Select an instance of the asset in the Scene Editor, and in the Options panel, enter a numeric value in the desired Speed attribute field. Repeat this step for each instance in the Scene Editor.

When you preview your game, you will notice that even though the same asset is present in multiple instances, each instance will move at a different speed.

If a pin icon doesn’t appear, then the attribute cannot be pinned or made unique.

Grouping Nodes

A Node Group contains multiple nodes that in a single colored rectangle.

  • To create a Node Group, click and drag a bounding box over each desired node, then right-click and select Group Nodes.
    The nodes are now contained with a black rectangle.
  • To select the group, click anywhere in the colored area of the group. All of the associated node attributes appear in the Options panel.
  • To rename the group, select it and in the Options panel on the right, in the Name attribute, enter a new name.

Previewing Mesh

When you open the Node Map of an asset, the preview of its mesh appears at the bottom of the Options panel. It displays what your asset will look like when you drag it into a scene.

Use the following controls to change the view of the preview mesh:

Control Description
Click + drag,

Space + Right-click and drag

Rotate the view.
Middle Mouse click + drag

Space + click and drag

Change the position of the view.
Scroll up Zoom the view in.
Scroll down Zoom the view out.

Buildbox Menu Bar – Buildbox 3 Manual

By |

Buildbox Menu Bar

The Buildbox menu bar is located at the very top of the Buildbox window.

Here is a quick overview of the Buildbox menus and their options.

Each Menu option’s keyboard shortcut is displayed next to its name. See also Keyboard Shortcuts.
Buildbox Menu (Mac)
Menu Option Allows you to
About View the About Buildbox window with the product installation and license summary.
Services Select your keyboard preferences.
Hide Buildbox Minimize the Buildbox window.
Hide Others Minimize all application windows, except Buildbox.
Show All View all active windows on the screen.
Quit Buildbox Save your work and close Buildbox.
File Menu
Menu Option Allows you to
New Save changes to the current project file or abandon it altogether and create a new one.
Open Save changes to the current project file or abandon it altogether and load an existing project file.
Open Recent View a list of recent projects, which you can choose to open or clear the list.
Save Save the project with its current file name.
Save As Save current project with a new file name, thus creating a copy.
Export Export your project when you are ready to submit your game to the App Store. See also Export a Game Project.

Fill in all required information for the desired export option in the project Settings before exporting your project.
Select the desired export platform:

  • iOS
  • Android
  • Steam
  • Windows EXE
Edit Menu
Menu Option Allows you to
Undo Undo the last operation.
Redo Redo the last operations.
Align Scenes Play scenes in a linear sequence in the Preview window.
Randomize Scenes Play scenes in a randomized sequence.
Run Menu
Menu Option Allows you to
Preview Play and test your entire game as it would look after export. See also Preview and Testing.
Preview Selected Scene Play and test the current scene in the editor as it would look after export. See also Preview and Testing.
Add Menu
This menu is available only in the UI node workspace.
Menu Option Allows you to
New Image Add an image object to a UI screen, where you can define its attributes.
New Button Add an image as a Navigation button to a UI screen.
View Menu
Menu Option Allows you to
Zoom In Increase magnification on the grid of the currently displayed editor or map to get a closer view of the screen.
Zoom Out Decrease magnification on the grid of the currently displayed editor or map to get a wider view of the screen.
Show All Change the zoom level to show all items in the currently displayed editor or map.
Show Frame Reset the zoom level and position of the view in the currently displayed editor or map.
Actual Size Reset the zoom level to the actual view size of the currently displayed editor or map, neither zoomed in or out.
Helper Show or hide the Helper section that provides help info about the panel, button, or attribute field you are working with, in the bottom left corner of the Buildbox window.
Enter Full Screen (Mac) View the Buildbox window in the full screen mode.
Scene View Menu Options
The following View options are available only in the Scene Editor in 3D World workspaces.
Menu Option Allows you to View Example
Animation Bar Toggle the visibility of the animation bar at the bottom of the scene editor.
Snap Mode Allows you to snap the selected object’s position to each grid point when using the move tool.
View Persp/Orth Switches between perspective (3D) and orthogonal views. In orthogonal view, the camera is set at a right angle, which gives more of a 2D look to the game.
View Align by X View the scene from the side, aligned along the X axis.
View Align by Y View the scene from the top, aligned along the Y axis.
View Align by Z View the scene from the other side, aligned along the Z axis.
View Rotate Left Rotate the current view slightly to the left.
View Rotate Right Rotate the current view slightly to the right.
View Rotate Up Rotate the current view slightly up.
View Rotate Down Rotate the current view slightly down.
View Rotate 180 Flip the view horizontally, by rotating it 180 degrees.
View Move to Ground Move the view to the default vertical position.
Reset View Reset the current view to the default rotation and position.
Tools Menu
Menu Option Allows you to
Font Editor Open the Font editor to create a
custom font.
Atlases Open the Atlas Editor.
Remove Unused Sound Objects Remove any MP3 sound files that were uploaded to Buildbox and
not used in the game.
Select Select any of these tools to use in a 3D World.
Move
Rotate
Scale
Multitool
Help Menu
Menu Option Allows you to
Report an Issue Access an online form to report a bug or issue to the Buildbox team.
Report a Feature Access an online form to report a feature idea or suggestion to the Buildbox team.
Buildbox Documentation Access product documentation online.
JS API Reference Access the Buildbox JavaScript API reference online.
Check for Updates Check if there is a new version of Buildbox available for download.
Get Logs Save a log file on your desktop. Provide this to the Buildbox Support team for troubleshooting purposes.
Activate License Switch from a demo version of the software into a fully licensed product.
Tutorial View a quick walkthrough to familiarize yourself with the Buildbox basics.
Account

There is currently only one option, Sign Out(Your email) that logs you out of Buildbox and
takes you back to the Login screen.

Mesh Manager – Buildbox 3 Manual

By |

Mesh Manager

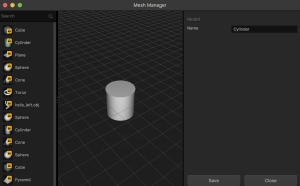
The Mesh Manager allows you to view and select desired shapes for your assets in a 3D World.

To access this editor, click the Edit icon in the top-right corner of any Mesh field in the Options panel of an asset, for example, with asset attributes.

The Mesh Manager appears with all available shapes (which are also the basic shapes from the Asset Library) listed on the left.

Changing Object Mesh

  • To select a mesh, click Save.
  • To discard your changes or simply exit the editor, click Close.
You can use the Search field at the top of the panel to find the shape you need for the selected object.

Sprite Editor – Buildbox 3 Manual

By |

Sprite Editor

The Sprite Editor allows you to view all images added to the project and edit the basic attributes of individual images.

To access this editor, click the Edit icon in the top-right corner of any image field in the Options panel, for example, with asset attributes.


The Sprite Editor appears with all sprites added to the project listed in the panel on the left.

You can use the Search field at the top of the Sprite panel to find the image you want to edit. If there was an image already selected in the options panel, it will be automatically selected.

Editing Sprite Image Attributes

In the Sprite Editor, you can edit the image name and image properties, such as brightness, contrast, hue, and saturation. To edit the sprite file attributes, select the image in the Atlas Editor.

Select the sprite image you want to edit, update its attributes in the Options panel on the right, and click Save.

While previewing the image on in the Editor, drag each slider to achieve the desired effect or enter a numeric value on the right.

Option Description
Name Enter a custom name for the image, if needed.
Brightness How much white (or black) is mixed in the color.
Contrast The difference in luminance or color that makes the image distinguishable.
Hue The mixture of the primary colors: red, green and blue.
Saturation Indicates the amount of grey in a color.
Save Click this button to save your changes.
Close Click this button to discard your changes and close the Sprite Editor.

Deleting Sprite Images

There are several locations from which you can delete an image:

  • To delete an image from a field in the Options panel, click the x icon.
  • To delete an image from the Sprite Editor list that is no longer in use, you need to optimize the atlas. See Atlas Options.

Atlas Editor – Buildbox 3 Manual

By |

Atlas Editor

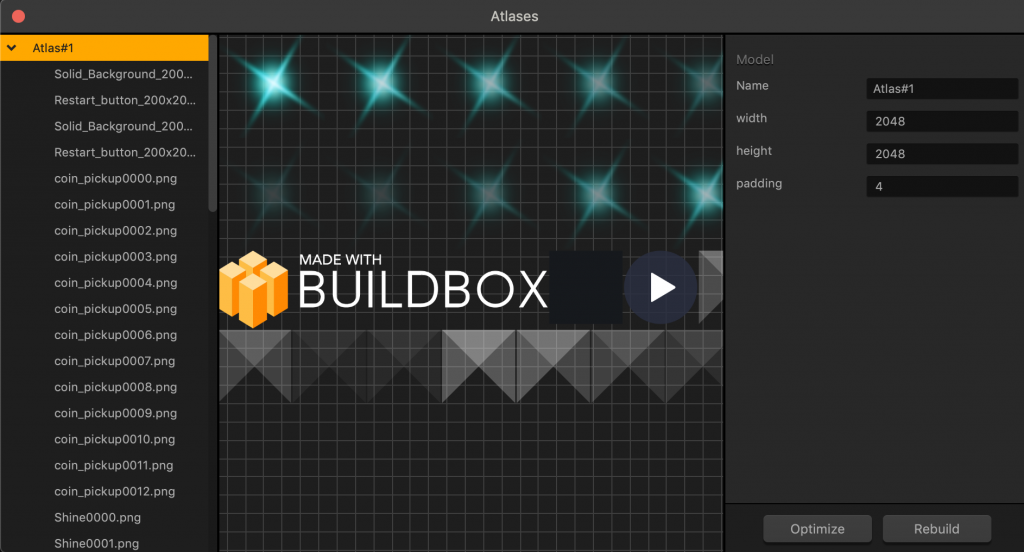
Atlases in Buildbox store all images in your game. To access the Atlas Editor, select Tools > Atlases on the Buildbox menu bar.

This is an advanced Editor that allows you to edit atlases and individual sprite files.

Editing Atlas Attributes

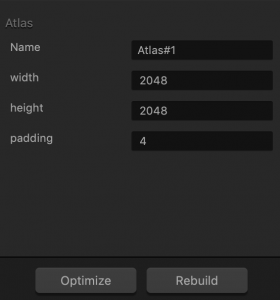
To edit an atlas, select it in the panel on the left and update it as needed in the Options panel on the right.

The more Atlases are present in a game, the larger your exported game will be. In general, the smaller the game size, the better it is for memory usage and download size of the app.
Option Description
Name Enter a custom name for the atlas, if needed.
Width Enter the number of pixels as a base-2 number, such as 256,52, 1024, 2048, and so on, to specify the width of the atlas.
Height Enter the number of pixels as a base-2 number, such as 256,52, 1024, 2048, and so on, to specify the height of the atlas.
Padding Enter a non-zero number of pixels to specify the space between individual sprites.
Optimize Click to remove unused images.
Rebuild Click to reorganize the images in a way that uses the Atlas space most efficiently.

Editing Sprite File Attributes

To edit an individual sprite from an Atlas, expand the Atlas and select the sprite name in the left pane. Otherwise, click the image in the Editor. The sprite attributes appear in the Options panel.

To edit image properties, such as brightness, contrast, hue, and saturation, you need to open the sprite image in the Sprite Editor and update its attributes in the Options panel.

Option Description
Name Enter a custom name for the file, including the file extension.
Format Enter the file format. Currently only PNG is supported for images.
Offset The offset and position for the image on the screen.
NOTE: These values are for your information only and should not be edited here.
Position

Logic – Buildbox 3 Manual

By |

Logic

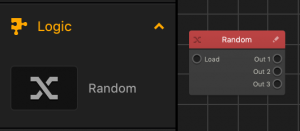
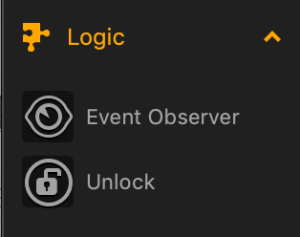
The overall game flow is defined by the connections between the nodes on the Mind Map. You may also define additional logic that would allow you to control the game flow dynamically, based on player actions and other events that occur during a game session.

There are several places where you can define logic in a game:


UI Buttons – Buildbox 3 Manual

By |

UI Buttons

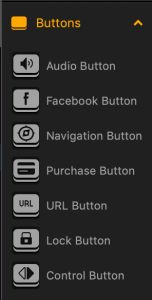
There are six buttons that you can add to a UI screen in the UI workspace.

To add a button, drag it from the Asset panel to the desired location on the screen in the UI Editor and define its properties in the Options panel on the right.

You need to have an icon image ready for each button you want to add so that it can be displayed on the screen.
Button Icon Description
Audio Turns the sound on and off in the game.
Facebook Creates a like for the logged in user, in their Facebook account.
Navigation Depending on the function you select for the button, creates a Pause, Back, Restart, Reset Settings, or any other button on the screen.
Purchase Allows the player to purchase items typically found in a game shop screen or elsewhere in your game.
URL Opens a web page specified by the URL.
Lock Appears as an inactive button that needs to be unlocked by purchase, game progress, or other player actions.
Control Allows you to create a UI button that you can use as a control node. See also Add a Control Button in the UI.