UI Button Node – Buildbox 3 Manual

By |

UI Button Node

This control node allows the player to click or tap a specified area on the screen. For details, see Add a Control Button in the UI.

Option Description
Name Type a custom name for this node, if needed.
UI Buttons To Specify where the user clicks or taps to make the asset change direction, click the drop-down list and choose an option.

  • None—the player will not be able to activate this node.
  • Screen—allows the player to tap or click the entire screen.
  • Control Button—select the name of a UI Control button to allow the player to click or tap an area on the screen. This option only appears when there is a Control Button on a UI screen.

If needed, you can also customize this node. For details, see Customizing Nodes.

Joystick Node – Buildbox 3 Manual

By |

Joystick Node

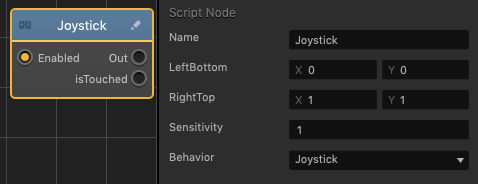
This control node enables the position of the asset to be moved by dragging across the screen with either a finger or mouse.

Option Description
Name Type a custom name for this node, if needed.
LeftBottom
RightTop
Sensitivity
Behavior

If needed, you can also customize this node. For details, see Customizing Nodes.

Mouse Control Nodes – Buildbox 3 Manual

By |

Mouse Control Nodes

Mouse Button

This control node assigns a Mouse Button that will activate any connected nodes.

Option Description
Name Type a custom name of this node, if needed.
Mouse Buttons To Assign a mouse button, click the drop-down and select the mouse button.

Mouse Move

This control node allows the movement of the mouse to enable any connected nodes.

Option Description
Name Type a custom name of this node, if needed.

Mouse Scroll

This control node allows the scroll wheel of the mouse to enable any connected nodes.

Option Description
Name Type a custom name of this node, if needed.

Keyboard Control Nodes – Buildbox 3 Manual

By |

Keyboard Control Nodes

Keyboard Button

This control node assigns a button on the keyboard to activate any connected nodes.

Option Description
Name Type a custom name for this node, if needed.
Button To assign a button, click the field then press the desired button on the keyboard.

Keyboard Move

This control node allows the WASD and Arrow keyboard buttons to enable any connected nodes. The X output will be activated when A,D, Left Arrow, or Right Arrow are pressed. The Y output will be activated when W, S, Up Arrow, or Down Arrow are pressed.

Option Description
Name  Creates a custom name for this specific node.

Touch Node – Buildbox 3 Manual

By |

Touch Node

This control node enables any connected nodes when the entire screen is activated by either the touch or release of a finger, or click or release of the mouse.

Option Description
Name Type a custom name for this node, if needed.

If needed, you can also customize this node. For details, see Customizing Nodes.

Trail Node – Buildbox 3 Manual

By |

Trail Node

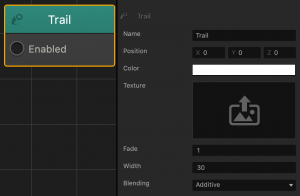
This content node creates a trail that traces along the asset’s movement path in a scene.

Option Description
Name Type a custom name for this node, if needed.
Position Enter numeric values to change the starting point location of the trail in relation to the asset that it is attached to.

For example, with the value of 4 on the Y axis, the starting point of the trail will be above the asset.

Color This attribute allows you to add a color overlay to the trail image.

To add a color overlay, click the field, and in the Colors window, select a color and click OK.

Texture To apply an image to the trail, drag a PNG file here.

You must upload an image, otherwise no trail will be shown in the game.
Fade Enter the number of seconds for the trail image to be displayed for before disappearing.
Width To change the width of the 2D sprite, enter a different value.
Blending Click the drop-down list to select the type of blending to be applied, if any.

Label Node – Buildbox 3 Manual

By |

Label Node

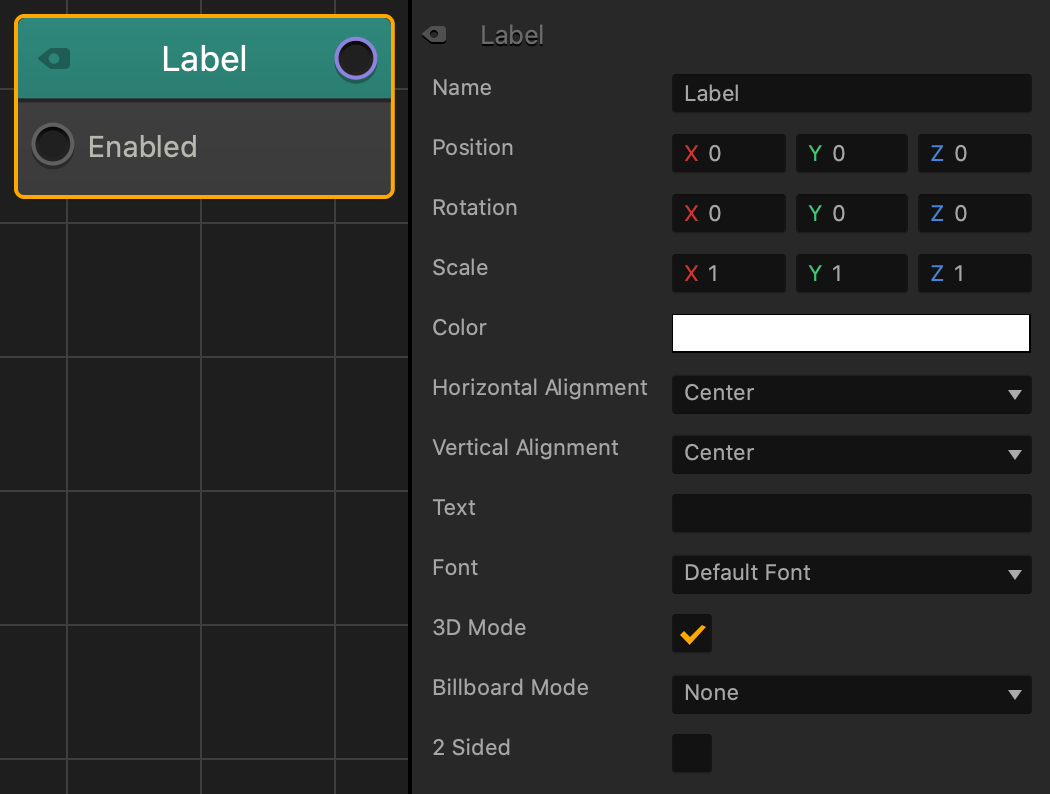
This content node displays a text area across the associated asset. If the asset is moved or rotated, the text will move and rotate with it.

Option Description
Name Type a custom name for this node, if needed.
Position Enter numeric values to change the location of the label in relation to the asset that it is attached to.

For example, a value of 4 on the Y axis will place the label above the asset.

Rotation Enter numeric values to change the rotation of the label in relation to the asset that it is attached to.
Scale Enter numeric values to change the size of the label in relation to the asset that it is attached to.
Color This attribute allows you to add a color overlay on top of the colors and/or gradients of the Font Template. For details on fonts, see Font Builder.

To add a color overlay, click the field, and in the Colors window, select a color and click OK.

Alignment Select the alignment of the text on the label, Left, Right, or Center.
Text Type the text you want to appear on the label.
Font Select a font for your text.

To add more fonts to this list, see Font Editor.

3D Mode Select to show the Billboard attribute in the Options panel. Clear to hide the Billboard attribute.
Billboard Mode Select an option to determine how the text automatically faces the camera in the game:

  • None—the label will not change its view or angle in the game
  • Point—the label will change its rotation in the game to always point towards the camera
  • Plane—keeps the label aligned with the camera view at all times

Export a Game Project – Buildbox 3 Manual

By |

Export a Game Project

This page has been updated for version 3.4.2.

To export your project, you need to complete the steps below and then compile your game project for the platform where you want to publish your game.

Saving and Exporting Your Game Project

  1. Remove unused images and sounds:
      1. On the Buildbox menu bar, go to Tools Atlases.
      2. In the Atlas Editor, select each atlas and in the Options panel click Optimize.
      3. Close the Altas Editor.
    1. On the menu bar, go to Tools and select Remove Unused Sound Objects.
  2. On the Buildbox menu bar, select File > Project Settings.
  3. In the Project Settings window, fill in the General project settings for each platform where you want to publish your game.
    Make sure to set a unique bundle ID for each platform App Store where you want to publish your game, for example, in the Apple App Store settings and Google Play Store settings. This will prevent errors and notifications when compiling your game.
  4. Close the Settings window.
  5. On the Buildbox menu bar, go to File Export and select the platform where you want to publish your game.
    A progress indicator appears as Buildbox saves your game project.

    1. If you have not added ad monetization, you will receive a pop-up asking if you want to do so. We highly recommend you add this so that you can make money off of your game, and it’s as simple as can be. Find more info here.
    2. You will also see a pop-up regarding your bundle ID. If your bundle ID is already taken, we ask that you change it. If your bundle ID is available, you will be asked to “claim” it for yourself. For prompt and accurate payouts, it’s important that you DO NOT manually change your bundle ID after export.
    3. Lastly, if you have not set up your Hyperwallet account by the time you export, you will be prompted to do so. This is not a requirement for export, however we ask that you do so as soon as possible to ensure we are able to pay you out.
  6. In the Save As field, type a name for your exported game project folder and select a location for it on your computer, for example, Desktop.
    If you are planning to export to more than one platform, to be able to distinguish between the export folders with the same name, include the platform name at the end of the export folder name, for example, My Game Name iOS.
  7. Click Save.
    A progress indicator appears as Buildbox exports your game project.
  8. When the process is complete, navigate to the export folder where you saved it on your computer and open it.
  9. For all platforms except Windows EXE, compile your project in Xcode, Visual Studio, or a similar IDE, as explained below.

Compiling Your Game Project

For iOS

Prerequisites

If you plan to include any ad SDKS in your game, you need to download Xcode 12 or later. This complies with the iOS 14 requirements and gives players the option to allow tracking.
  • Complete the saving and exporting steps above, including the settings for Apple App Store.
  • Install the latest version of Xcode on your Mac computer. If you only have a PC, search for solutions to running Mac OS on other computers online.
  • Make sure you have an Apple Developer Account or at least an Apple ID so that you can add an account during the compilation process, if you don’t have one.

To compile your game in Xcode for iOS:

  1. Navigate to the iOS export folder where you saved your game and double-click your Xcode project file named BBPlayer.xcodeproj.

    Xcode opens with your project loaded.
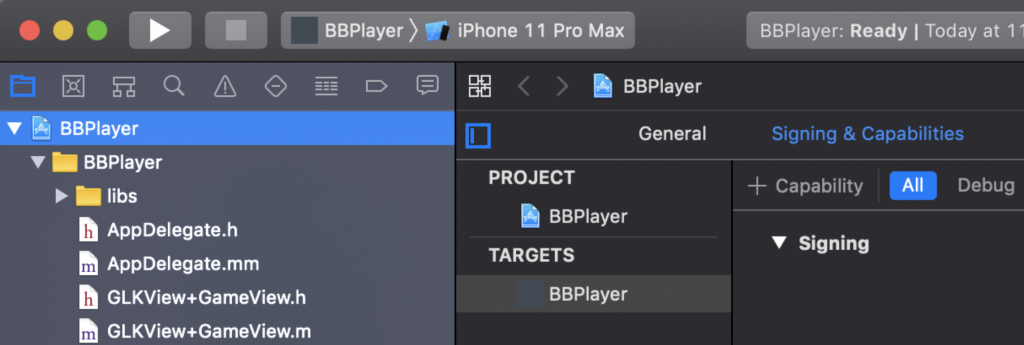
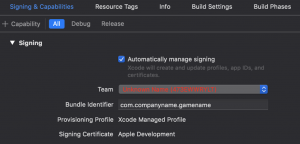
  2. In the panel on the left, select BBPlayer at the top and navigate to the Signing & Capabilities tab on the right as shown below.
  3. In the Team drop-down, select your developer account. If you don’t have one, select Add an Account and enter your Apple ID and follow the onscreen instructions.
  4. Select the device on which you would like to run your game:
    1. Plug in your device to your computer with a cable and, if you want to trust the connected computer, select Trust on your device when prompted.
    2. In the Device list that appears in Xcode, scroll and select the device you need, for example, iPhone 11 Pro Max.
    3. If you are prompted to register your device in the Status section, click Register Device and follow any onscreen instructions that may appear.
  5. Unlock your device.
  6. In the top-left corner of the Xcode window, click the Run button.
    A blue build progress indicator appears at the top of the Xcode window.
  7. When prompted, enter your computer password as the login keychain password.

When the build is complete, you should be able to play your game on your iOS device. Congratulations! You’ve compiled you game project and can now upload your game to the App Store.

For Android

Prerequisites

  • Complete the saving and exporting steps above, including the settings for Google Play Store.
  • Install the latest version of Android Studio and Android Gradle Plugin.
  • (Optional) Install the Dropbox app on your Android device for importing the APK file.

Open your exported project in Android Studio:

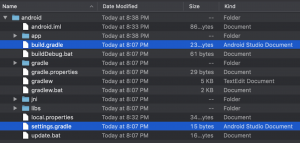
  1. Navigate to the Android export folder where you saved your game and double-click your either the build.gradle or settings.gradle Android Studio Documents.

    Android Studio opens and starts syncing your project. If prompted to search for an application, click Choose Application and select Android Studio to load the gradle file.
    If prompted to install any missing SDK packages, do so by following the displayed links and installation instructions.
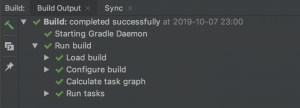
    After the synching process is complete, the build output is displayed with green checkmarks at the bottom of the Android Studio window.

Build APK for Dropbox:

  1. Click the Make Project button .
    The build process begins, with the progress indicated by green checkmarks appearing in the Build Output section. When the build is completed, a new build folder is added in your game export folder.
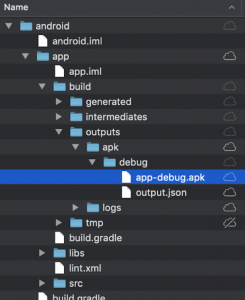
  2. Navigate to the app-debug.apk file in the newly added folder, android > app > build > outputs > apk > debug.
  3. To install the APK, connect your device to the computer and in Android Studio, click the Run App button . Follow the onscreen instructions.
    You can also add the APK file to your personal Dropbox, create a sharable link, and then use the Dropbox app on your device.

Build AAB for Google Play:

Google Play now requires Android App Bundles (.aab) to submit to the Play Store.
  1. In the menu, select Build -> Generate Signed Bundle / APK…
  2. Follow the steps in the subsequent window to build an Android App Bundle.
  3. For more information on app signing, please reference the following Android Developer guide: Sign your app

Congratulations! You’ve compiled you game project and can now play your game and upload it to the Google Play Store.

Add Control Button- Buildbox 3 Manual

By |

Add a Control Button in the UI

You can add a control button to the UI and use it as a control node for a character or an object.

  1. From the Mind Map, navigate to the UI node where you want to add a control button.
  2. In the UI node workspace, from the Asset panel, drag the Control Button to the UI Editor and define the button attributes as described in Control Button.
  3. On the Navigate bar, click Mind Map and on the Mind Map, double-click the World node where you want to use this button.
  4. Inside the World, in the Asset panel on the left, double-click the object or character where you want to use this button.
  5. Inside the Node Map of the selected asset, in the Node panel on the left, expand the Controls list and scroll down to the UI Button.
  6. Drag the UI Button node to the Map.
  7. In the Options panel on the right, in the UI Buttons list, select the name of the control button you’ve added to the UI screen.
  8. Connect the node as needed. For details, see the Node Reference.


Sound Nodes – Buildbox 3 Manual

By |

Sound Node

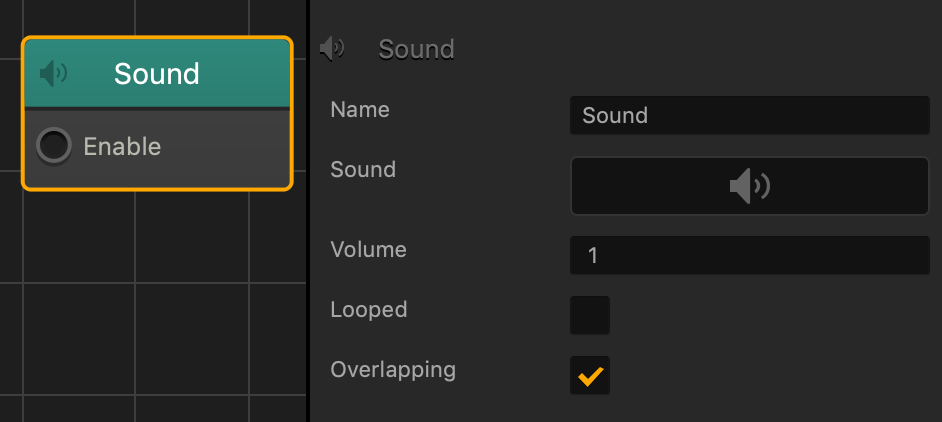
This content node plays an MP3 file.

Option Description
Name Type a custom name for this node, if needed.
Sound To add a sound file:

  • Drag an MP3 file from your computer here.
  • Mouse over the field, click the Edit icon , and select the sound file.

See also Add Music and Sound Effects.

Volume Enter a decimal value from 0-1 to change the sound volume.
Looped
  • Select to play the sound continuously.
  • Unselect to make the sound play once and stop.
Overlapping
  • Select to play this sound without stopping any other sounds.
  • Unselect to make this sound stop all other sounds before playing.