Delay Node – Buildbox 3 Manual

By |

Delay Node

This advanced node delays the activation of the next node by the number of seconds specified.

Option Description
Name Type a custom name for this node, if needed.
Delay The amount of time in seconds that will pass before the next node is activated.

Script Node – Buildbox 3 Manual

By |

Script Node

This advanced node allows you to create a custom node in JavaScript.

  • To write or paste your own code, double-click on the node to open the Script Editor Panel. Here is our JavaScript API documentation.
  • You can also hover your mouse over the node and click the + icon to create inputs and outputs to use in your code,
  • To add attributes to this node, click Add Attributes on the bottom of the Options Panel once the Script Editor is open.

In the Name attribute field, type a custom name for this node, if needed.

For more details on customizing nodes, see Customizing Nodes.

State Machine Node – Buildbox 3 Manual

By |

State Machine Node

This advanced node will keep only one output active at a time. Each input and output row represents a single state. When the input of one state is active, the other inputs of other states will immediately become inactive.

  • To add more states to the state machine, simply click the + icon.
  • To rename a state, click the text next to the input and type a custom name.

In the Name attribute field, type a custom name for this node, if needed.

Texture Scroller Node – Buildbox 3 Manual

By |

Texture Scroller Node

Applies continuous movement to the textures on the surface of all 3D Models attached to the asset.

NOTE: This node will only work if a 3D Model Node is attached to an asset and has a texture applied, for more details see 3D Model Node.

Option Description
Name Type a custom name for this node, if needed.
Speed The direction and amount of movement the texture will constantly move in.

If needed, you can also customize this node. For details, see Customizing Nodes.

Move Node – Buildbox 3 Manual

By |

Move Node

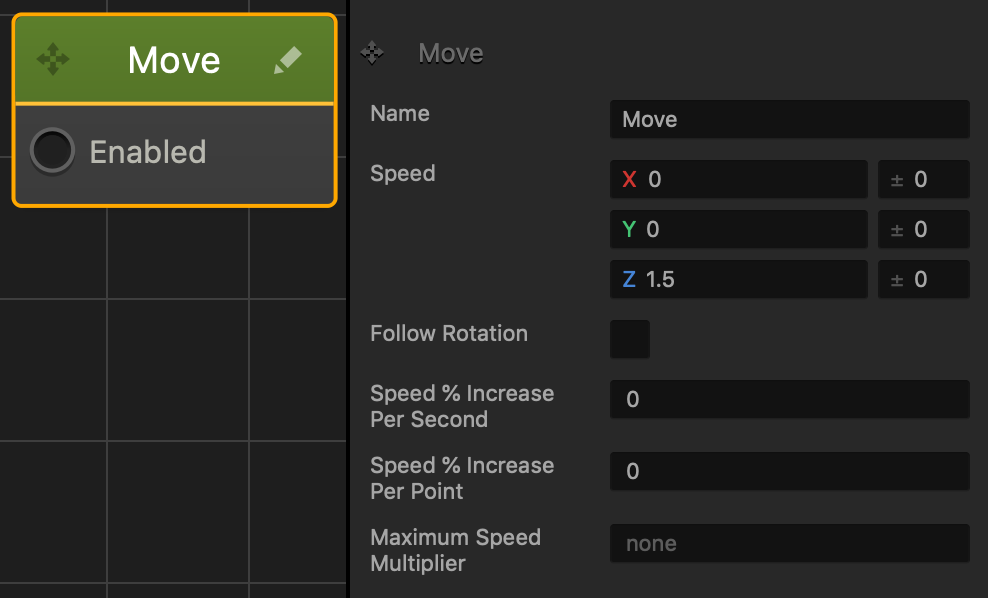
This movement node allows the asset to travel in the direction specified in the axis values. See also Making Characters Jump and Objects Move, and Move Brainbox.

  • Speed
    • Enter a numeric value in any of the axis fields to represent the movement direction and speed.
    • The greater the number, the faster the asset will move.
  • Direction
    • To make an asset move:
      • Forward, enter a positive value in the Z axis field.
      • Backward, enter a negative value in the Z axis field.
      • Right, enter a positive value in the axis field.
      • left, enter a negative value in the axis field.
      • Up, enter a positive value in the axis field.
      • Down, enter a negative value in the Y axis field.
    • Also depends on which direction the game camera is facing.
  • If you put values in more than one axis, the asset will move in all specified directions.
    • For example, if the Z and X axis fields contain values, the asset will move in a diagonal direction.
  • Range
    • To make the asset pick a random axis value, enter a value in any of the range fields to the right.
    • The range value is both added and subtracted to create a minimum and maximum of possible outcomes.
    • For example, if you enter a value of 100 in the Y axis field and 50 in its range value field, a value between 50 and 150 will be selected during gameplay.
      |50———-100———-150|
    If you don’t want the asset to rotate in a specific direction, delete the value in any of the axis fields.

The table below shows sample values in the X, Y, and Z axis with their speed and direction.

X Y Z
Sample Value 10 -50 20
Speed Slow Fast Medium
Direction Right Down Forward

Node Attributes

Option Description
Name Enter a custom name for this node, if needed.
Speed Enter a numeric value in the axis fields to specify the speed and direction the asset will move in. The higher the number, the faster the asset will move. Enter a range value on the right to make the asset pick a random axis value.

If there is no value in an axis field, then other nodes can affect this asset in those axes. This is useful when adding a Jump node to an asset.
Follow Rotation To make the asset always face the direction it is moving, select this option.
Speed % Increase per second Enter the percentage value to multiply the speed by a percentage after every second.

For example, if you enter the following values:

  • Speed—2
  • Speed % Increase Per Second—50

After every second, the speed will increase by 50% of its value or 1 in this example.

Speed % Increase per point
Enter the percentage of the speed value to multiply the speed for every point score in total.

For example, if you enter the following values:

  • Speed—3
  • Speed % Increase Per Point—50
  • Total Point score—5

For ever total point, the Speed will multiply by 50% or 1.5 in this example. With a Total Point score of 5, the speed will be increased 5 times to a total speed value of 10.5

Maximum Speed Multiplier Enter the maximum amount of times you want the speed to multiply by the Speed % attributes. If you don’t want a maximum speed multiplier, delete the value from the field until None is displayed.

For example, if you enter the following values:

  • Speed—3
  • Speed % Increase Per Point—50
  • Total Point score—100
  • Maximum Speed Multiplier—20

The speed will stop increasing after the score reaches a value of 20.

If needed, you can also customize this node. For details, see Customizing Nodes.

Wake Up Node – Buildbox 3 Manual

By |

Wake Up

This action node activates the Awake output after character has moved the specified distance from the scene start point

Option Description
Name Type a custom name for this node, if needed.
Distance Enter a numeric value to determine how far the Character needs to move away from the scene start point.
Sleep Distance The distance from the Start point the Character must travel to deactivate the Awake output.

If needed, you can also customize this node. For details, see Customizing Nodes.

Timer Node – Buildbox 3 Manual

By |

Timer Node

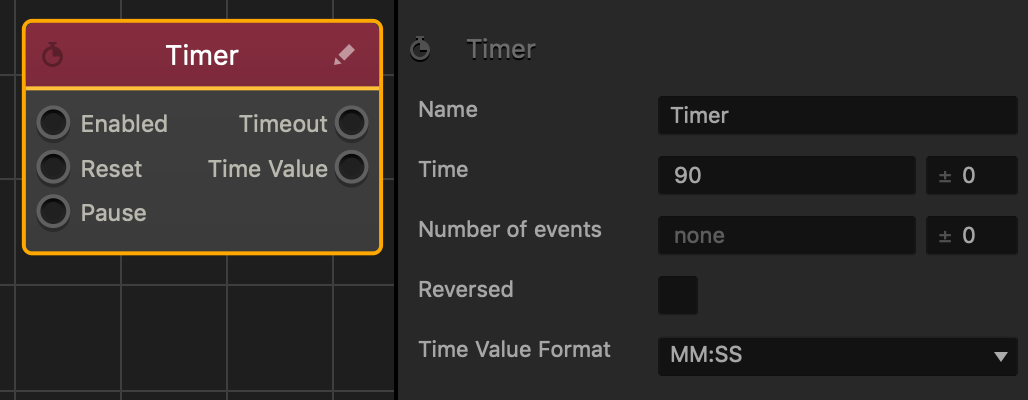
This action node sets the number of seconds to be counted down before the Timeout output activates another node.

The table below describes what happens when each node input or output is connected.

 Type Name Description
Input Enabled Starts the timer.
Reset Restarts the timer, setting it to 0 or if the Reversed checkbox is selected in the Options panel, to the specified Time value.
Pause Pauses the countdown. The timer will resume when the connected output is no longer active.
Output Timeout Activates the connected nodes when the timer reaches 0.
Time Value Sends the current time information to connected Custom nodes.

The following is an example of a timed explosion asset.

When this asset collides with another, the timer will count down to three seconds before causing a debris explosion.

To Modify the remaining time during gameplay, see Modify Timer node.

Node Attributes

Option Description
Name Type a custom name for this node, if needed.
Time Enter the number of seconds to be counted down.

You can also set a random time range for countdown when the asset is created or spawns in the game. To do this, enter a value in the field on the right instead of the default 0. The value you enter is both subtracted from and added to the number of seconds you enter for the countdown, thus setting the minimum and maximum values for the time range.

For example, if you enter a Time value of 90 and a range value of 10, you set the random countdown range between 80 and 100 seconds:
|80———90———100|

Number of Events Enter the number of times the timer will reset on its own.

You can also set a random reset range for the number of events. To do this, enter a value in the field on the right instead of the default 0. The value you enter is both subtracted from and added to the number of events you enter, thus setting the minimum and maximum values for the range.

For example, if you enter a Number of Events value of 5 and a range value of 3, you set the random range between 2 and 8 events:
|2———5———8|

Reversed Select the checkbox to make the timer count up instead of counting down , starting at 0.
Time Value Format Select an option to determine how the remaining time appears OR is displayed in a UI node.

  • Fractional Seconds—displays the milliseconds as a decimal. Example: 7.2.
  • MM:SS—displays the units as two digits. Example: 07:20.
  • Seconds—displays seconds only. Example: 7.

If needed, you can also customize this node. For details, see Customizing Nodes.

Scale Animation Node – Buildbox 3 Manual

By |

Scale Animation Node

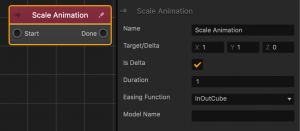
This action node changes the asset size over time. Amount specified in the axis fields.

Option Description
Name Type a custom name for this node, if needed.
Target/Delta The length and direction the object will animate to.
Is Delta If checked, the axis values of the Target/delta attribute will change over time from the assets current size.
Duration The amount of time in seconds that the animation will last.
Easing Function Specifies the rate of change when the object rotates.

  • For an ease in ease out pattern, select InOutCube.
  • For a straight and constant pattern, select linear.
Model Name Optional: Type the name of a 3D model you want to animate.


NOTE: If left blank, this node will animate everything attached to this asset. If there are multiple models or images attached to the asset, then only the specified model or image will animate.

If needed, you can also customize this node. For details, see Customizing Nodes.

Rotation Animation Node – Buildbox 3 Manual

By |

Rotation Animation Node

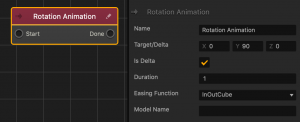
This action node rotates an asset over time. Amount specified in the axis fields.

Option Description
Name Type a custom name for this node, if needed.
Target/Delta The length and direction the object will animate to.
Is Delta If checked, the axis values of the Target/delta attribute will change over time from the assets current rotation.
Duration The amount of time in seconds that the animation will last.
Easing Function Specifies the rate of change when the object rotates.

  • For an ease in ease out pattern, select InOutCube.
  • For a straight and constant pattern, select linear.
Model Name Optional: Type the name of a 3D model you want to animate.


NOTE: If left blank, this node will animate everything attached to this asset. If there are multiple models or images attached to the asset, then only the specified model or image will animate.

If needed, you can also customize this node. For details, see Customizing Nodes.