Changing Game Camera View – Buildbox 3 Manual

By |

Change the Game Camera View

To change the view of a 3D scene in the Scene Editor, see Navigating in the Scene Editor.

To change the view of the World that the player will see while playing the game, you need to change the game camera view. To do so, on the Scene Editor toolbar, click the Camera button and use the keyboard shortcuts below.

You can also select Camera in the Outliner and enter the appropriate values for the Position, Rotation, and Scale axis attributes in the Options panel. You may want to modify other attributes as well, for example, Field of View.
Shortcut Keys Description
Command–Minus Sign (-) Zoom in/out on the objects in the camera view of the scene. You can also use the mouse wheel to zoom in/out of the scene.
Command–Plus Sign (+) 
Space bar–Left-Click Hold the shortcut keys and drag the grid to move the camera view in the Scene Editor.
Space bar–Right-Click Hold the shortcut keys and drag the grid to change the angle of the camera view in the Scene Editor, for example, to rotate it.

Adding Event Observer- Buildbox 3 Manual

By |

Add an Event Observer to the UI

To add an Event Observer to the game UI:

  1. On the Mind Map, double-click the UI node where you want to add an Event Observer.
  2. On the Asset panel, expand the Logic category and drag the Event Observer icon to the UI Editor and position it outside the UI screen.
  3. In the Options panel on the right, define its attributes.
  4. On the navigation bar, click Mind Map.
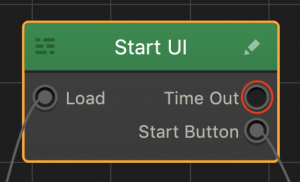
  5. On the Mind Map, on UI node where you have just added the Event Observer, click the Event Observer output (which will be labelled with the name you assigned to the Event Observer in the Options panel, for example, Time Out in the image below) and drag a connect to the appropriate World or UI screen to which the game should transition based on the event you selected in the Event Observer attributes.
  6. Preview and test your game.


Camera Shake Node – Buildbox 3 Manual

By |

Camera Shake Node

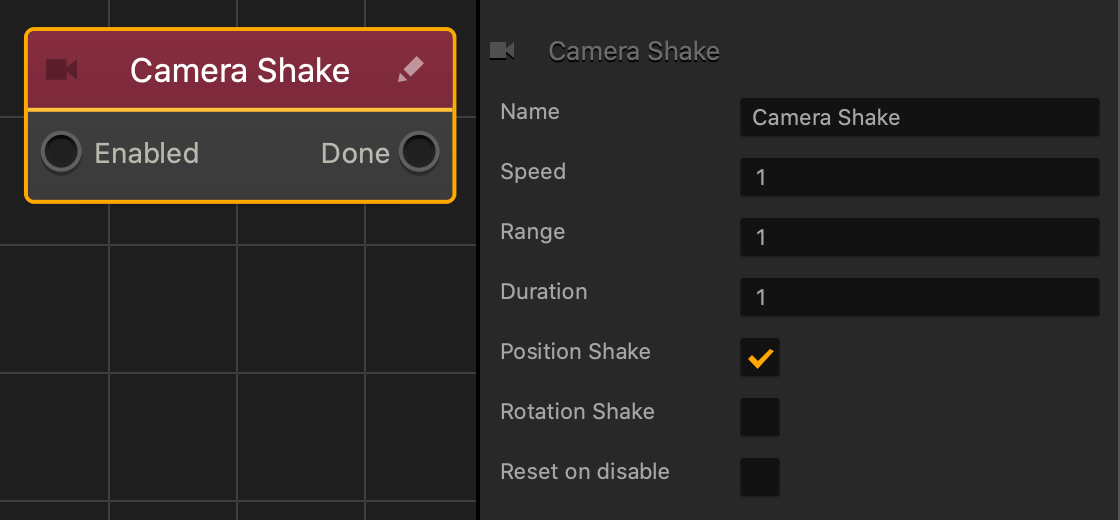
This action node applies a continuous shake to the camera.

Option Description
Name Type a custom name for this node, if needed.
Speed A numeric value that specifies how quickly the camera will shake.
Range A numeric value that specifies how wide of a movement or rotation the shake will have.
Duration Enter how long (in seconds) you want the camera to shake.
Position Shake If checked, the shake will affect the camera’s position.
Rotation Shake If checked, the shake will affect the camera’s rotation.
Reset on disable If checked, the camera will revert back to its default position once the shake has been disabled.

If needed, you can also customize this node. For details, see Customizing Nodes.

Camera Rotation Animation Node – Buildbox 3 Manual

By |

Camera Rotation Animation Node

This action node rotates the camera in the direction specified by the axis values over time.

Option Description
Name Type a custom name for this node, if needed.
Target/Delta The amount and direction the camera will change its rotation.
Duration The amount of time in seconds the animation will last
Single Launch If checked, the animation will only happen one time.
Easing Function Specifies the rate of change when the camera rotates.

  • For an ease in ease out pattern, select InOutCube. 
  • For a straight and constant pattern, select linear.

If needed, you can also customize this node. For details, see Customizing Nodes.

Camera Position Animation Node – Buildbox 3 Manual

By |

Camera Position Animation Node

This action node moves the camera in the direction specified by the axis values.

Option Description
Name Type a custom name for this node, if needed.
Target/Delta The amount and direction the camera will change its position.
Is Delta
  • Select to make the camera move in the Target/Delta direction.
  • Deselect to make the asset move to the Target/Delta position. 
Duration The amount of time in seconds the animation will last.
Easing Function Specifies the rate of change when the camera changes position.

  • For an ease in ease out pattern, select InOutCube. 
  • For a straight and constant pattern, select linear.

If needed, you can also customize this node. For details, see Customizing Nodes.

Adding Scenes – Buildbox 3 Manual

By |

Add a Scene to a World

A scene is a section within a World (game level). If needed, see Glossary.

To add a scene to a 3D World:

  1. On the Mind Map, double-click the World node where you want to add a scene.
  2. In the World workspace, in the Scene Selector at the bottom, click the Add button on the far right.

    To duplicate an already existing scene, click it and press D on the keyboard. For more details on managing scenes, see Scene Selector.

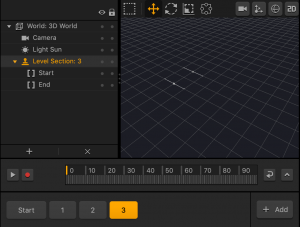
    A new scene appears highlighted as a sequentially numbered button in the Scene Selector and as a Level Section with the same number in the Outliner, with the Start and End points displayed in the Scene Editor.

  3. If needed, in the Options panel on the right, type a custom name for the scene.
  4. Add the necessary assets to the new scene, define the desired logic, and test the scene.

Adding Game Levels – Buildbox 3 Manual

By |

Add a Game Level

A game level is a 2D World or 3D World in the game that contains all assets within a game and can be organized into sections called scenes. So basically to add a game level, you need to add a World. If needed, see Glossary.

To add a game level:

  1. On the Mind Map, from the Node panel on the left, drag the 3D World icon to the Mind Map grid.
    You can also right-click anywhere on the Mind Map grid and select Add New World or duplicate and existing World by pressing D on your keyboard. For details, see Adding, Editing, and Deleting Nodes.

    A new disconnected purple 3D World node appears on the Map.

  2. Depending on your game design, connect the node as appropriate, to the Start, UI, or Random node. For example, to ensure that the new game level is loaded at the start of the game, on the Start Node, click the Load output and drag a connector to the Load input of the newly added 3D World node.
  3. Double-click the new 3D World and add the necessary scenes and assets to it.


Send and Receive Nodes – Buildbox 3 Manual

By |

Send and Receive Nodes

These nodes are action nodes. The Send nodes create a special kind of event for the Receive nodes to use in order to activate any connected nodes on a different asset.

NOTE: These Events are only valid for the Send and Receive nodes, and are not associated with the Event Observer nodes or the Event Observer UI logic.


Option Description
Name Type a custom name for this node, if needed.

TIP: Type the name of the Event after Send or Receive to better keep track of what event these nodes are sending or receiving.

Event Group Groups multiple events so that events of the same name will only be received if they share the same group.
Event Name Type the name of the event that will be sent or received.

NOTE: The event name in the Send node MUST match the event name in the receive node.

If needed, you can also customize this node. For details, see Customizing Nodes.

Logger Node – Buildbox 3 Manual

By |

Logger Node

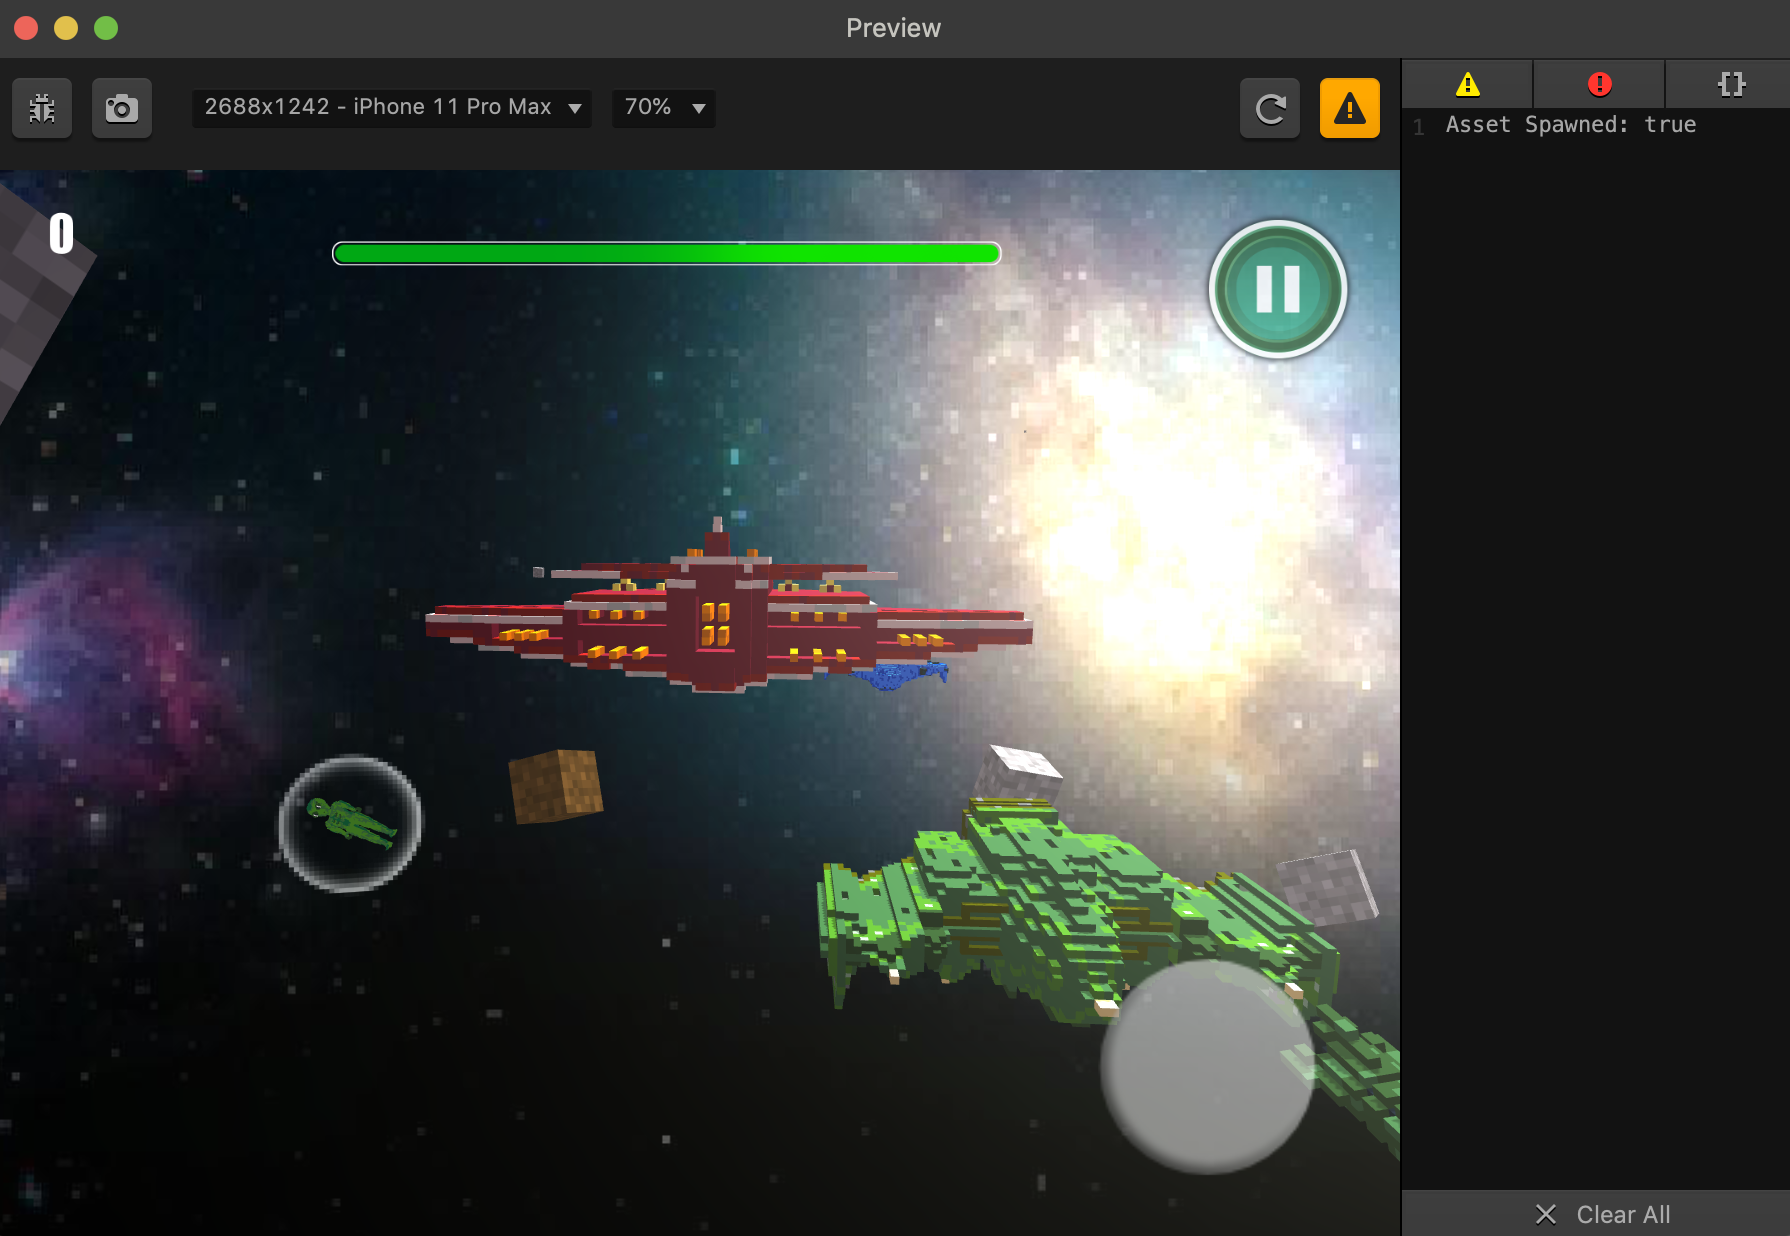
This advanced node creates a log entry that could be found in the Script Logs Panel inside the Preview Window. For details, see Log Panel.

When the IN input activates, this node creates a Log entry in the Log panel the Log panel displays the Log Name text along with the IN‘s activation status as true or false.

The example below displays the logger node added to the Astronaut 8 asset in the Interstellar Strike template.

In the gameplay example below, when the green Astronaut 8 asset on the left spawns, an Asset Spawned log entry appears in the Preview log panel. Since the Created output on the Start node of the Astronaut 8 asset is active, it’s value will be true in the Asset Spawned log.

Option Description
Name Type a custom name for this node, if needed.
Log Name Type a custom log entry that will appear in the Log Panel when this node is activated.
Log level Select the type of log message that will appear in the log panel in the preview window.

If needed, you can also customize this node. For details, see Customizing Nodes.

Global Counter Node – Buildbox 3 Manual

By |

Global Counter Node

This advanced node creates a counter that can be used in multiple Global Counter nodes in multiple assets. The counter increases when this node is activated, and after it reaches the Target value, the Trigger output will activate any connected nodes.

Option Description
Name Type a custom name for this node, if needed.
Identification Type a custom name for the counter, if needed.
Target Enter the value the counter must reach before the Trigger output activates any connected nodes.

If needed, you can also customize this node. For details, see Customizing Nodes.