Google Play leaderboards are a great way to boost engagement in your mobile game. Leaderboards allow players to compete against each other within the game and encourage active player participation. It’s also relatively easy to set up.
This blog post will walk you through how to add Google Play leaderboards to your Buildbox game step-by-step.
So let’s get started!
How to Add Google Play Leaderboards
Step 1:
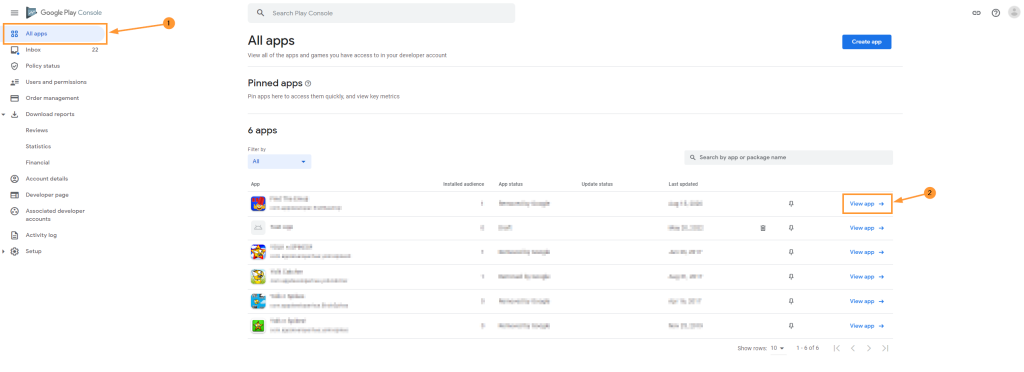
In your Google Play Dev Console, select ‘All Apps’ to see the list of apps, choose the app you wish to set up a leaderboard for, and then click ‘View app’ as shown in the image below.
Step 2:
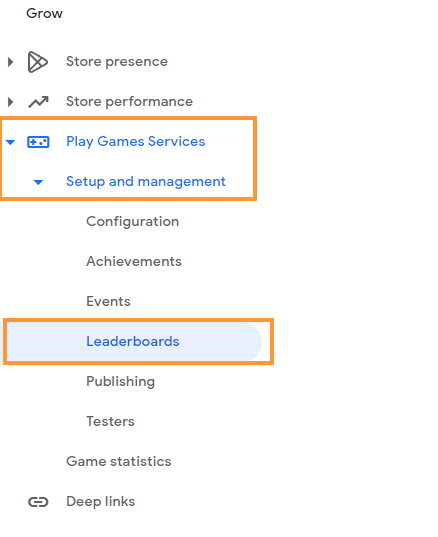
Click to open ‘Play Games Services’ from the left side menu, then open ‘Setup and management’ and select ‘Leaderboard’.
Step 3:
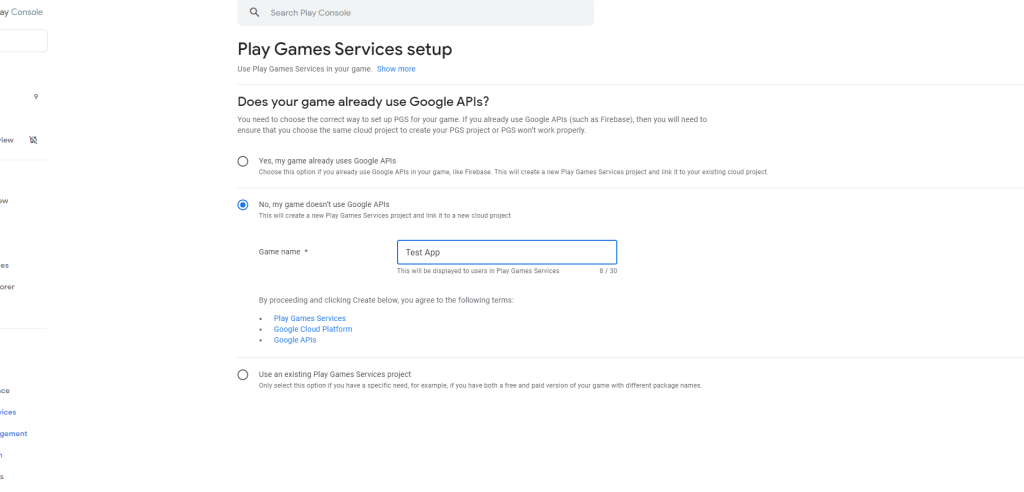
Click the “Get Started” button.
Does your game already use Google APIs? – No, my game doesn’t use Google APIs.
Now click the “Create” button at the bottom right of the screen.
Step 4:
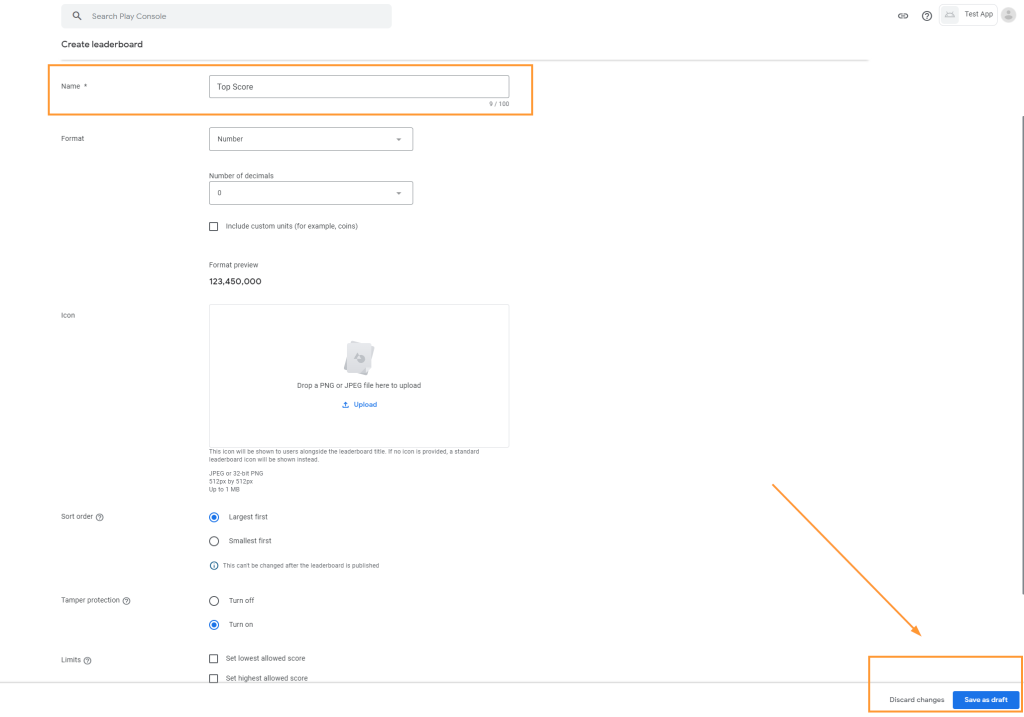
Create a name for your leaderboard and fill in the required fields. Then save as a draft.
Step 5:
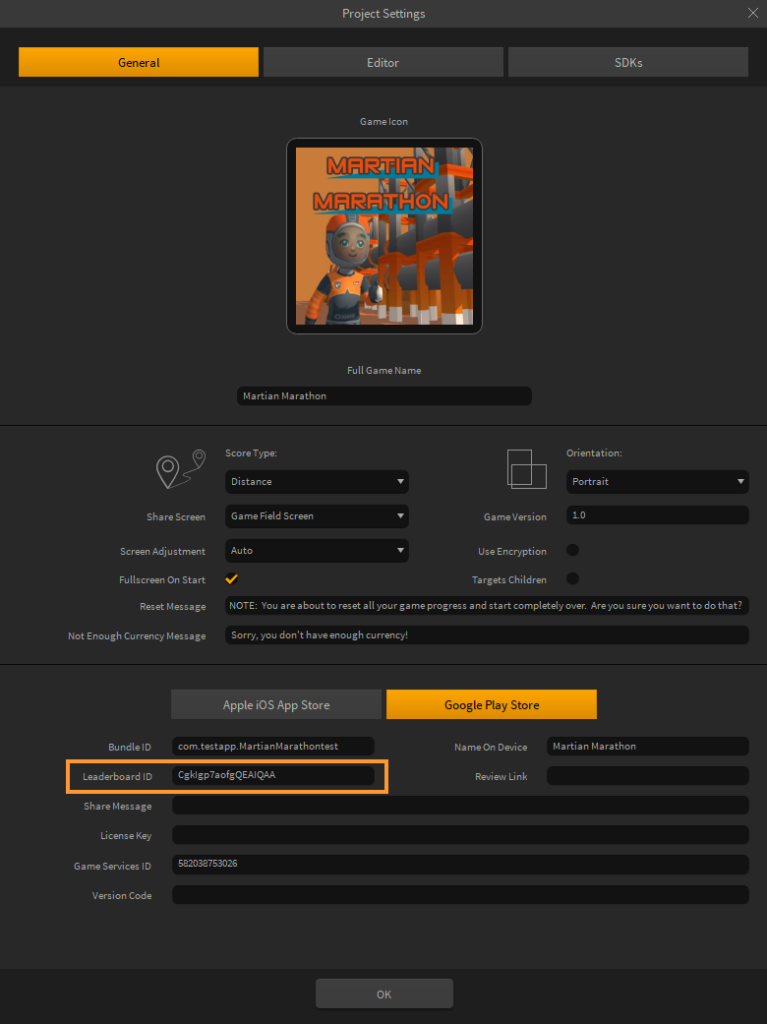
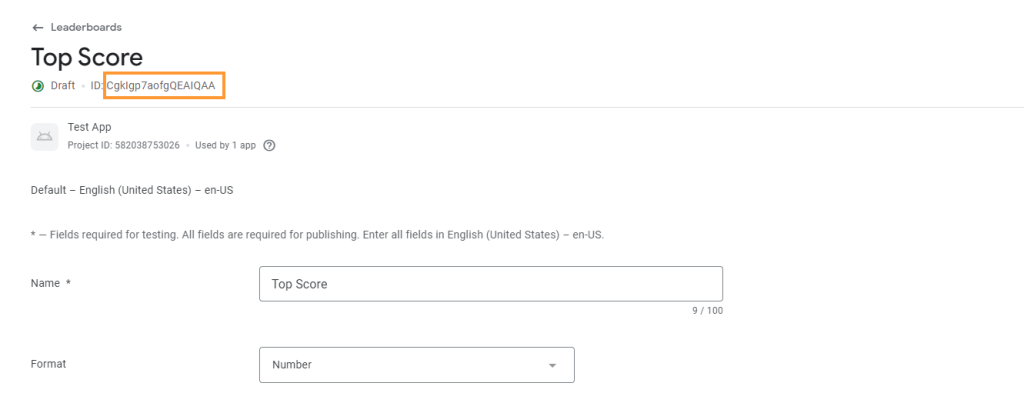
Once created, copy the leaderboard ID as shown in the image, then paste it in the ‘Leaderboard ID’ section on the Buildbox Project Settings window.
Step 6:
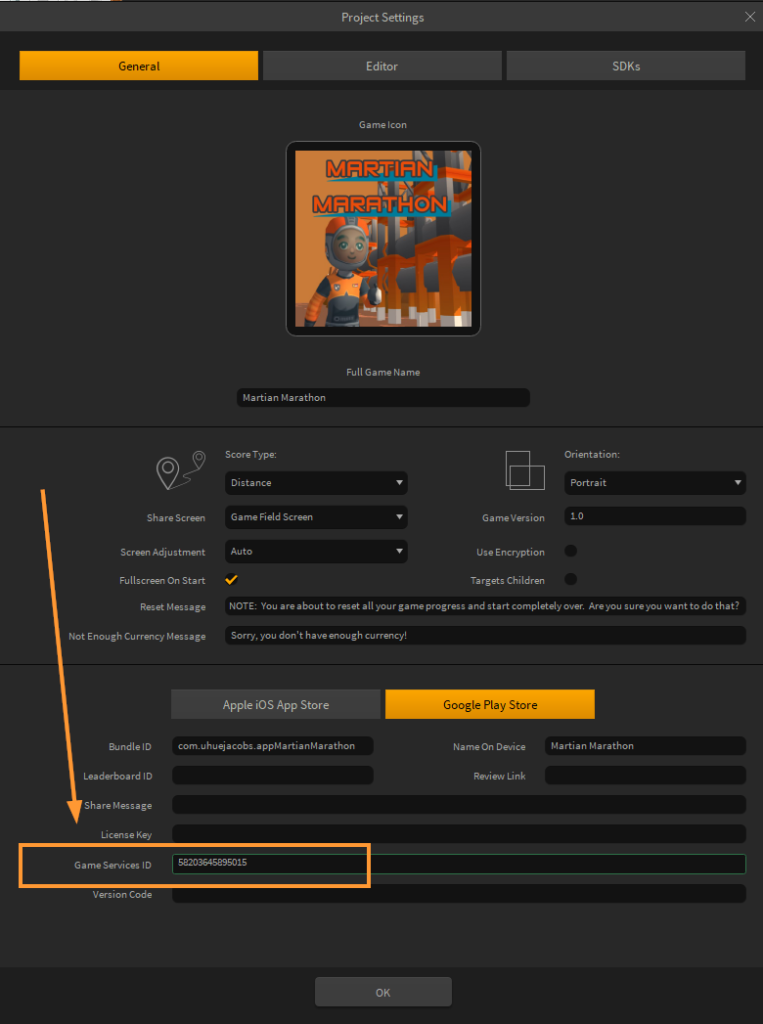
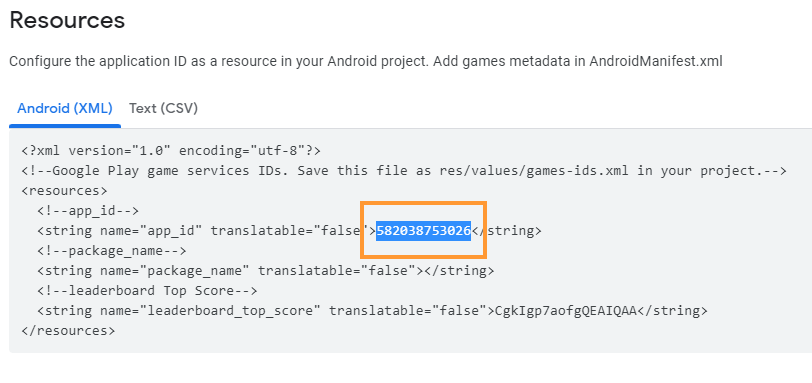
Reopen the leaderboard list view and click ‘Get Resources’ as shown in the image below. Highlight and copy the number in the (string name=”app_id”) line. This is the game services id which can be added to ‘game services id’ section in the project settings window.

Step 7:
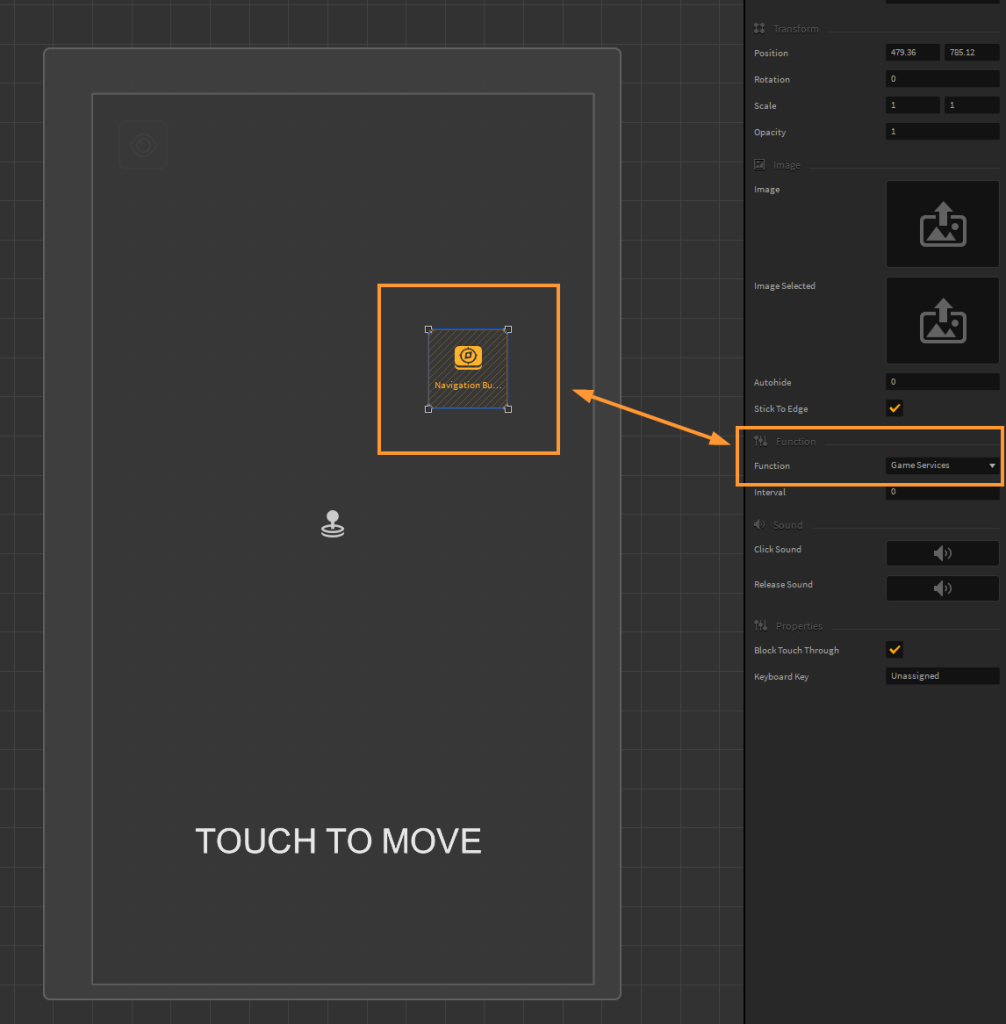
To trigger the leaderboard in game, you must use a Navigation button on a UI screen set to ‘Game Services’. The leaderboard is viewable only after the game has been published.
And that’s it! Easy, right?! We hope this tutorial has been helpful in setting up your own Google Play Leaderboards in your Android game.

