Today, we’re diving deeper into our “Getting Started with Buildbox 4” series to unlock even more of the exciting possibilities of game creation with Buildbox AI. In this second lesson, we will be focusing on the AI Command feature. We will guide you through the steps of using the AI Command feature to effortlessly add assets and expand your game.
With the AI Command feature, you can just type your request and press enter or the ‘Create’ button to send it to the AI assistant.
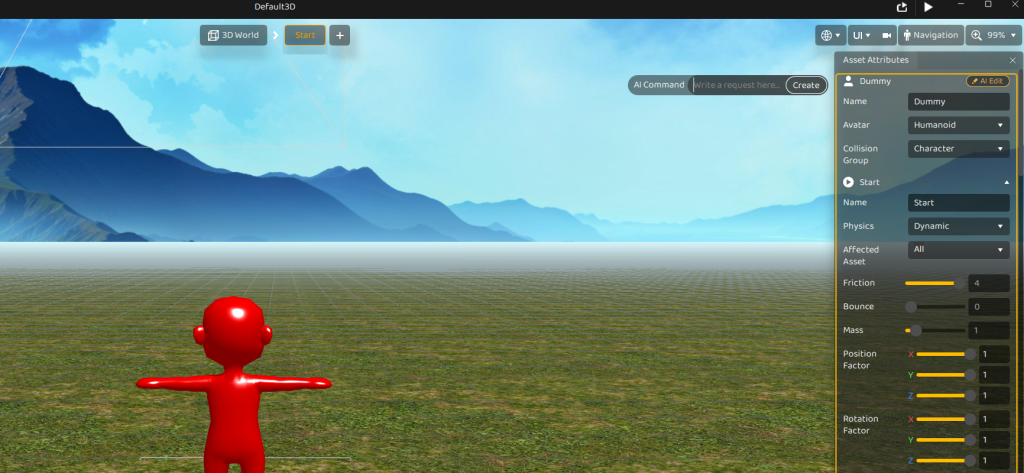
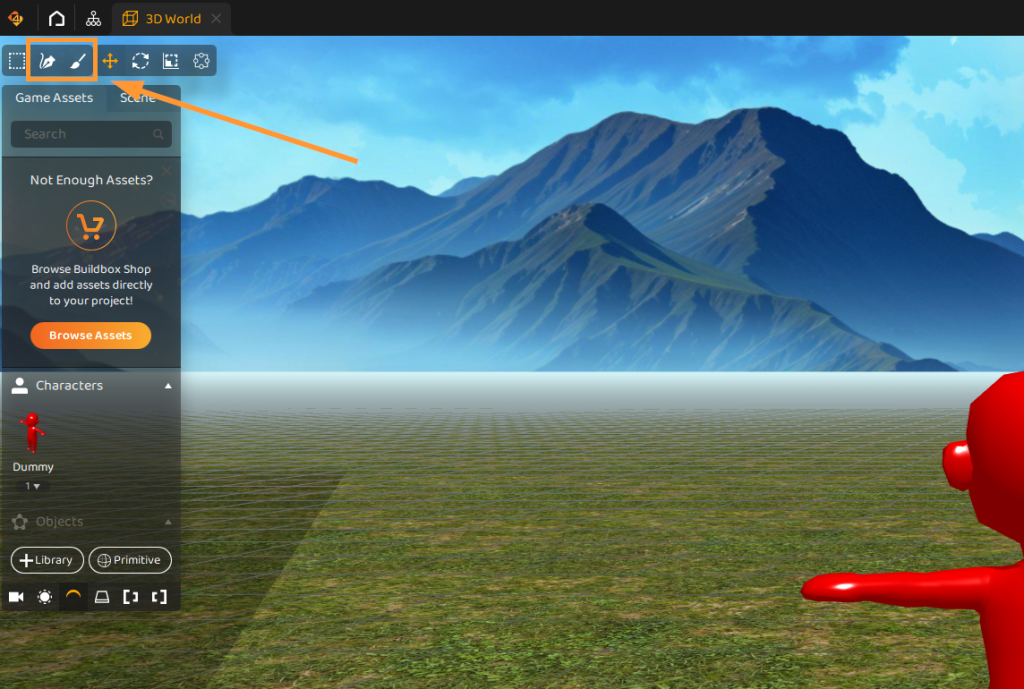
By clicking the “AI Edit” button in the right side panel, you can access the AI Command option. Additionally, by selecting one of the tools from the left side panel and drawing or clicking directly in your scene, you will activate the AI Command box.
You can use the selection tool and the AI Command feature in our game editor to easily add objects, characters, enemies, and more from our extensive catalog of assets. This allows you to precisely position them in your game’s scene.
Below is a breakdown of the process for adding a simple game asset, such as a ‘tree’, using the AI Command feature.
How to use the AI Command feature in Buildbox 4:
- Open a new game.
- Click the “Selection Paint Brush” located at the top left corner.
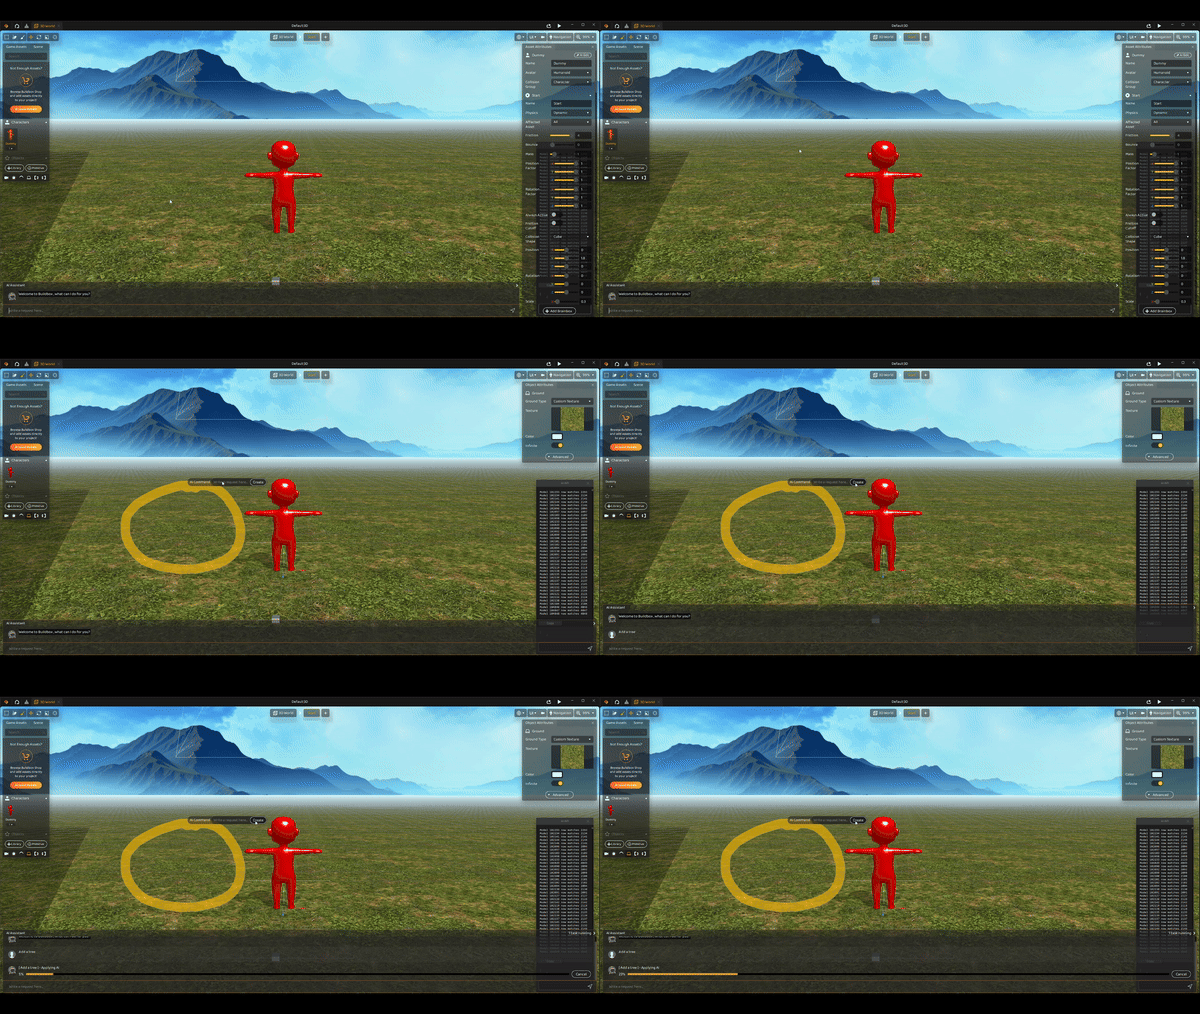
- Draw a circle in the desired area, then type “Add a tree” in the Al Command section.
- Press Enter.
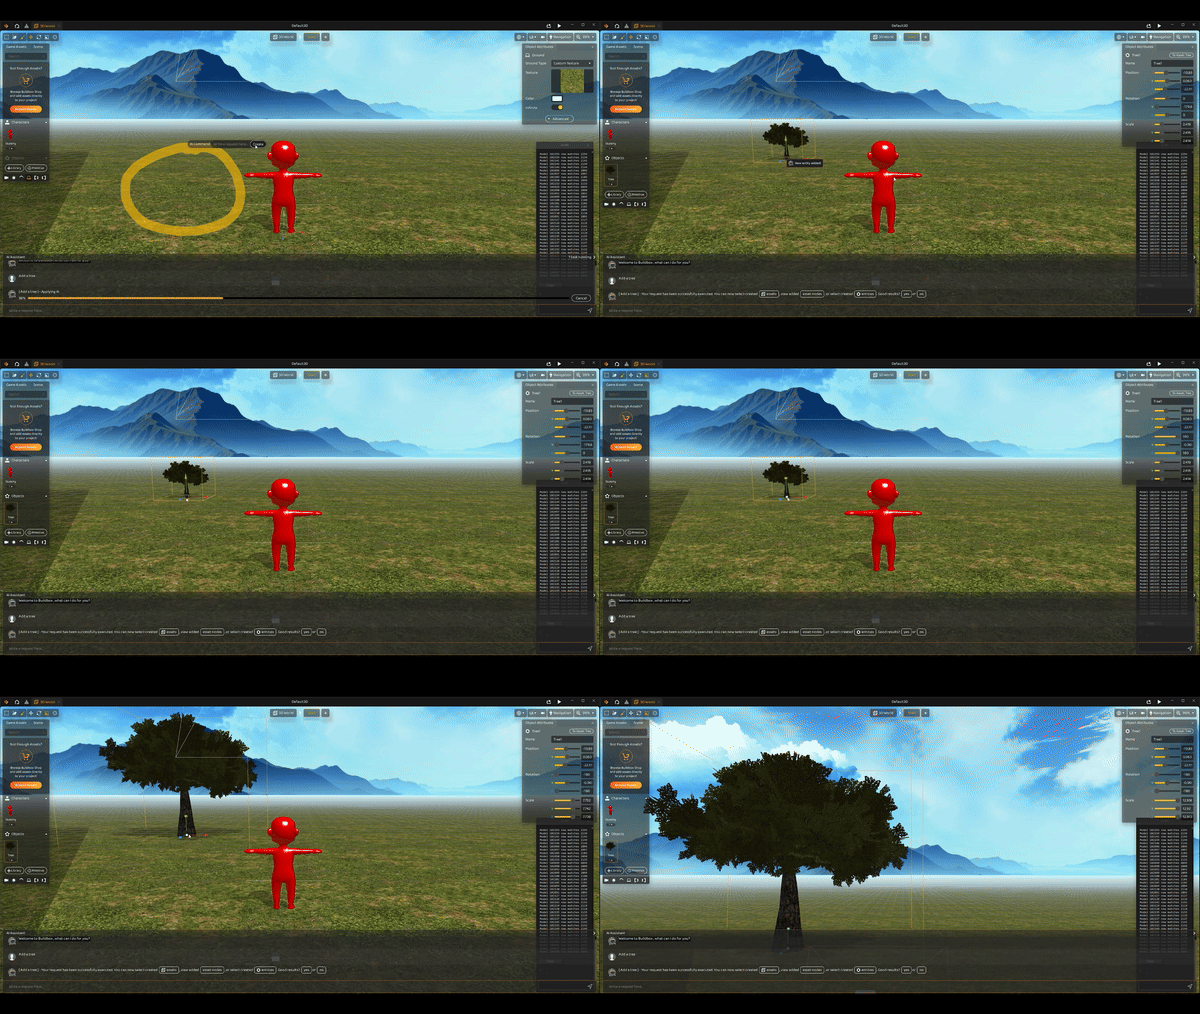
Easy right?!
We hope you found this brief tutorial helpful. Remember, mastering Buildbox 4 requires experimenting with its features and applying the techniques discussed. Stay tuned for our next lesson, where we’ll explore the AI Scene Generation in Buildbox 4 in more depth.
Haven’t downloaded Buildbox 4 yet?
Start Now!


